
Back in 2021, Joetta Maue led a workshop through TextileArtist.org‘s Stitch Club to embroider from a photograph. Of course, I didn’t keep it simple but went full-in. It was too fun! As with so many other workshops, I want to revisit this one again!
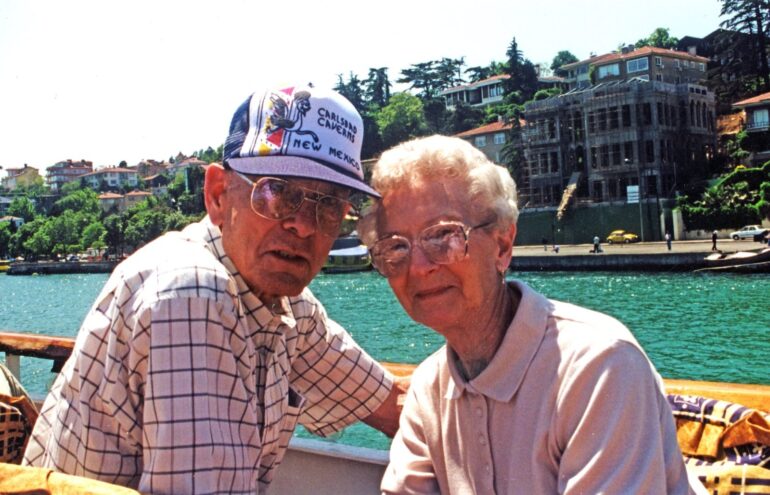
A lot of ideas came together for me with this one. First, I’ve always loved a particular photograph of my grandparents. That made deciding what photograph to use super easy.
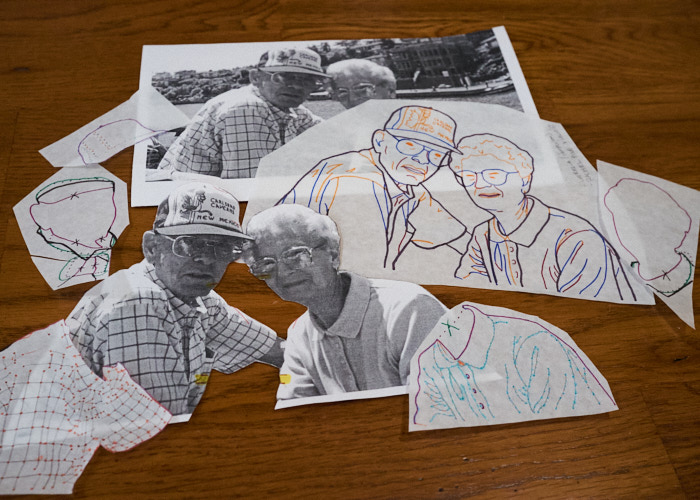
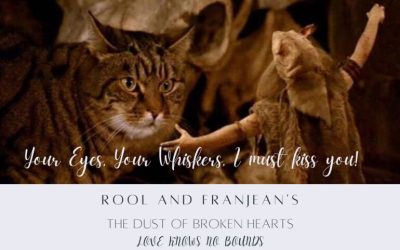
Second, when I began this project, I had just recently visited the Speed Art Museum to specifically see the art nouveau work of Alphonse Mucha, whom I’ve long admired. We didn’t have very much time to spend there, so I snapped a lot of photographs to examine later. His variation in line thickness is one of the most interesting things to me, and I let that inspire my line work here to a degree. I color coded some tracings to get an idea of how to do that. Then I made other tracings to transfer the shapes to fabric by poking holes along the lines or at intersections of them (similar to prick + pounce, but with a frixion pen rather than pouncing). I referred to the original photograph and color coded tracing often throughout the making of this.
The third thing I wanted to try was using tea bags in my art. I’ve been saving a lot of them (easy to do, since I drink a lot of tea!) and was itching to try something. I’m seeing many artists use them in a plethora of ways, but lately the work of Carol Ann Webster has been a big inspiration to just have a go at it. I found some tea bags in my stash that weren’t mottled nor too dark to represent the faces of my grandparents. My only regret is how important it is to get the facial details right – I could use some practice here as neither look like Gramma and Grampa to me out of context, but that’s ok. The sum is greater than the parts, for now! I also accidentally tore gramma’s nose, but patched it with the tiniest piece of a tea bag using basic glue.
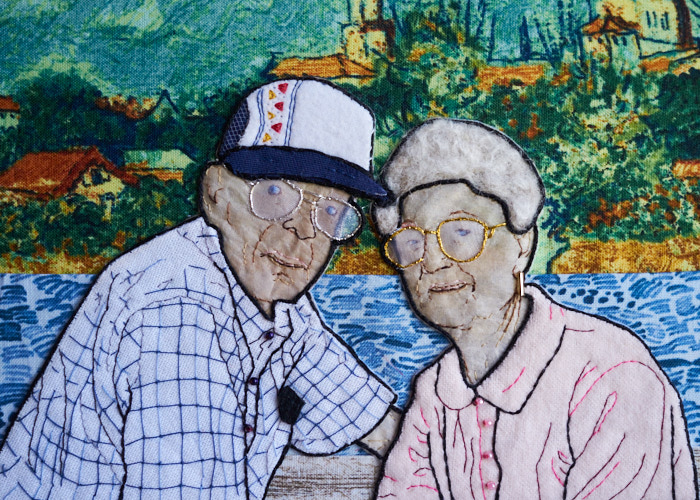
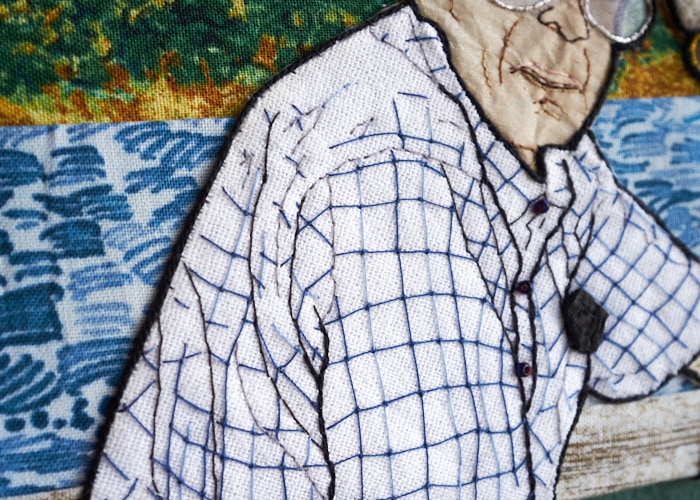
Indirectly, as a fourth inspirational tie, Sue Stone’s work played a part. I haven’t taken a workshop with her yet using portraiture (which perhaps she is best known for), but in a previous Textile Artist workshop with her (see here), we got to see a snippet of her portfolio, and I’ve added her blog to my RSS feed. She often recreates the textures and patterns of clothing fabric, so Grampa got his (plaid?) shirt through straight and couched stitching. I added the little notebook he often carried around by snipping off a piece of leather from an old coat of Boy’s. Both got some buttons, and Gramma got a gold earring – the smallest I could find in my stash. Their eyes were a bit of a challenge since their glasses had a lot of light reflection in the original image. I made a decent attempt, and then added some sheer fabric over top to add a glass quality.
And last, I’ve been wanting to make something special for my aunt, who had donated so much to my crafty passion. She and my uncle had gone with my grandparents on this trip to Istanbul, so of course I knew from the start I’d be gifting it to them.
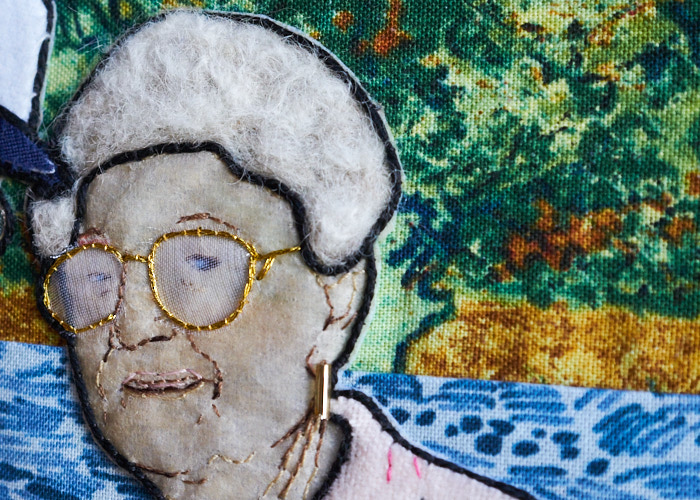
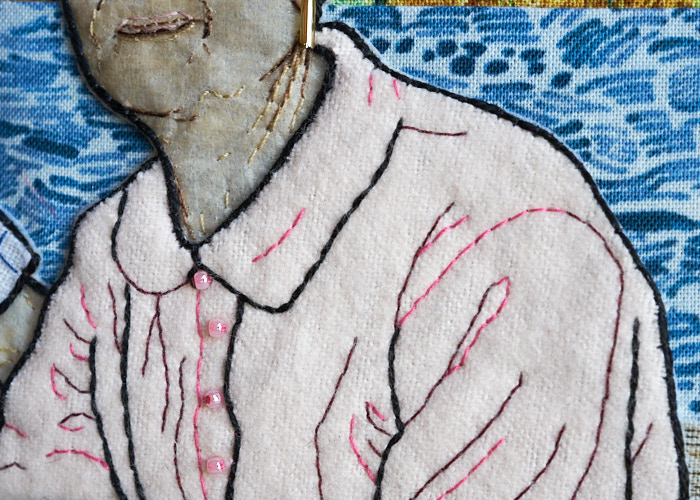
I found it really neat to think about the choices because I realized, when looking through my stash, that my grandmother would never wear the particular color I had in the material I originally wanted to use (a lens cloth for the sharp cutting edge). No, she would not, and realistically, she’d wear something much softer anyway, which led me to choose a thin flannel – and how serendipitous that I inherited that flannel from her stash! I also realized she always had her hair perfectly done when I saw her (which, unfortunately, I wasn’t able to recreate those white curls very well, which are rendered by needle felting here). I never realized I knew this sort of thing about her, but there it was. While stitching her, it was like she was sitting next to me. Tickled pink at the whole concept, even. I can hear her say “bless her heart”!
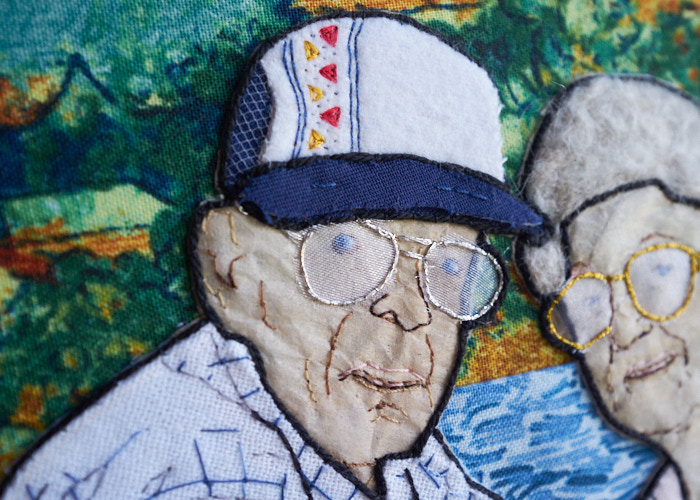
With Grampa, he always wore button-up shirts like this, and they were always a bit stiffer fabric than what Gramma found comfortable, so I found a thin cotton weave that I starched fairly well. I had the most fun with his hat. While I did not opt to add the roadrunner and text (out of fear I couldn’t replicate it at that scale), I did enjoy making it a little three-dimensional with padding, and the little netting (from painter’s mesh) I added delights me to no end. It’s all about the details, eh? Like Gramma, I could feel his presence nearby. Not in any spiritual ghostly way, mind you, just the memories, real as day.
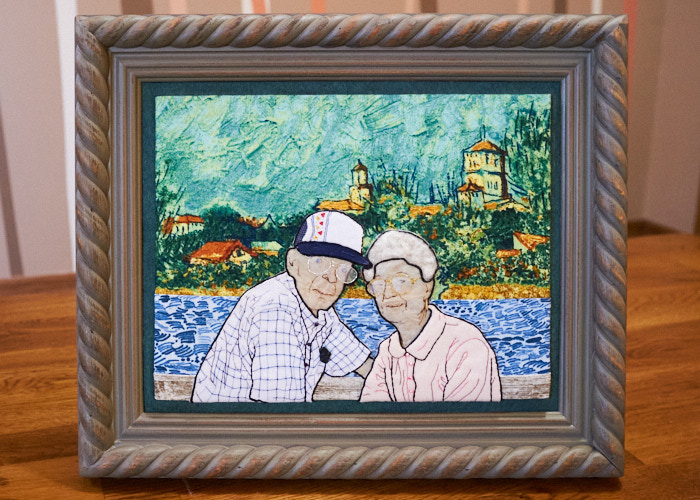
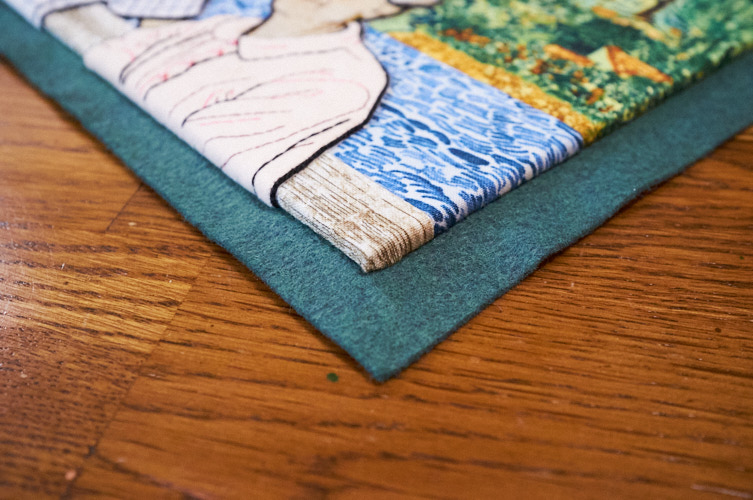
The background stumped me for a long, long while, and I investigated a lot of ideas. This is why months had passed without any progress, actually. I began this project in November! But in those months, I revamped my craft closet which required me to sort through my fabric once again. I found the perfect panel piece in none other than my aunt’s donated stash. She had a lot of pieces from this artist collection, and since she didn’t get a chance to use them, I thought it was just one more reason it made a great choice. Gramma and Grampa were stitched independently onto interfacing, so when the time was ready, I cut them out and hid small tacking stitches in place before adding the bold black outlines. To finish it off when all was said and done, I used painter’s tape to secure the fabric around the back of a canvas board (I really need to investigate a brand of archival tape, if such a thing can exist), and then stitched it all to a coordinating “mat” of wool felt and tucked it in a frame I happened to have on hand, glass removed.
I send a huge thank you to Joetta for the inspiration of the project, and Sue for her own inspirational contributions, as well as Mucha! And Carol for giving me the courage to just try some tea bag art. This piece reminds me, even, a little of Keeley, which I made waaaay back when. I might have to make more portraits like this, as I really enjoyed the whole process.
———
In other news, I also want to shout out to Lowery embroidery stands. I had purchased a cheap wooden stand from Joann’s years ago, and it was alright I guess, but always loosened up. By the way, one day I was attempting a 100-Day Challenge by doing daily drawings, and the stand made an appearance back when I was stitching my Letter R. Boy just rediscovered my notebook, and I’m still quite proud how the wood shaped up, so here’s a peak of that if you missed it the first time:

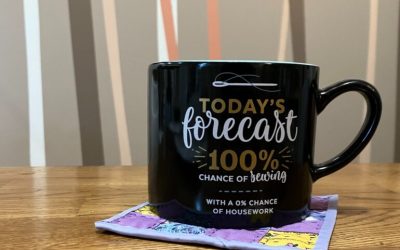
I didn’t know any better about quality of stands, and rarely used a stand anyway. Then more recently, my friend gifted me her old wooden stand. It had much higher quality wood and bolts, so I used it much more often and understood how game changing a stand could be. Over time though it, too, started to fail. Let me tell you: there’s nothing more annoying than being in the middle of a stitch only to have the entire hoop fall into your lap, pulling the thread tight into a knot exactly where it shouldn’t be. Plus due to the design, the adjustability of the stand was just kind of clunky and obtrusive to someone who gets up often in the middle of stitching (sitting still has always been a problem for me). So, I recently decided to splurge. I wanted something metal that would, in general, never fail, and I was willing to spend real money if it was something that I would be using for decades. I also wanted something in a minimalist style to stay out of my way. Thus, Lowery and its shipping from the UK and its customized sizing seemed like the right choice for me. This was the first project I made using it and wow. I might begin using a stand exclusively now. Truth.


0 Comments