
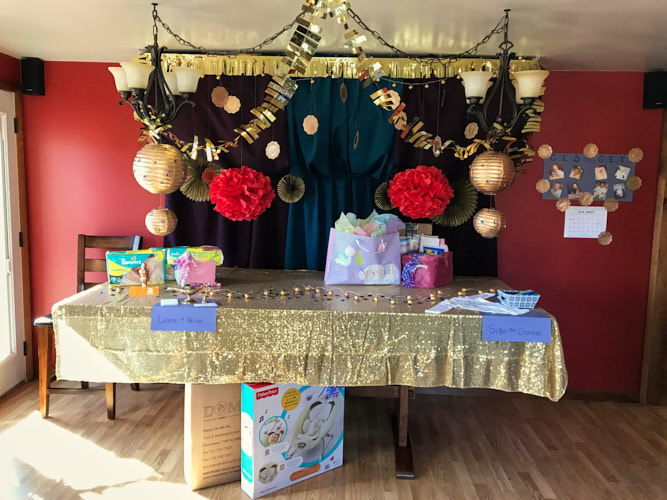
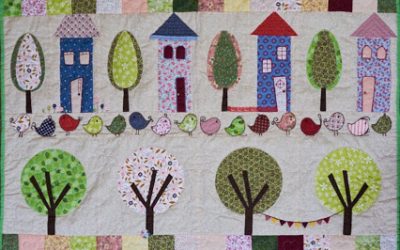
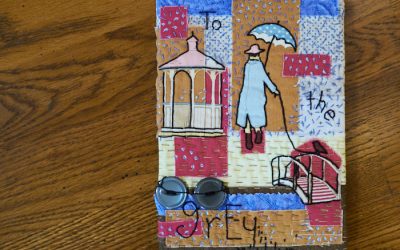
Our old roomie Chris is having a baby girl and I hosted the shower with the help of another gal. We aimed for a Disney Aladdin theme based on a Pinterest photo we discovered. Of course, ours didn’t look as dramatic but considering we barely spent any money at all, I think we did a stellar job! This is the gift table (pre-party) with some activities for guest: a genie lamp to leave wishes for the baby when she is older; a onesie to sign; and on the wall is a “guess the guests” game with some baby photos. Under that is a calendar to guess the due date, also, so we have yet to see who’s won that.
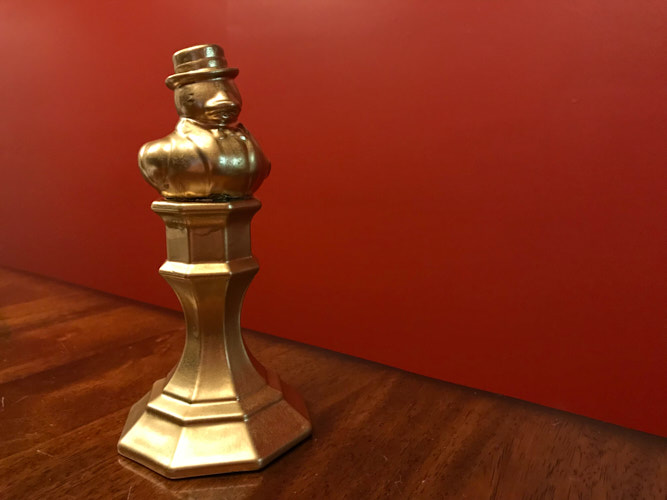
We also had a Bouncing Babies (from 1984!) tournament complete with a ducky trophy (other winners received gift cards). Carly made it with a candle stick, rubber ducky, and spray paint – I got the idea from Make It and Love It’s Halloween awards. That game had some intense competition, I tell you! At one point, there was a four-way tie with the highest score at 53, until Boy stomped them all at 85! It was a great choice because the adults enjoyed it as well as my 9 year old niece. It is so basic that anyone can play – no video game experience required! Yet it gets really difficult so it is even fun for those elite gamer types. We simply downloaded an emulator for it onto our media box, and Boy tweaked the FPS rate so it was like I remembered it growing up.
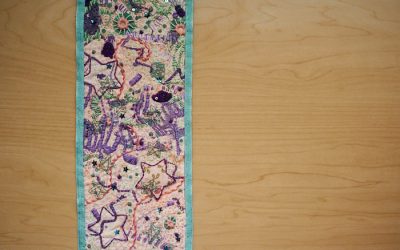
Anyway, I wanted to make a baby blanket and hand-sew it but I made a couple of critical errors that prevented me from doing hand quilting. [I did my best at the photos, forgive me and my dark cave house!]
The first misstep was probably because I decided I’d rather make a lap quilt than a baby quilt (I wanted its use to last, you see). I found an easy pattern though, so I misjudged the time required for the final size. The pattern I used is the Easy Charm Square Quilt by Coral + Co. A big thanks for the freebie, Shelly! I ordered my fabric from Missouri Company and then had the pitfall of super delayed shipping you may recall. I pretty much knew by then that hand quilting was out. I had waited too long to bite the bullet and get started, ugh.
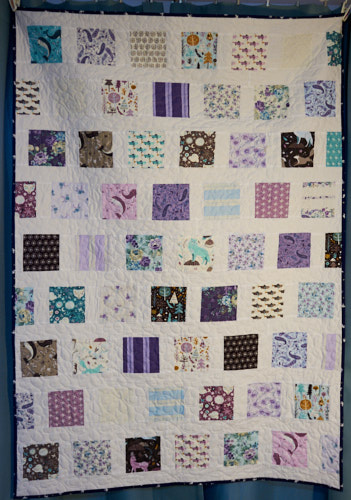
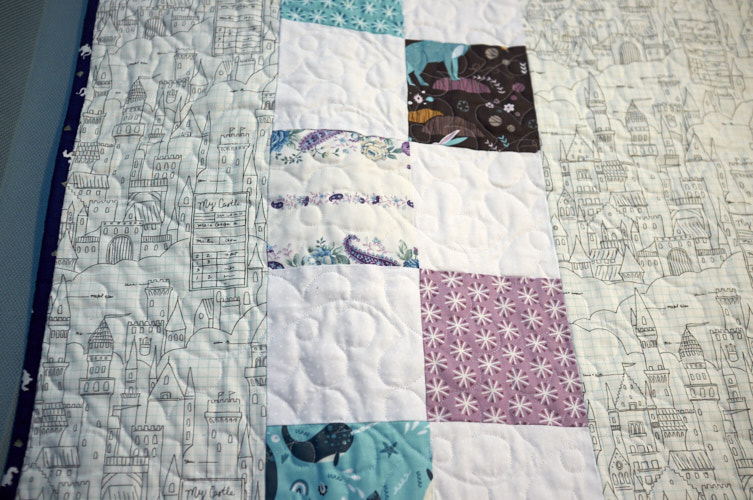
My next pitfall came when I learned the hard cold lesson about different companies using different rulers for their 5″ charm packs. This is a thing, I guess? Five inches sometimes doesn’t mean five inches? I recognized that when I laid out the design, but had totally forgotten about it when I started sewing. Zomg, are you kidding me?? Rather than being able to follow the pattern, I opted to stagger my rows so that it wasn’t super obvious that the blocks didn’t line up. I’m ok with that! It only means it’s a bit skinnier than planned (it is now between crib and throw size), and not all the blocks have white between them and the binding. This frustrated me quite a bit because I had gone through the effort of adding some length to my sashing only to find out I didn’t need to add any length after the adjustment. This realization was had only after I had already added some sashing to the quilt top, so rather than taking it out, I decided it added handmade character and included some seamed sashing elsewhere anyway! Ner!
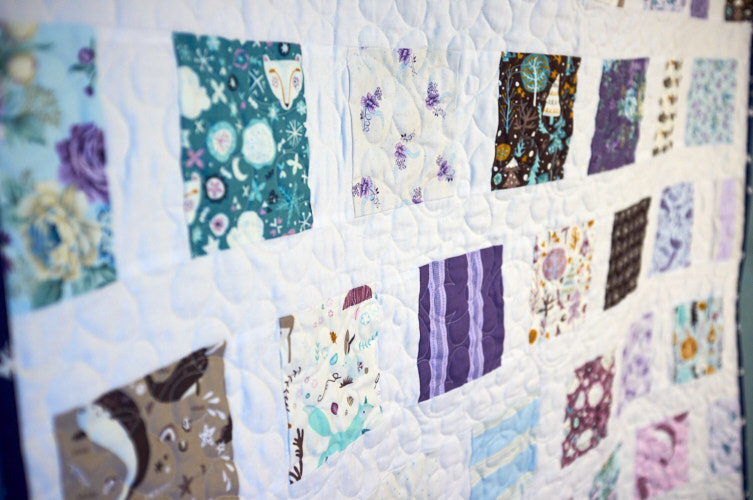
At any rate, I just can’t get behind making traditional things sometimes, you get me? I mean, I’m not the type to make a de facto baby quilt that screams little girlie girl. Yuck. This is interested, because I do sometimes swoon over things like that! Alas, I am but a conundrum. Therefore, I used the Snowfall Charm pack because I wanted something whimsy, but not cutesy or obviously baby (remember, my plan is she gets to use this as she grows up!). To offset it, I wanted something more mature and elegant, too, so I also used the Twilight Garden charm pack. I fell madly in love with the soft yellows and rich purples, I tell you what! The two packs work well together, in my opinion. It’s like the designers almost used the same color palettes!
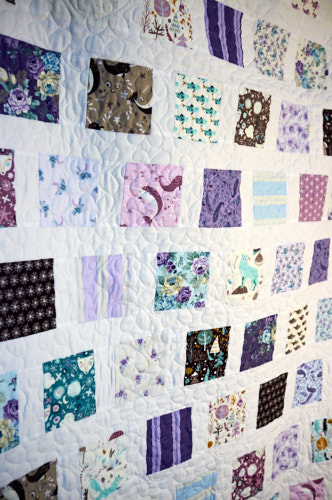
When Missouri Star didn’t send me the needed yardage of the white dot fabric, I decided I would do the whole thing in a very, very pale yellow because I loved that with the purples so very much. Only, my fabric options in a hustle and bustle came from Joanns, and I didn’t find what I wanted. Instead, I went with their version of the white dot fabric, knowing I wouldn’t be happy with it. (I’m not; it is plainly see-through in comparison to the whites in the other fabric. Eye roll, please.)
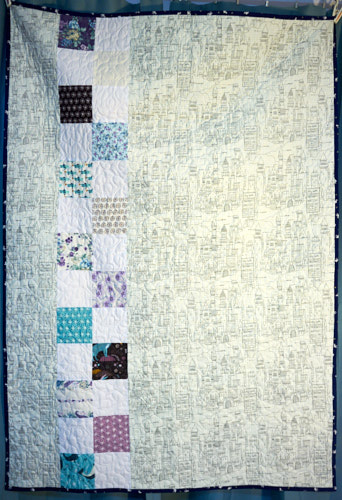
Toph enjoys a good dragon, so as a nod to him, the binding is Magic – Baby Dragon. I won’t mention that even though I am not new to sewing in general, and even though I watched Missouri Star’s very clear video on how to bind a quilt, I pieced my strips together wrong three times, and when it came to piecing the two ends together after being machine stitched to the quilt, I did that wrong three times also. But wow, that method is so much better than an earlier method I was using! To sum it up – when you come around the quilt, you overlap the binding by how wide you made it (mine is 2.5″ so I overlapped them 2.5″). Then you sew the ends together just like you did when you were piecing strips, and it lays exactly as you need it to!
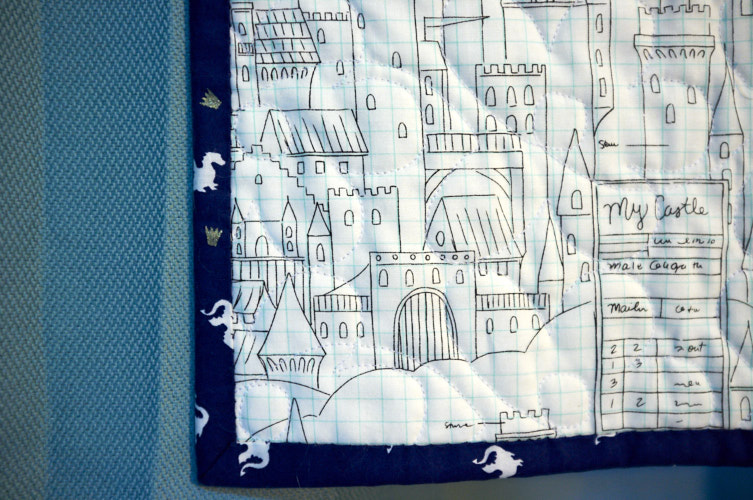
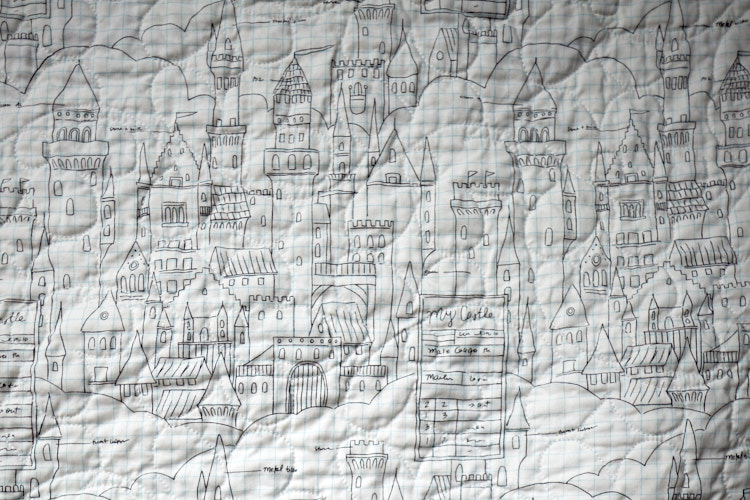
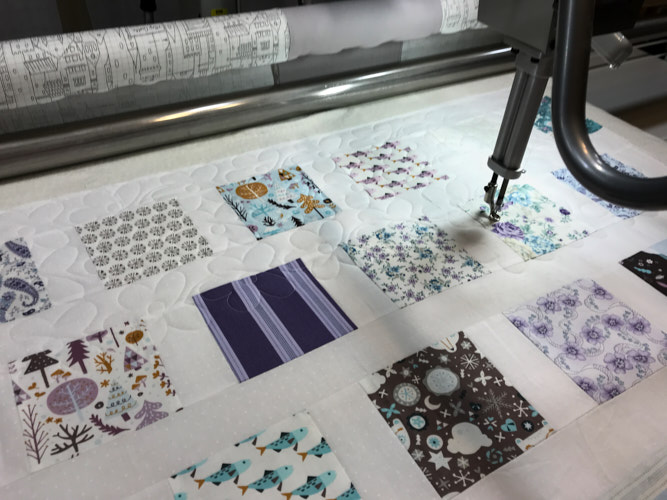
The backing is pretty snazzy and untraditional, too. It is Magic – Castle Plans. I was going to have so much fun hand quilting the castle design (and maybe even embroidering bits here and there!), but whatevs! Father Time, you are such a rudely consistent marcher:P I also ran into a problem here, which clearly speaks to my being a newb at quilting. The original pattern gave measurements for the particular fabrics Shelly used. I went off-key without even thinking about how some fabrics come in different size bolts, so my backing ended up not being wide enough for use in my neighbor/step-mother-in-law’s quilting machine. To correct this, I had some charm squares left over and so I inserted two columns of them, a wee offset as part of the backing (the graph paper design of the castle fabric made this super easy!). Yea, it’s pretty snazzy – one of those serendipitous mistakes!
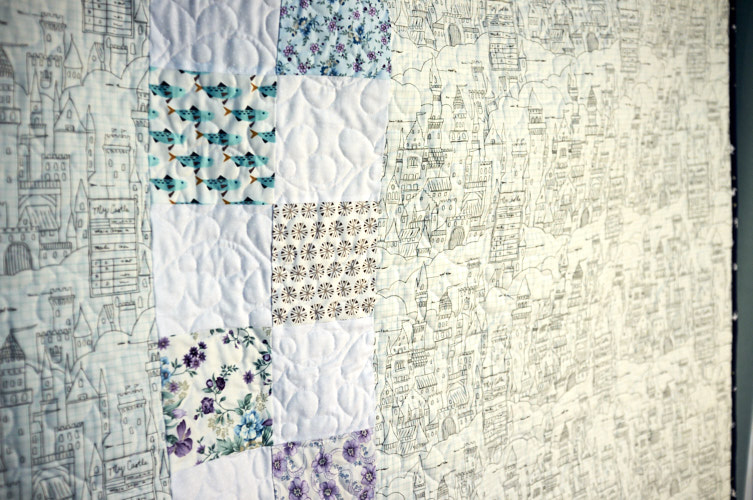
For the quilting design, I did want to avoid anything specifically girly, but this little flower motif actually looked really cool, so I went with it. As a side note, the neighbor also gave me a bottle of Mary Ellen’s Best Press in Lavender. WOW. Ironing will never be the same:)
Surprisingly, I can celebrate all the things that didn’t happen to the quilt which I fully expected (you don’t realize even half of the failures learning corrections I made with this one!): A. all of the patterns that required an orientation are correctly oriented, B. I did not spill food or drink on it, C. I did not drop it in the muddy puddles between my house and my neighbor’s, D. I did not burn it with an iron, E. my sick cat didn’t barf on it or snot all over it, F. the quilting machine didn’t have any major hangups, E. no blood was spilt in the making of this quilt.
Now, we wait for baby EJ’s arrival!


0 Comments