
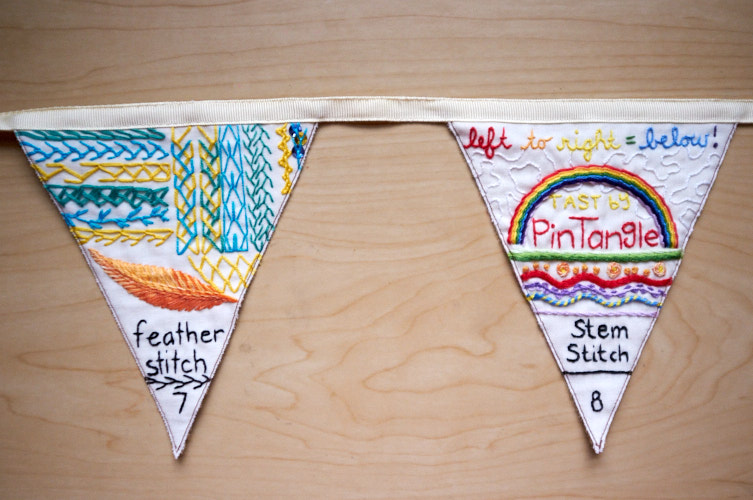
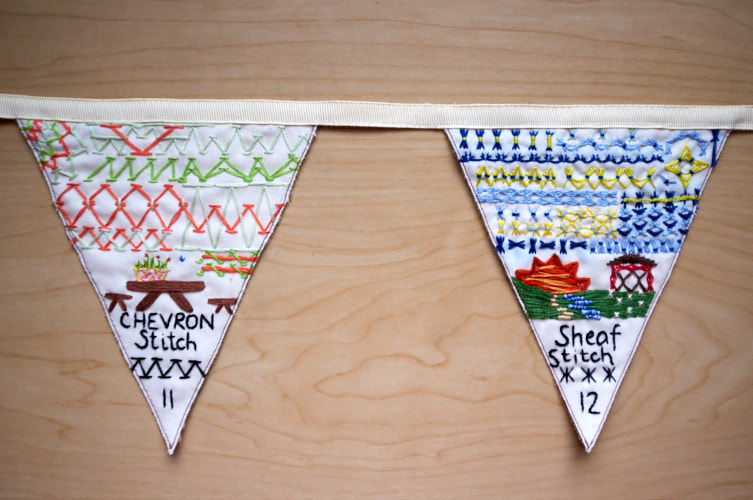
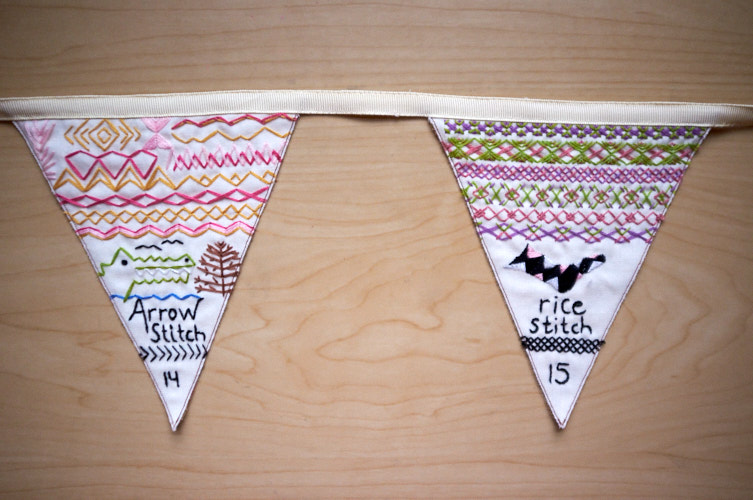
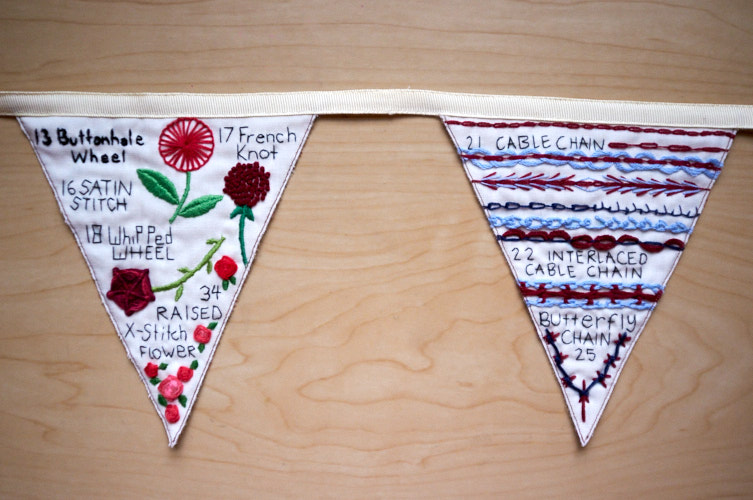
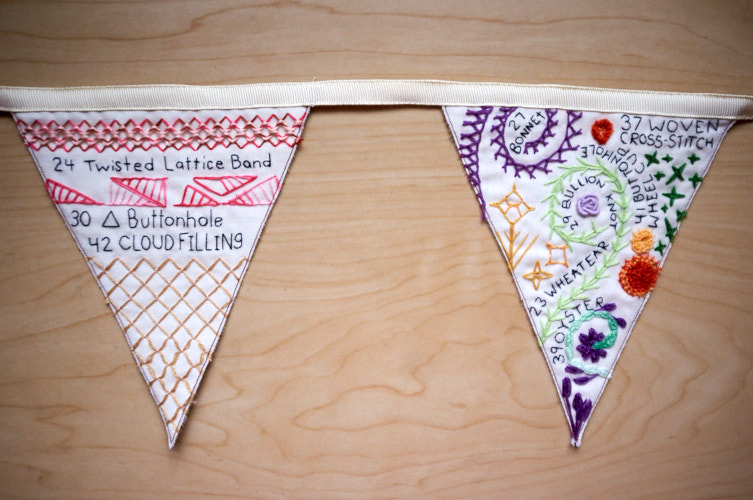
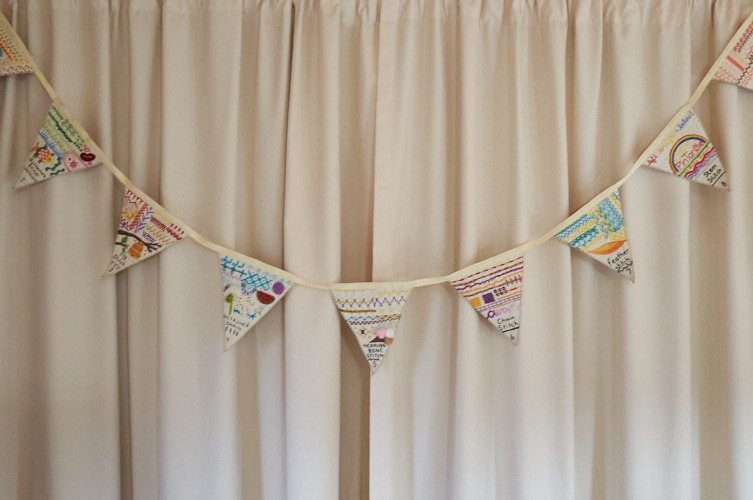
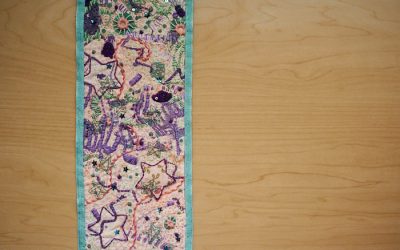
Sharon at Pintangle has been running an annual Take A Stitch Tuesday (TAST) program for many years now, and you might recall that I participated in 2018 (see my journey here). Well, I finally pulled it all together and converted my study of embroidery techniques and color combinations into a stream of bunting!
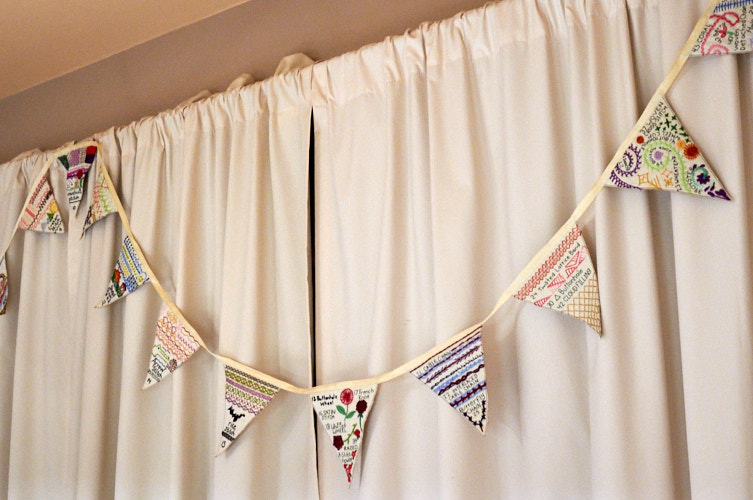
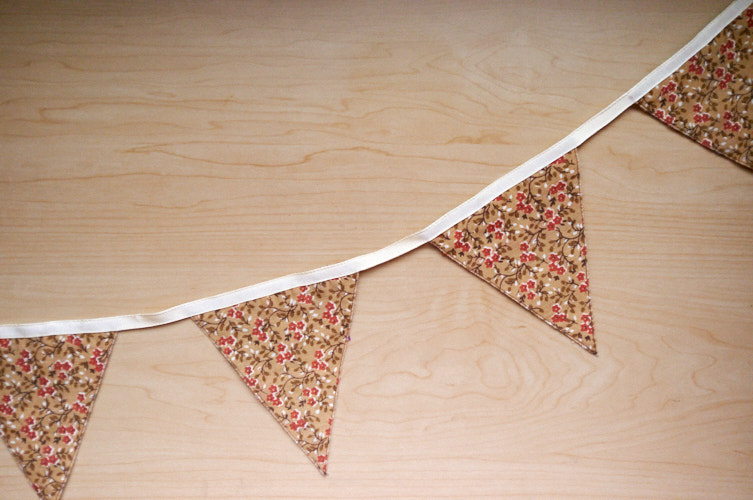
When I designed this project, I had inspiration from Sheila at Making a Fairytale. To turn my samplers into bunting, I sewed them as triangles onto a vintage brown floral cut of fabric for the backing.
I inherited a huge roll of grosgrain ribbon so I chose that as the connecting line so that I wouldn’t need to piece strips together. I whip stitched two lengths together across the top, then spaced out the triangles and hand-sewed them in place, whip stitching between each triangle.
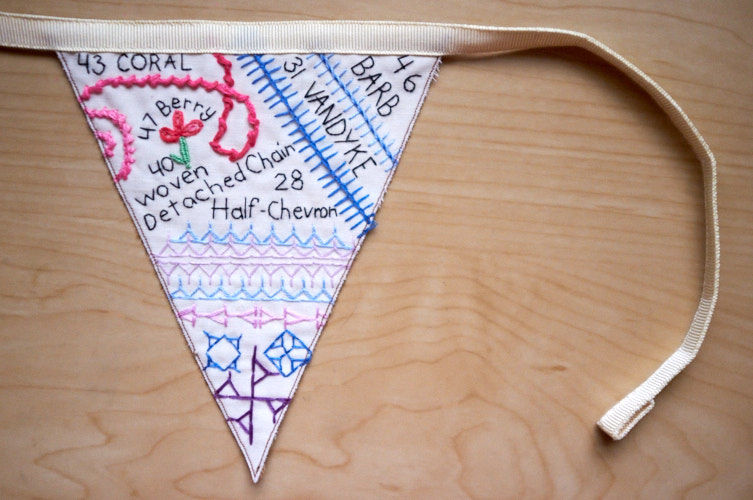
Even though my finished triangles are small (roughly 4.5″ wide by 5.5″ tall), by adding a 2″ gap between each and 6.5″ of length at each end for attaching it some place, my bunting is quite long as there are 19 pennants to it. There would have been more, but if you’ve followed me since then you will remember that I was beginning to run out of the ground fabric so I opted to merge many stitches together by the end.
Everyone who has seen it seems to have a different favorite one. I have a few favorites myself, so I completely understand! I wonder which is your favorite?
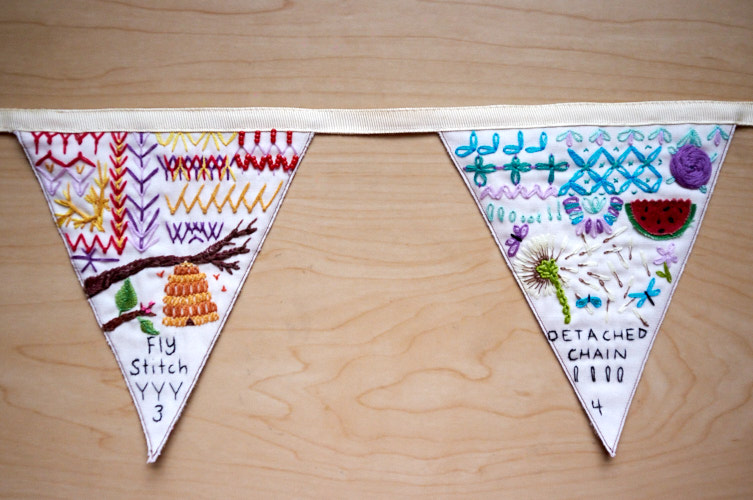
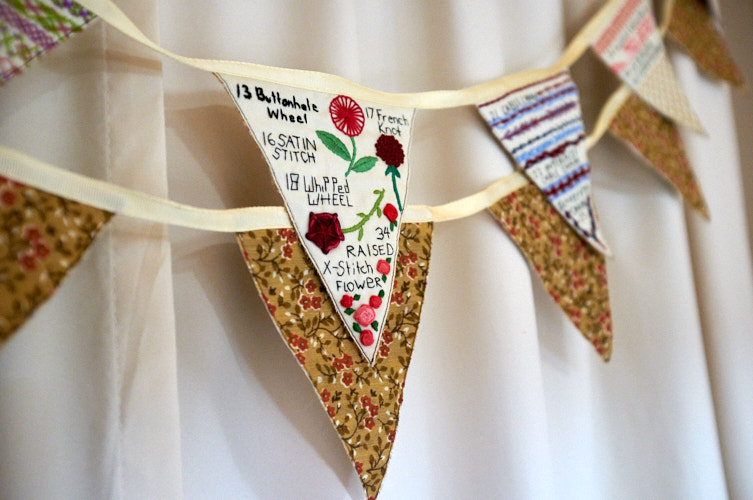
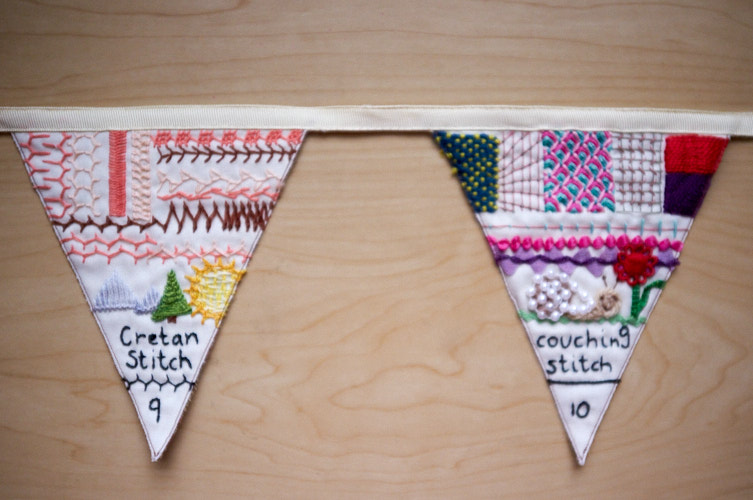
My technical skills drastically improved over the course of the year. I was, of course, working on other projects as well but TAST really helped me focus and understand various stitches.
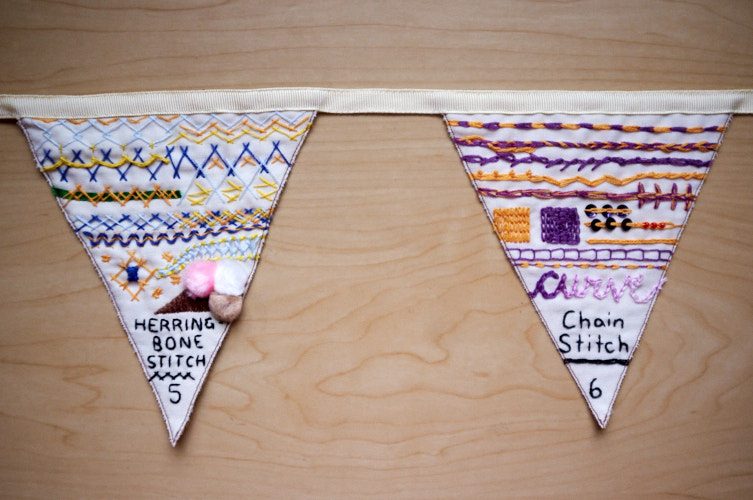
TAST also allowed me to play with color. I limited myself to the giant pouch of bulk embroidery thread I had from my very early days (the cheaper stuff), so I had to stretch my mind a little to get out of the color-combo box I normally live in. Playing with color combinations isn’t something I had done before, for the sake of color, as usually I follow a pattern with colors already chosen.
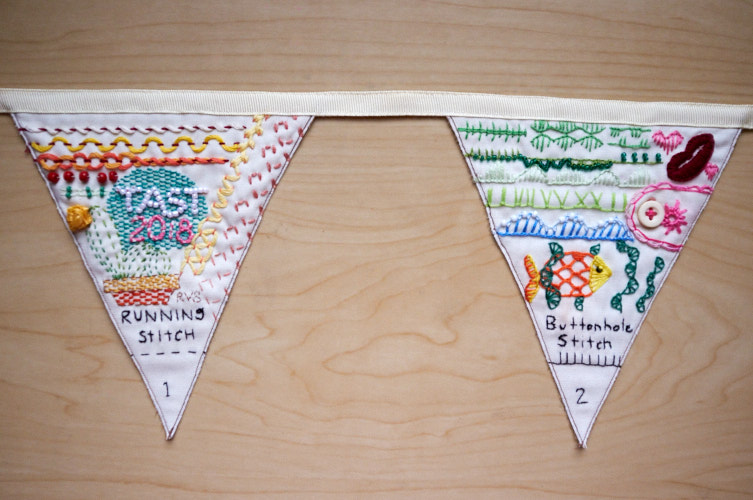
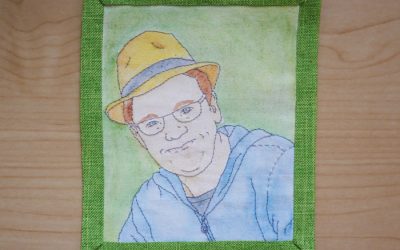
In the very beginning, I didn’t understand what ribbon embroidery is. I used rayon ribbon on the very first pennant (the yellow ribbon flower on the Running Stitch triangle) and was like “how do people work with this?!?!”. Later that year, I would try out a ribbon embroidery kit and learn my lesson – duh, there are different kinds of ribbon and silk is magic!
When I started TAST, I also didn’t understand much about using beads or sequins. You can see that I tried implementing them early on but then later ditched the idea. Since then, I have also learned about beading, namely through the crazy quilt classes by Kathy at Shawkl (here, here, and the one I am still working on!).
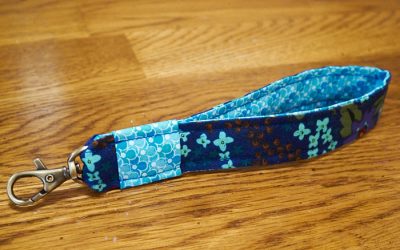
I would love to try TAST again and either follow Sharon’s Beyond TAST version, or experiment more specifically with beads or different kinds of embroidery thread (these are almost exclusively 6-stranded floss, though occasionally a perle cotton or strip of yarn or ribbon make an appearance).
I would do another banner like this as well, because I think it is just such a clever way to visually display a sample of embroidery techniques. Next time, though, I wouldn’t use triangles – why repeat exactly the same? I might try either a scalloped banner, or even squares/rectangles.
My technical skills, as I said, increased with this project, and one of the things I would like to explain is how to prevent permanent accidental knots without any frustration because I finally figured this out. Even though I am thousands of times better at this than when I first set out to sew, knots get even the best of us. Maybe I will make a post about this in the future, with photos, but until then I hope this helps. The first lesson is simply doing enough sewing to realize, at a subconscious level, if the length of thread you are pulling is shorter than it should be compared to your last stitch (as in, there is a knot behind the fabric). This lesson is tied to hearing the thread being pulled through the fabric as well (if your hearing is still rightly good and you don’t have a lot of noise in the background). It is also tied to finding the right speed and force when pulling the thread. The key is to stop pulling immediately when something is off and check the back. This results in a loose knot, which is almost always a type of slip knot. If you gently hold the knot between your fingers and thumb, and gently pull in the direction away from the tail of the previous stitch (not in the direction away from the tail connecting to the needle – this makes it tighter!), it will likely slip out quite easily! If it is a particularly tight knot, you can sometimes wedge your needle into the length of thread that has wrapped itself around the loop; pull the tail end coming from the previous stitch while keeping the needle within the knot, and voila! This almost always works, and once you get the hang of noticing a knot forming, and how to remove it, they take less than a few seconds to correct – honest! Of course, there are ways to prevent the knot forming in the first place, but this tip is for those times when a knot just hangs you up anyway.
Anyway, this bunting will be lended to the guild for display at the library early next year and whenever else they might want a sampler of surface embroidery for display. I had considered donating it to the guild, but Boy, of all people, refuses to let me part with it, so there is that 🙂
I hope you try TAST for 2020 – don’t be overwhelmed with the idea. Just doing a basic one inch line of a stitch once a month is better than nothing at all! You will learn so much by the end of the year 🙂


Love this! You spent too much time on it. I like the feather stitch fether – how meta (:
Haha I did spend a lot of time on it, but I can’t complain – it kept me busy and I got better! 🙂
Thank you so much for sharing this. I learned to make a “stitch dictionary” with my sewing machine, so that I could duplicate a stitch when necessary. This gives me a whole new skill to practice.
So welcome, Candy! I would love to see your progress:)
Thank you for the inspiration for my TAST 2021 challenge. I wanted a visible way for my record. The bunting will be a perfect addition to my soon to be new craft space
Wonderful, Andrea! I hope you persevere – it is quite a challenge! And keep in touch, I’d love to see your results 🙂