
So I am still looking up little patterns to help me learn sewing skills and inspire new ideas. Since most of the patterns I find for free ask not to be used on products for sale, I really need to get a grasp of how patterns are created so I can make my own. If I ever get that good, and keep the hobby up, that is.
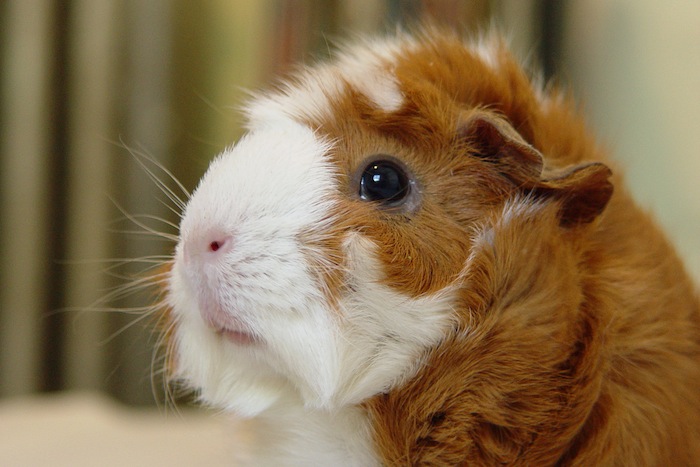
So my bro’s birthday was coming up and I thought it would be yet another good excuse to try something. Rather prematurely (and by no fault of my own – the pattern just doesn’t exist where I can find it!) I tried to create my own pattern, loosely based on the guinea pig here. See, he had a guinea pig named Story, but she passed away long ago, so why not give him a cuddly squishy piggie in memory of her?
My first attempt worked well as far as getting the white and tan body sections, but when I pieced them together, I realized I would need a spacer for the body to make it fatter. In addition, I wanted the legs to stick out but wasn’t sure how, so I just went in with guns blazing, cut along the leg line, sewed it back shut, and was very unimpressed with the results altogether.
Undaunted, though, I am. So I continued, again, and created a spacer for the top of the pig. What I didn’t consider was creating another for the bottom. DOH! I also opted to embroidery the legs rather than try to do anything fancy with them being 3d.
I took the pattern from that website, added a tale, and cut it in half, with a slightly curved line. I made the back half out of tan, and the front out of white, and stitched each side together along the curved line.
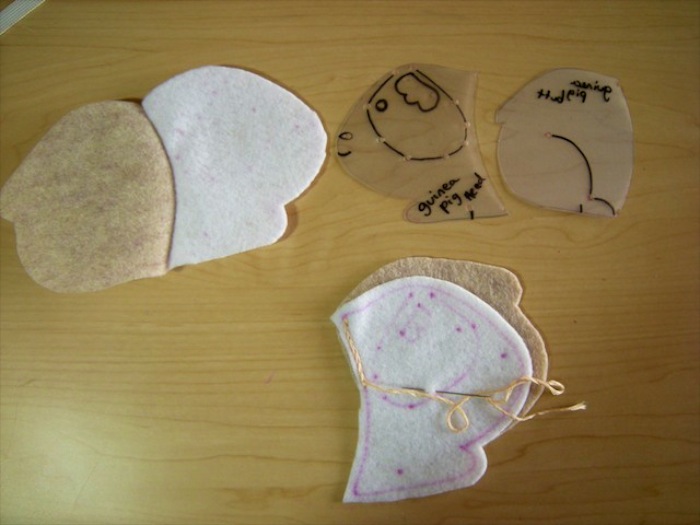
I just kinda guessed the shape for the spacer, but I knew I wanted the head and body to be fat, whereas the middle section could come in a little. I also made it half and half.
I pinned one side to the spacer and sewed them together and repeated on the other side, then I stitched all around to sew the two sides together, leaving a big hole at the bottom – much bigger than needed for stuffing, but I wanted to keep it open to embroider the legs (I could have done that first I suppose, before any sewing had been done, but Im a noob).
When I reversed it right-side-out, it appeared that the shape of the spacer gave it more of a dog face look than a guinea pig. I was NOT going to make a third one, nor was I going to remove all of the stitching, so I kind of reshaped it by adding a seam in the middle of the head portion. It didn’t work too badly – not something I would do again. I would make sure that it was the right shape. But for the learning purposes of it here, it would suffice.
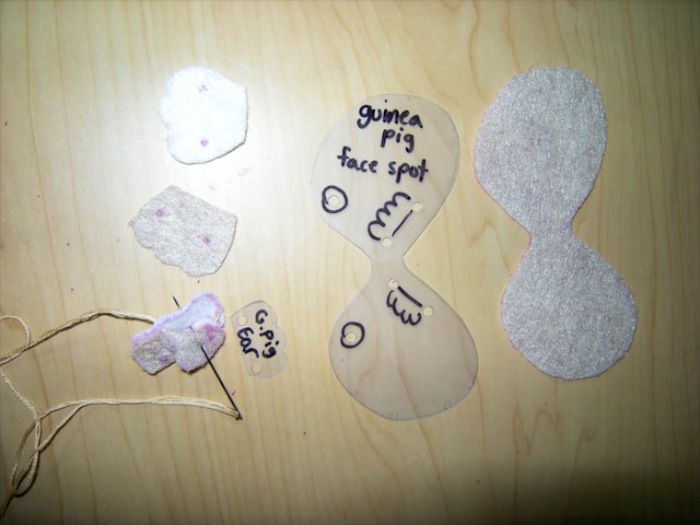
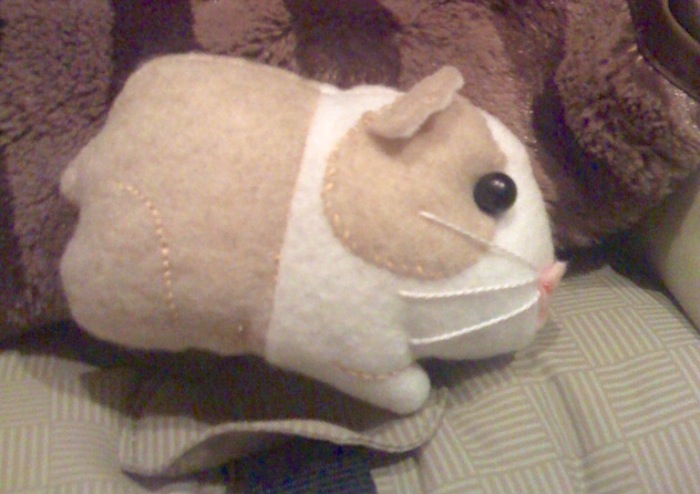
Then I stuffed it full, stitched it up, and began working on a shape for the face coloration. Once I finally got a paper version, I traced it onto the tan felt and cut away. My gramma’s borrowed buttons saved the day again, as I found two beady eyes to place (not exactly as small as I was going for, but really suited the look compared to my other options). I also used the website’s ear pattern, and sewed a tan one to a white one and attached it to the face coloration part.
Similar to the alpaca’s saddle, I sewed it onto the head. What I somehow didn’t notice was how crooked I pinned it on, but honestly I didn’t think it took too much away from it. I mean I wouldn’t sell this one, its definitely not up to par of the quality I want to churn out. But for my second softie, and my first somewhat hodgepodged pattern, Im pretty happy with the results.
I think in this example, having a spacer at the bottom might have been all it needed -not one at the top. This is a pig not meant to be viewed from the front or back (in which it looks a little creepy with only one leg)- this little pig much prefers profiles instead.
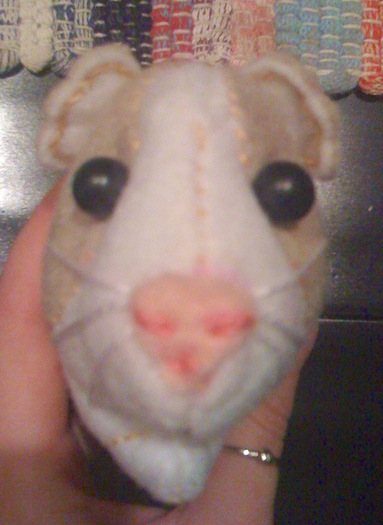
So the guinea pig I made was a hit with my friends. They suggested I added whiskers and maybe a nose. So one day I decided to test it out with just whiskers. Using the same technique with the crochet hook, I pulled the knot into the body, and used white crafting thread to make some whiskers. Then it just looked like it was noseless, so I added a little pink nose, and used pink thread to add the details. I also pulled the eyes together so they didn’t stick out all goofy like. It was okay, but I still was not in love with the way it looked. So when my pseudo nephew Cam went crazy over how it looked just like Bugsy from the new movie Bedtime Story, and he asked if I could make him one, I just gave him that one. He was really happy and told me it meant a lot to him. How sweet!


0 Comments