
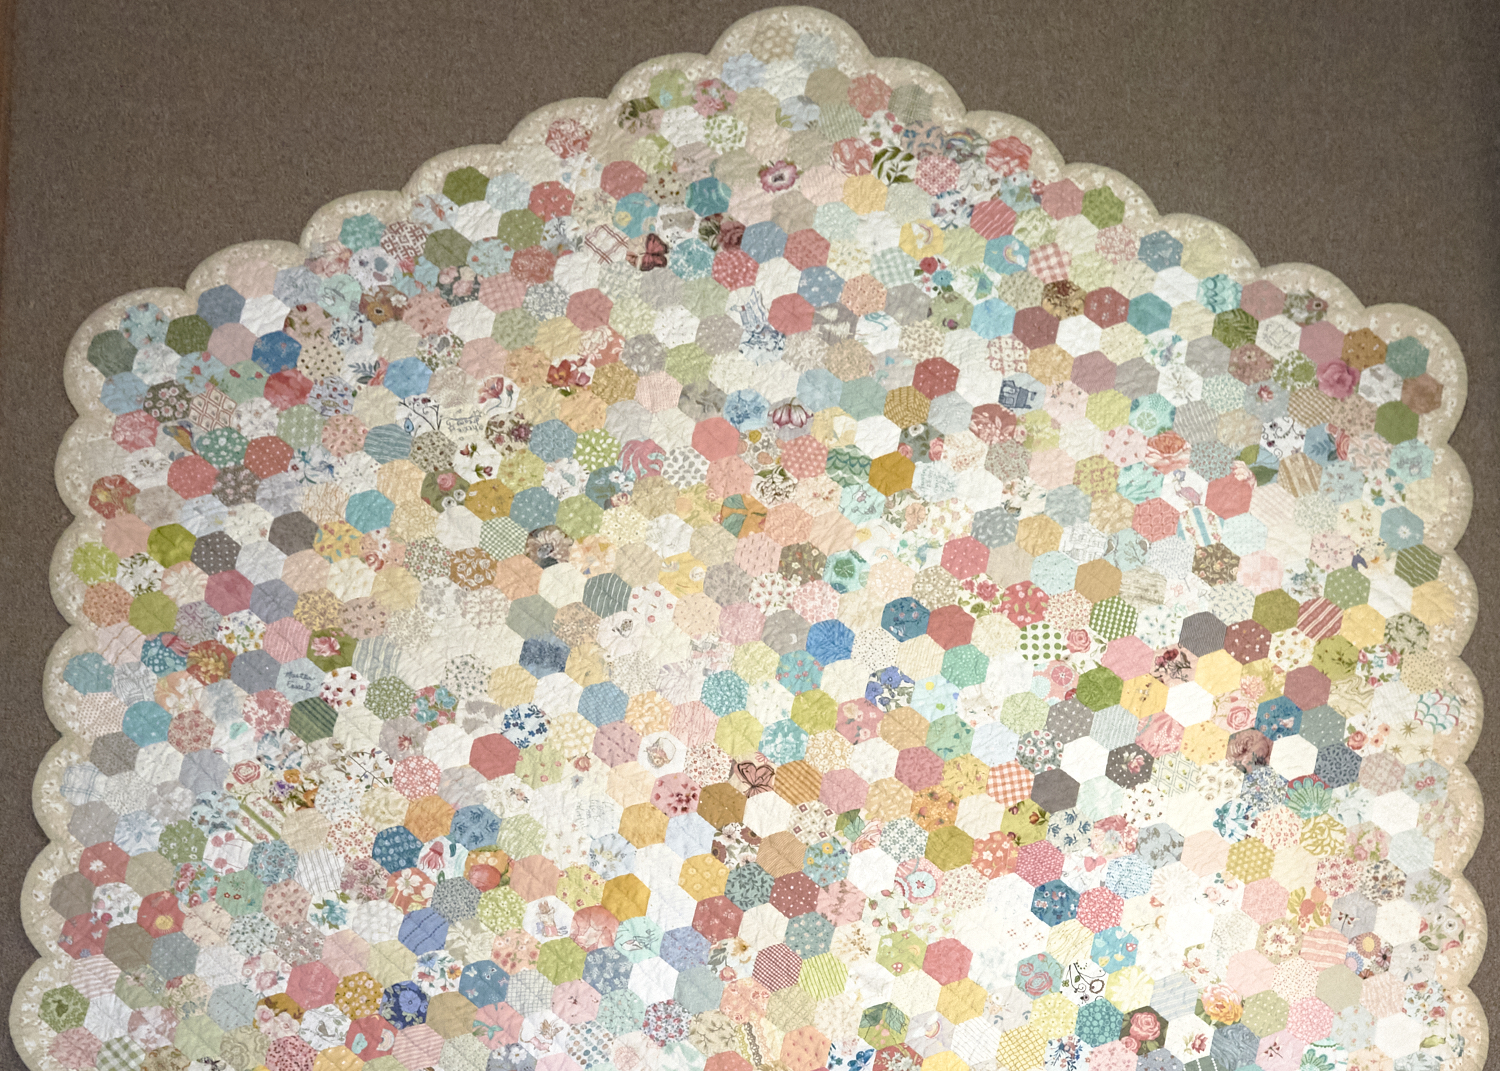
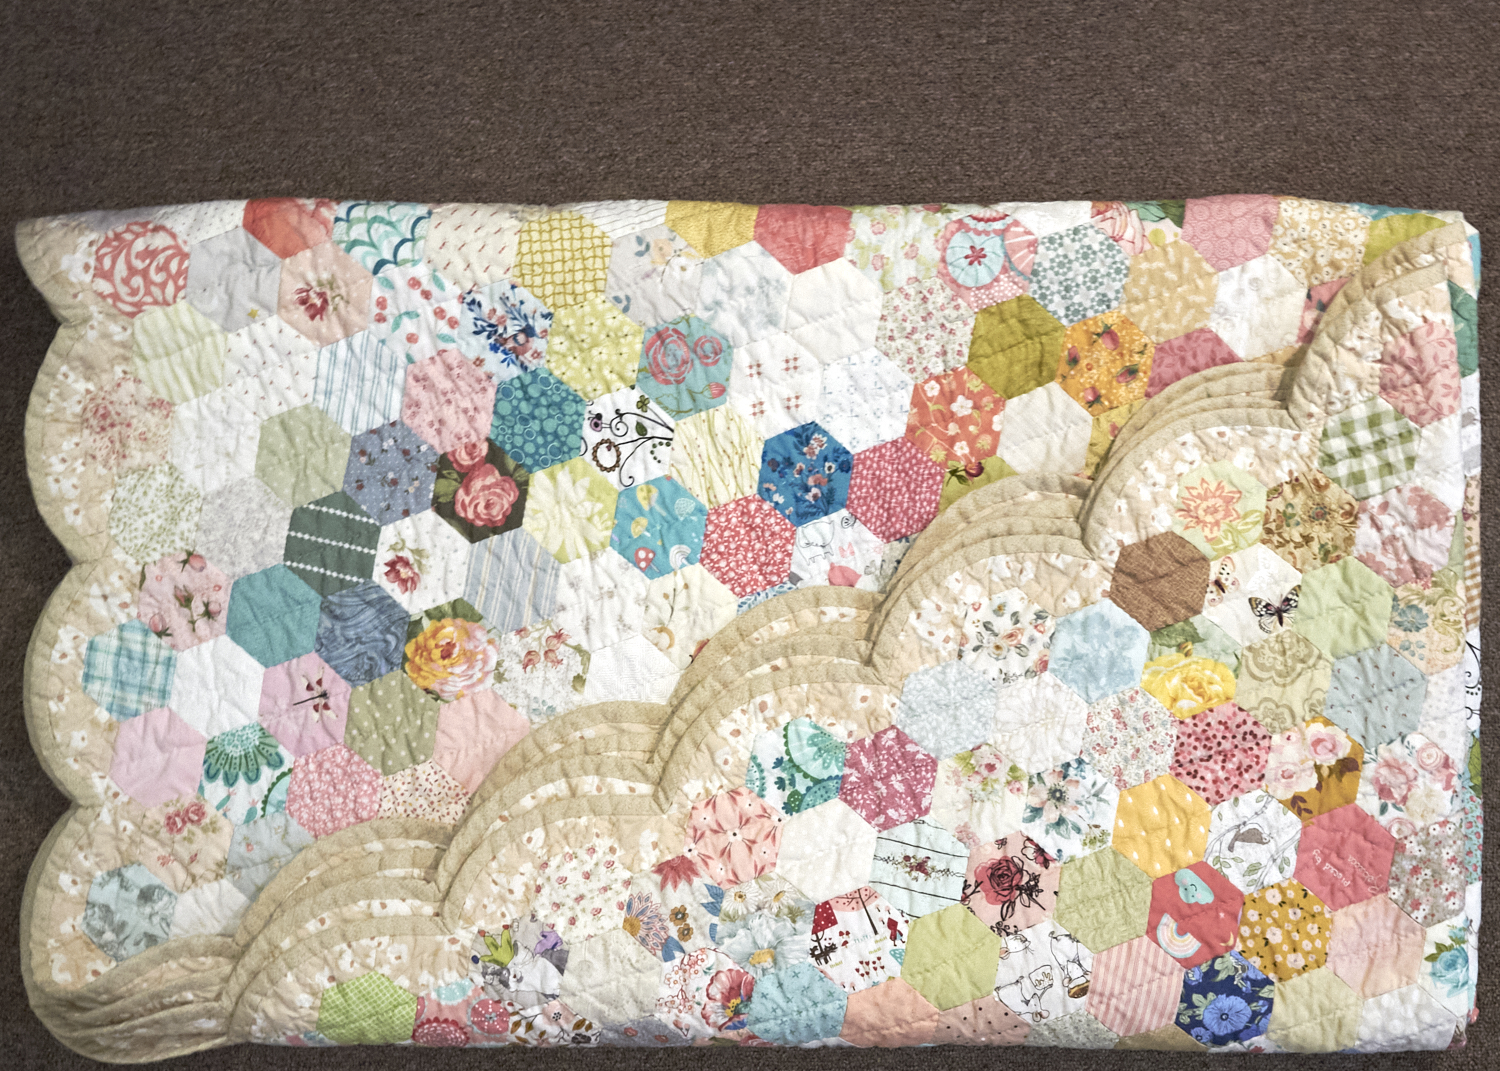
Ya’ll, my Hexie Dreams quilt is finished! And, in case anyone out there ever wants to be crazy and make a hexagon shaped quilt with a scalloped edge the way I have, I made a template for you to download (with directions near the end here). Yippee! Newcomers should know I am most certainly not a quilter, so this one isn’t nearly perfect – and I am most unlikely to ever make another (though, I keep saying saying that after every quilt!). This was simply an indulgent personal project I decided to tackle (and then avoid, and then tackle..and avoid…and…) back in 2021.
While I didn’t get to be with my gramma as she hand quilted it, I am super happy to know that we made this quilt together. I did piece a lot of the hexies at her house, actually, too. I told her to do what she found easiest, and so it is straight lines across the rows, with some loving hearts tossed in here and there.
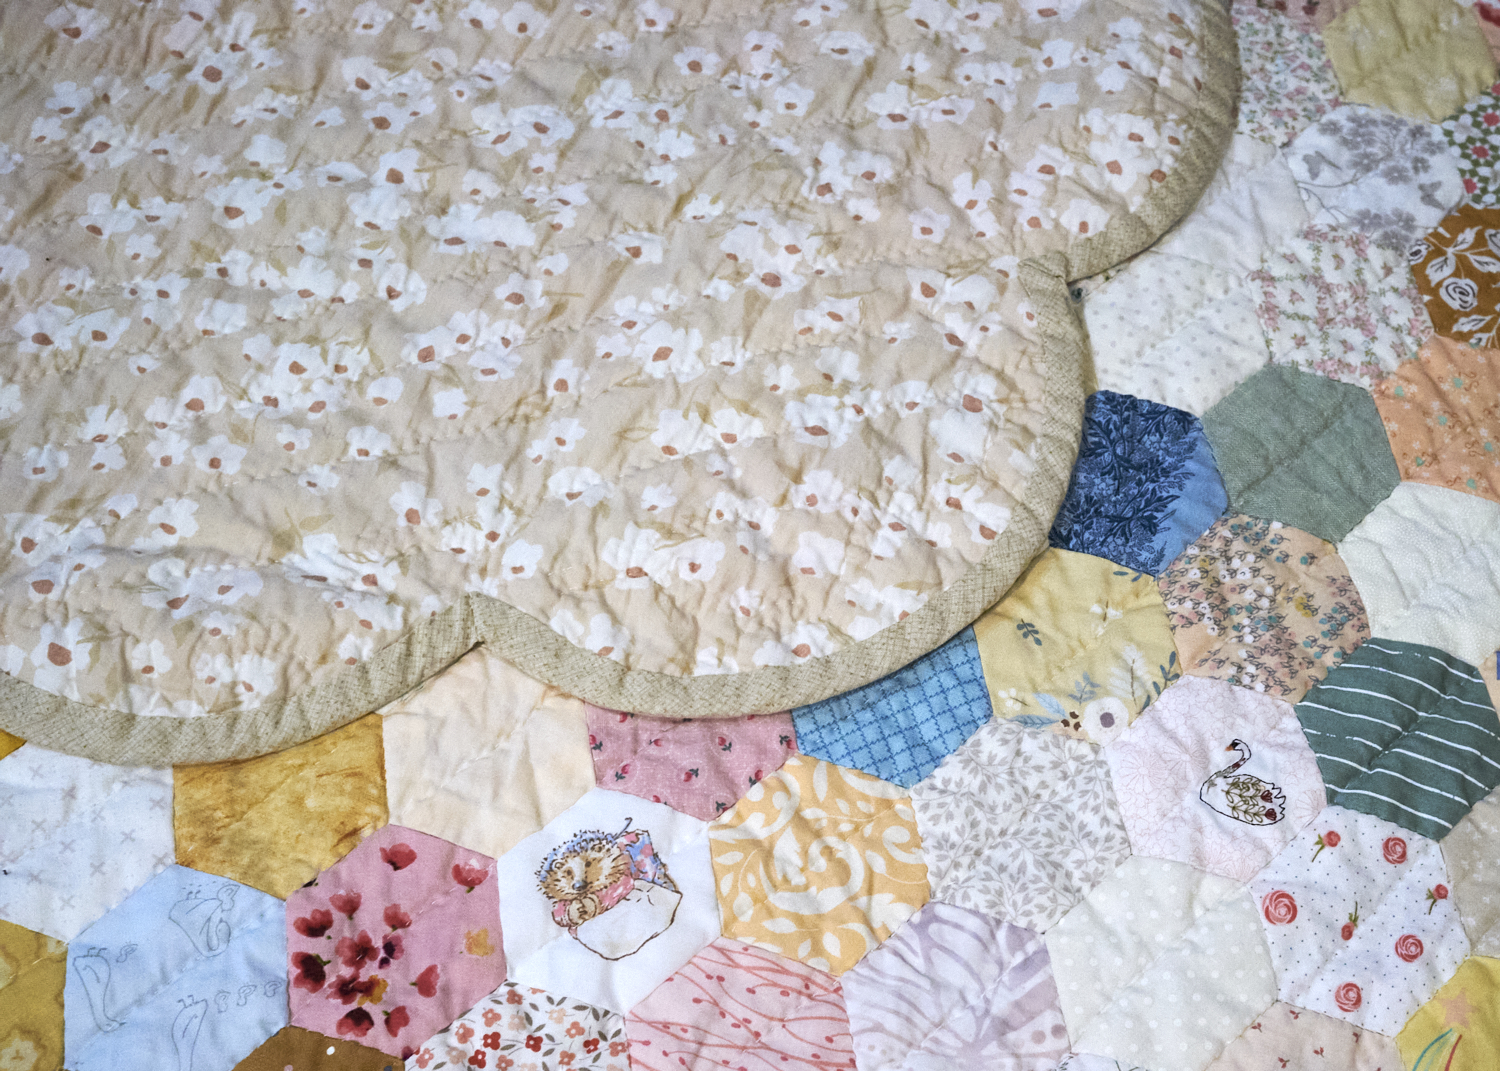
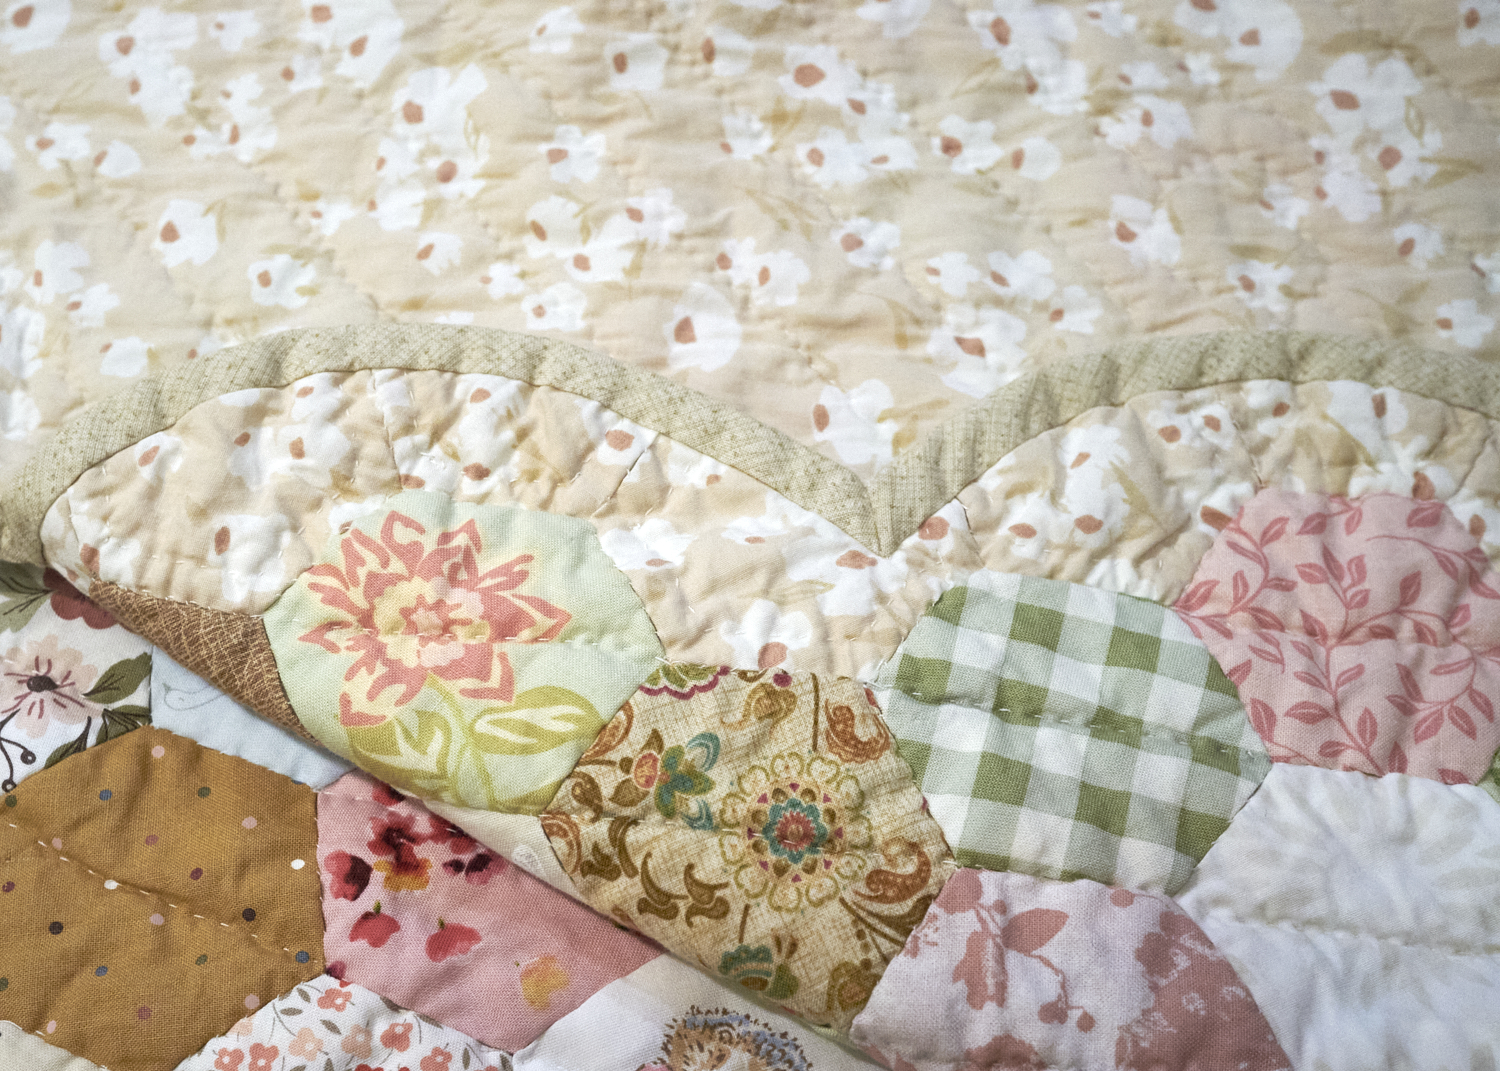
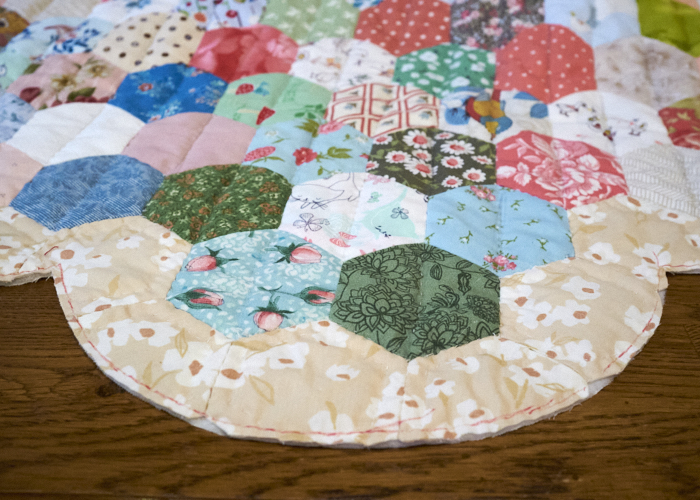
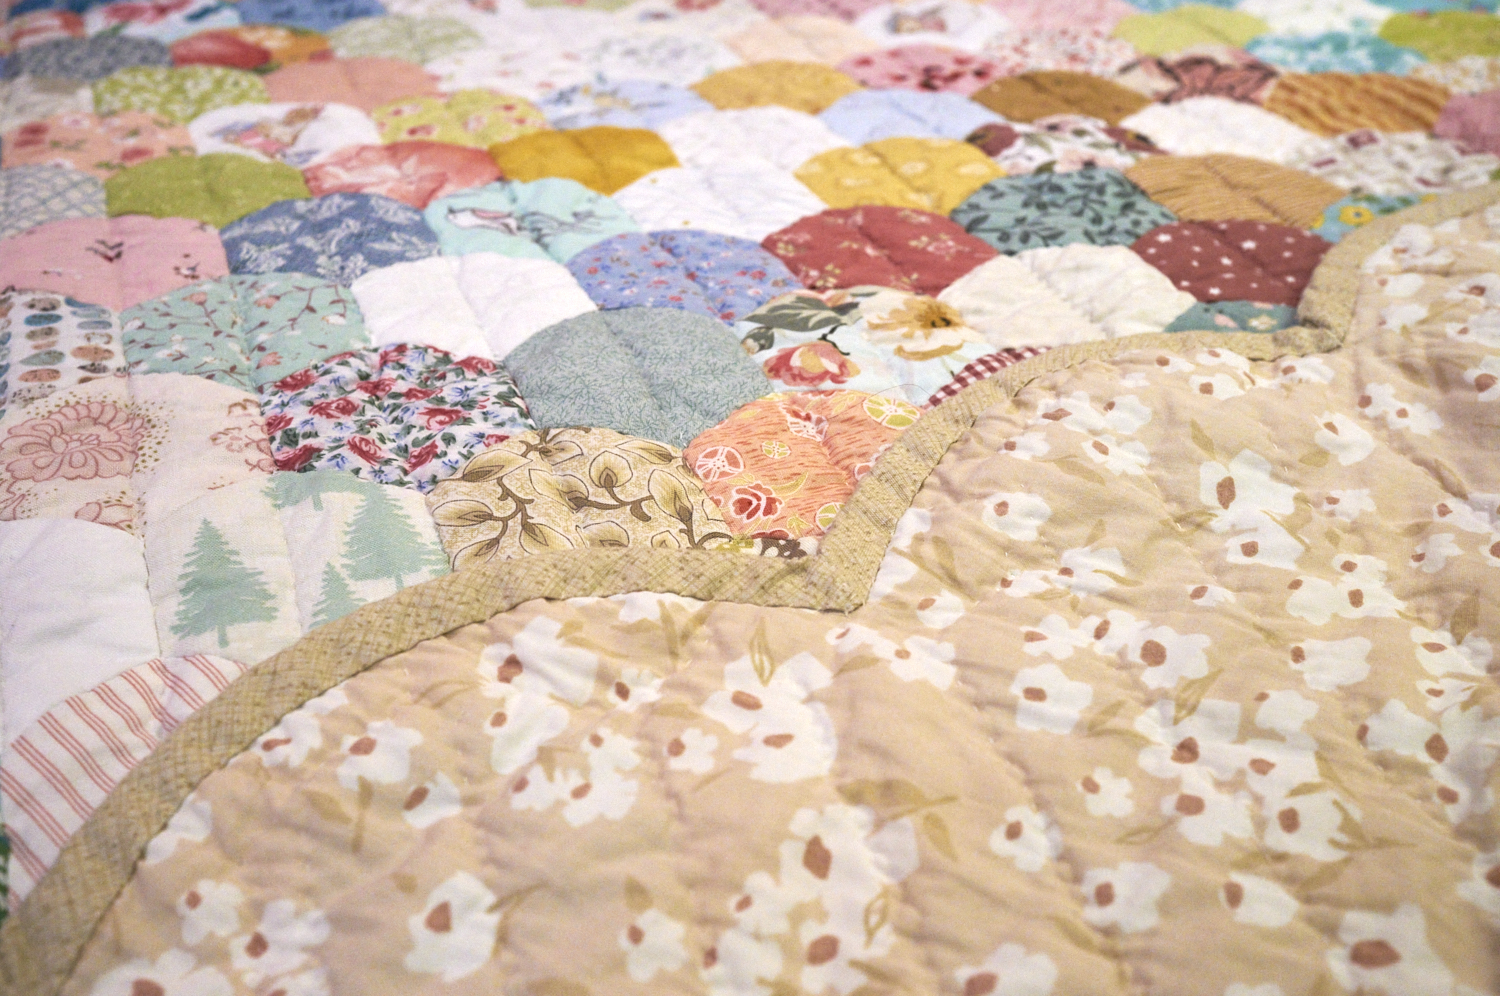
Neither of us knew how I was going to end up binding it, but I had wanted to attempt a scalloped edge. [I fell in love with that idea when I inherited my (other) gramma and grampa’s double wedding ring quilt that my great aunt (pieced) and aunt (quilted) made for their 50th anniversary.] Trouble was, my hexies were all at an angle with how I joined each flower together, so it was to be an uneven scallop, and I wasn’t exactly sure how to pull that off. But, this is why I had added the border all the way around. It was frustrating at the time to not get on with the thing, but it turned out to be a fabulous idea. I love the way it looks!
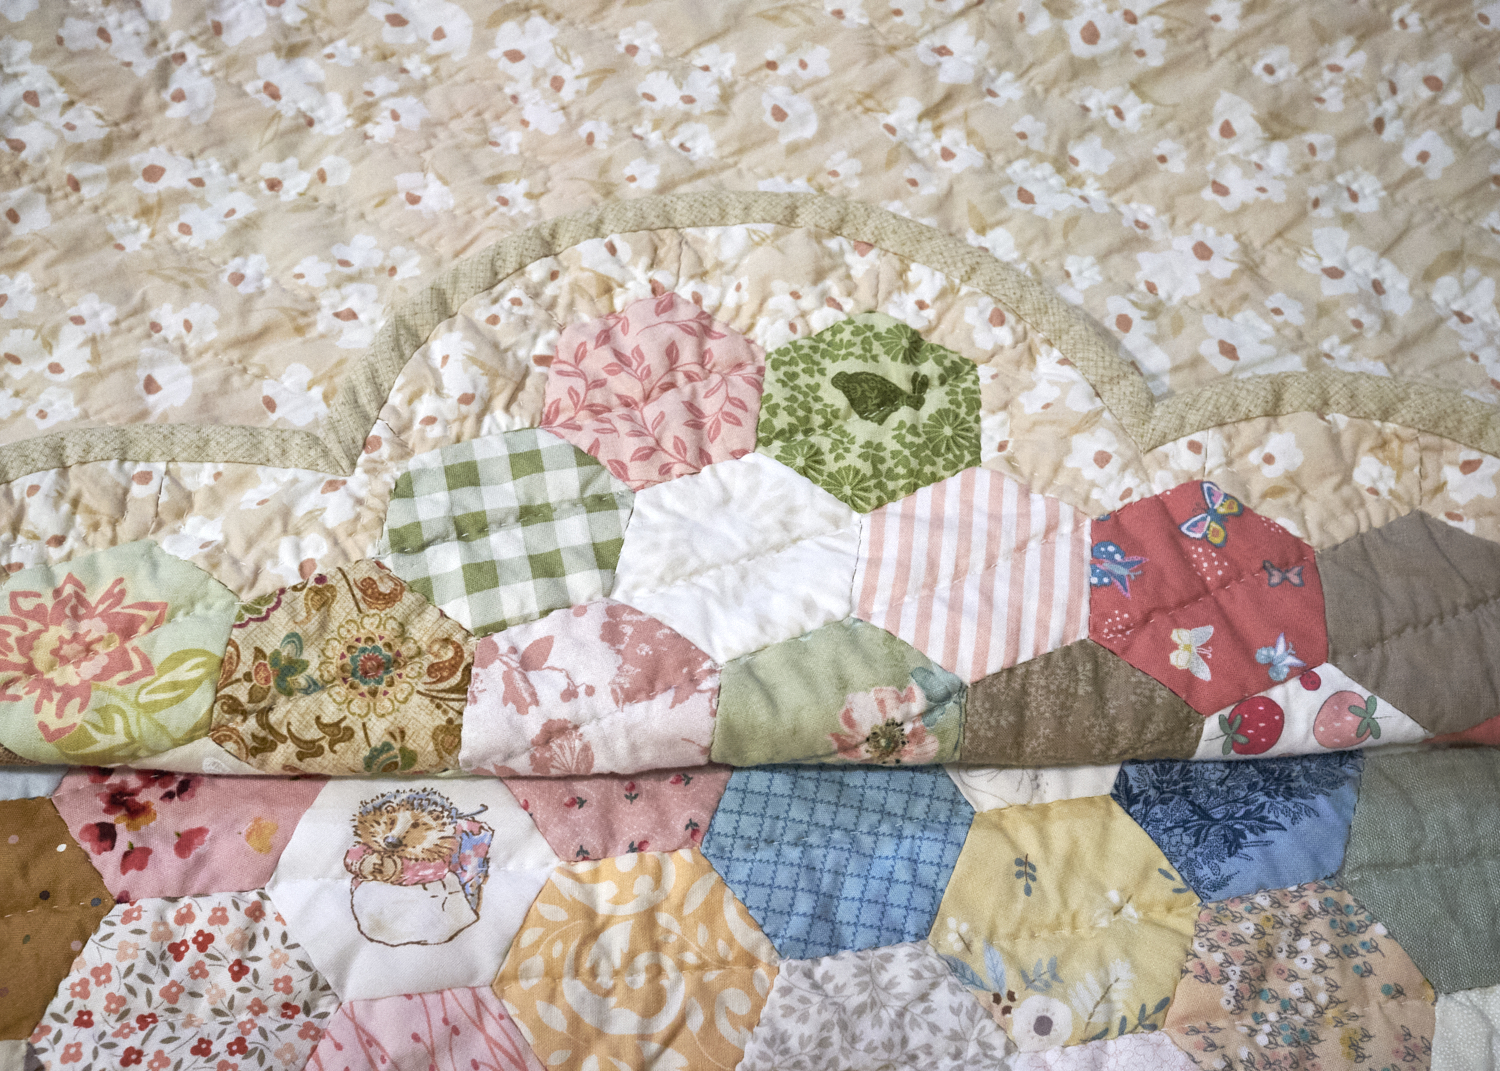
I was pleasantly surprised by how easy the bias binding I ordered hugged each curve. I’ve heard that’s the case, but I’ve only ever binded straight edges. The valleys were a little more difficult, and, sure, I could have done these better, but I am not about making a perfect quilt. I know what I’m about – and I know (now, in hindsight) that when I changed from whip stitch to ladder stitch in joining hexies, perfection was off the table.
Some of my stitching is loose; that’s the nature of using the wrong stitch I suppose. My gramma did her best to toughen it all up with the quilting, but there are still places where you can see the batting. But you know what? It didn’t phase me at all! I’ll tell you why. I think it will be so fun to keep this project as a dynamic, ever-changing work in progress. Yes, yes, I was so over it a while back, but I have ideas for it now. Like this:
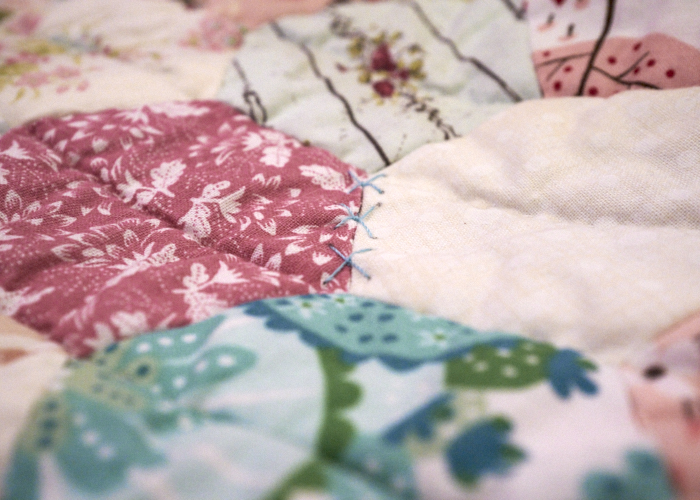

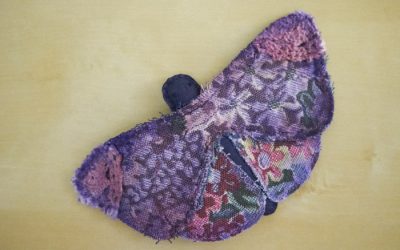
For the love of stitch I have, I can add cross stitching, sashiko, kantha – whatever floats my boat when I find an issue. These two repairs are a basic cross stitch and a row of fly stitches (not stitched through the backing). Considering I made the quilt for my craft room, the solution will always be right in hand. And over the years, it will tell colorful stories!
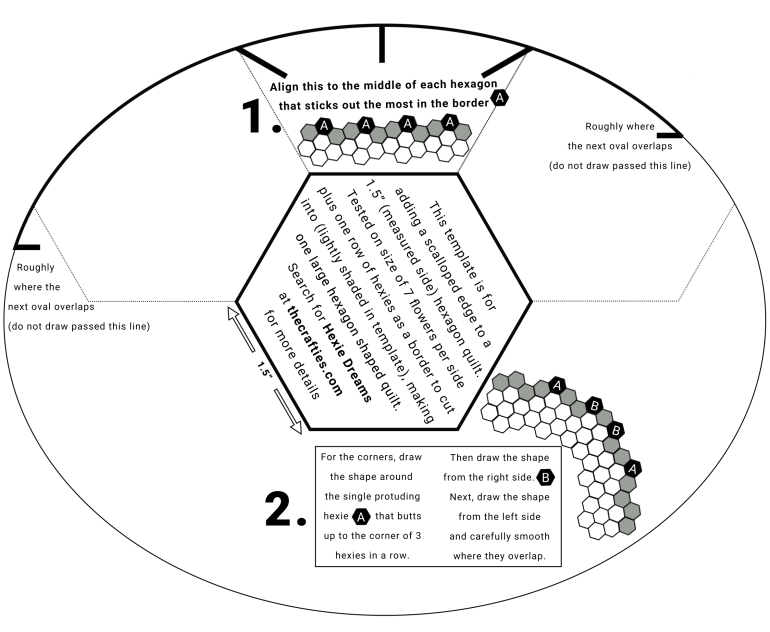
Now, for the curious: how I made the scalloped edge. I found that my flowers were roughly 7.75″ circles. I can pretend I did some math, but honestly I kind of winged it and made an oval of 7.75″ by 6″ based off of a guess: squish the circle to be only as tall as a couple of hexies, and this should give the shape I needed. It did! But I only understood that was correct when I moved the oval aslant, to match the angles of my hexies. I think my template does a great job of explaining how I added scallops.
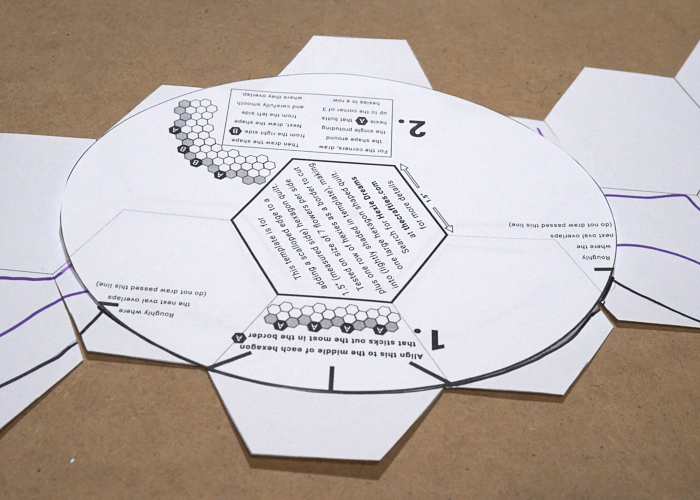
I printed out one edge of my quilt in hexie form (with photoshop) to include a full turn of a corner, cut it all out, taped it all together, and tested it. There was no way I could have imagined I got it right on my first try, but I sure did. Now, that was magical!
How to add a scalloped edge:
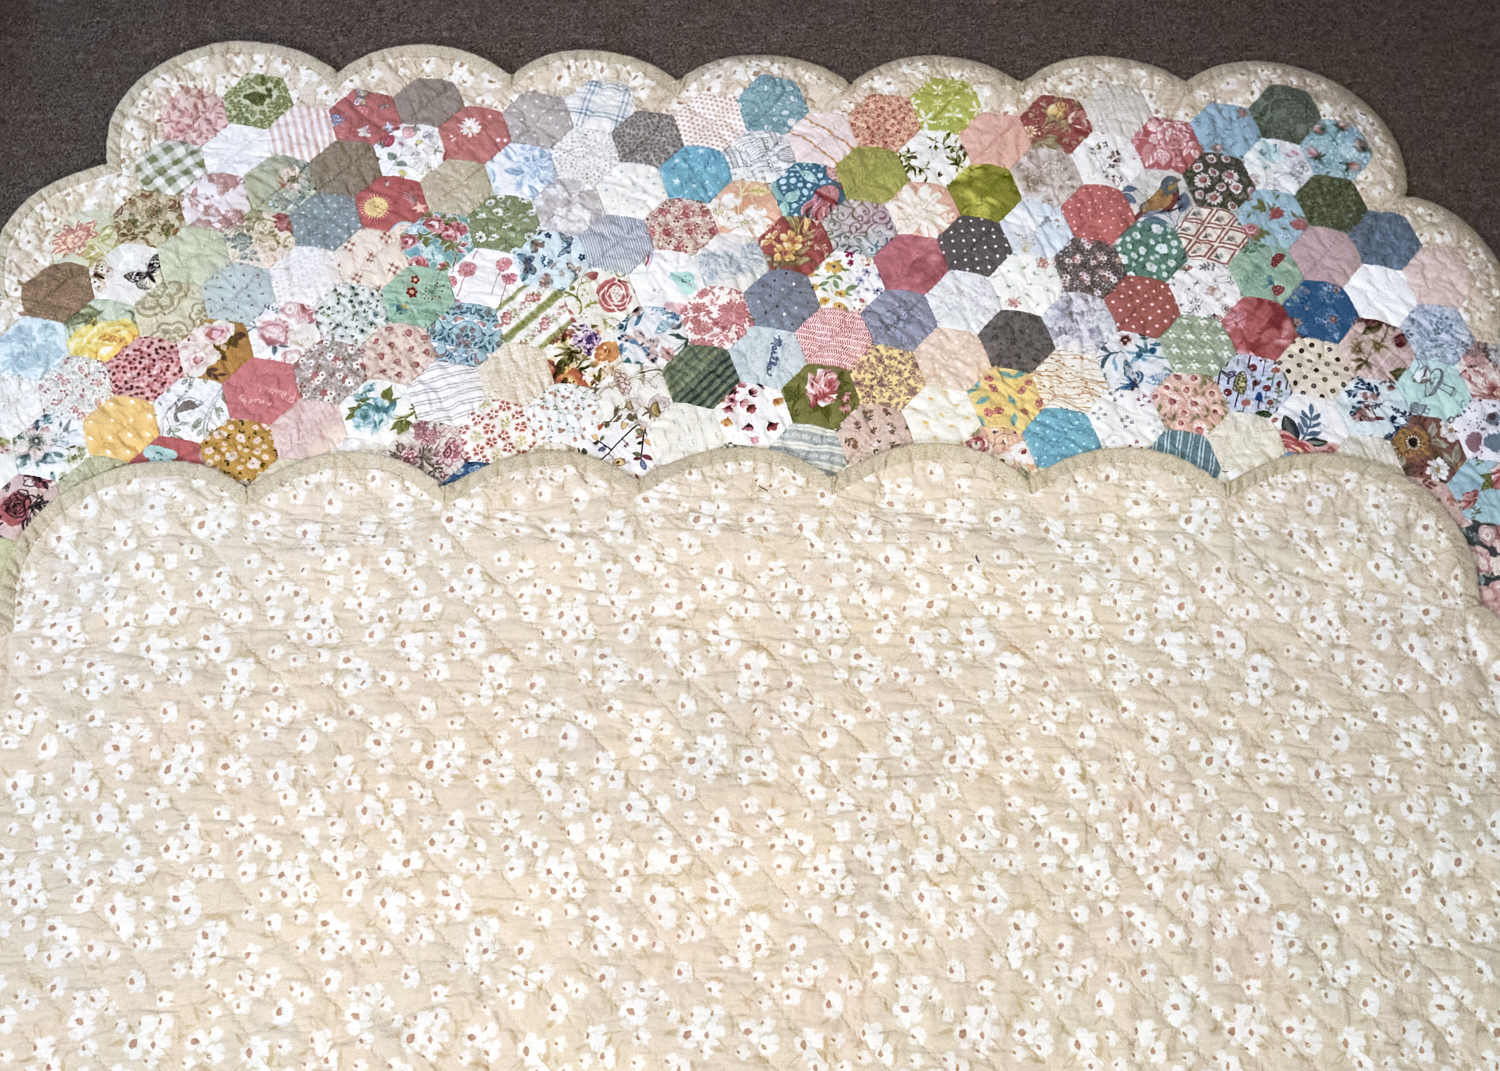
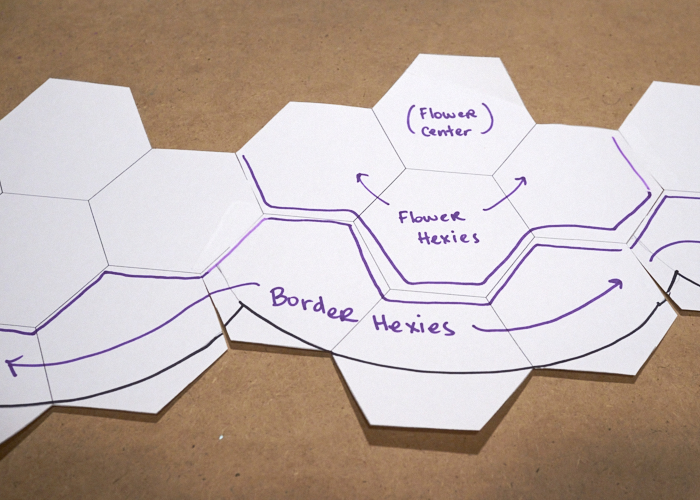
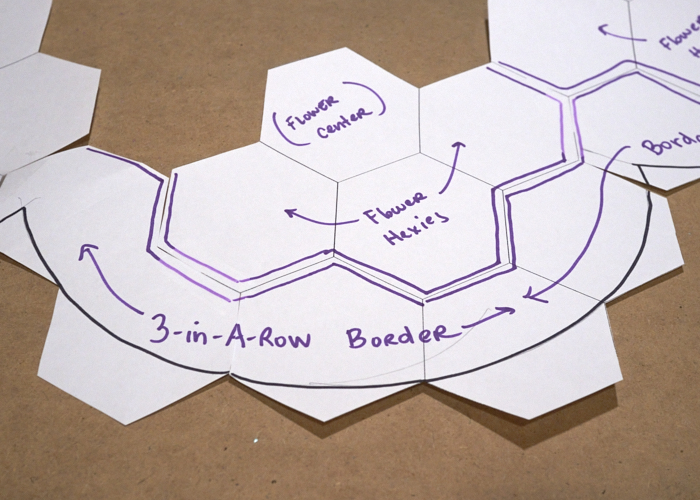
Remember, my quilt is shaped like a hexagon. I pieced six 1.5″ hexies around a 7th one to make “flowers”. I laid one flower down to be the middle of the quilt, and kept adding flowers, round and round, until each straight side had 7 flowers, corner to corner (the 1st and 7th are re-used for the next side). Then I pieced together each row, and then pieced the rows together. Next, I added a single hexie border all along the outside edge because I did not want to cut into the hexies I fussy-cut. If I have a straight edge in front of me, with the quilt spread out before me, the protruding hexies of interest are slightly tilted to the lower left. Use the photos as a guide to see if your quilt matches up. If your quilt doesn’t follow this design, I can’t say whether this template will help but it may just be a matter of flipping the template and reversing lefts and rights. If you try it, let me know!
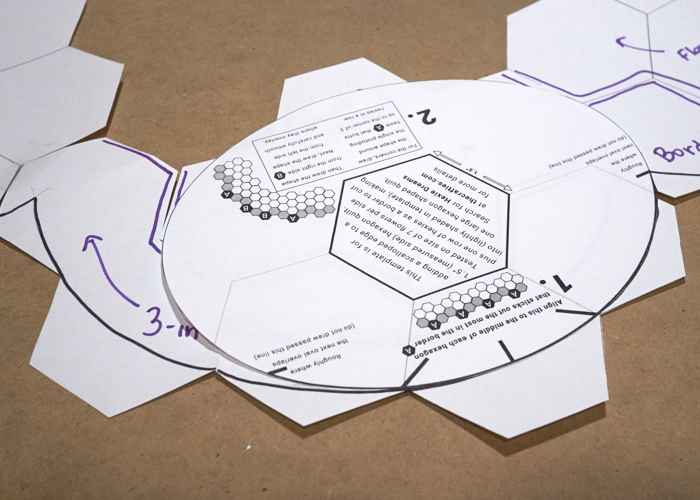
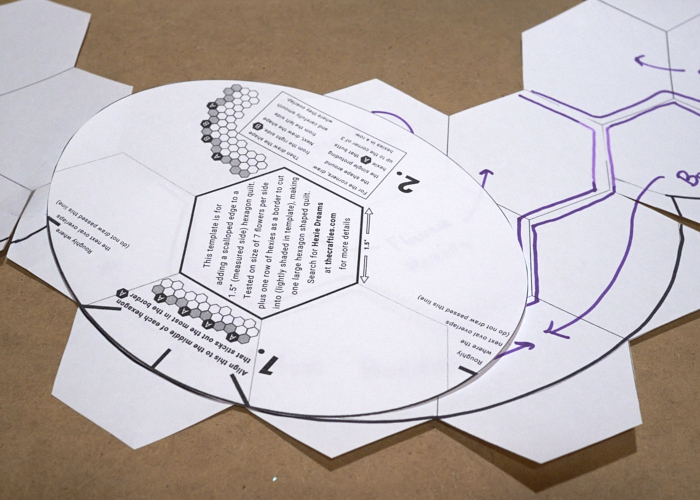
Step 1: The Template
Print out the template at 100% size and cut it out. Do not use the photo above, as the size will not be correct. You can check the size is right by measuring the side of a hexie I have marked with 1.5″. I used the paper hexies sold by Dritz, by the way (cheaper elsewhere, though!).
Step 2: Align the Template
On area 1. of the template, you see a schematic of the straight side of the quilt. The grey symbolizes the single hexies I added as a border. The black marks each hexie that you align the template to. Place the central mark over the center of the hexie, and tilt the oval a little so that the two nearest marks line up with the points where the neighbor hexies join it. I added faded hexie outlines to represent them.
In the photos, you can see these were my paper tests, so you may have noticed that the outline is already marked in black, but I think you can get the idea of where I’m going with this.
Step 3: Trace the Outside Edge
Next, simply trace along the bolded edge of the oval, between the two marks furthest away from the center line. You’ll notice one is closer than the other – this is all because the hexies are joined at an angle within each row. If you draw pass the marks, you risk drawing on to the visible part of your quilt. That’s ok, as long as you know the marking tool disappears or washes away. Repeat this for every protruding hexie along the straight sides of the quilt.
Step 4: Corner Markings
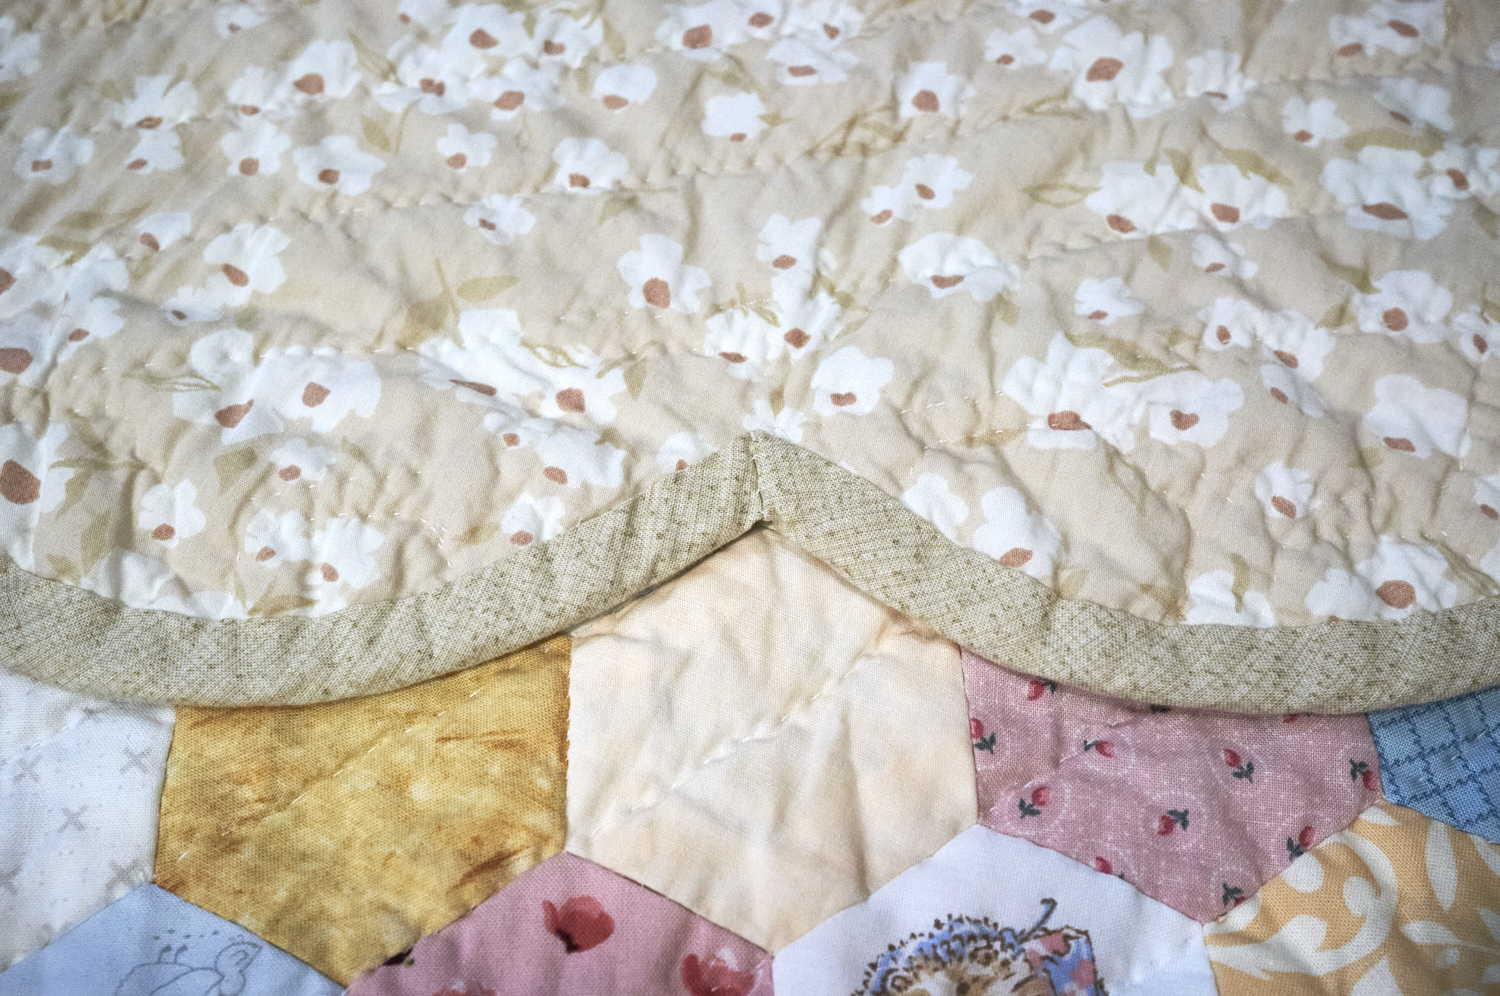
The corners are slightly different, because you end up with – not a single hexie protruding – but a set of three hexies all in a row. As you come to these three, I suggest to skip them and first get the next single hexie marked after the corner. Then, use the first and third of that 3-in-a-row set as if they are the ones that are singly protruding. When you trace, trace from the right hexie first, going to the furthest left mark as you normally would. Then trace the left side up to the pre-traced line, and gently smooth out where the two intersect.
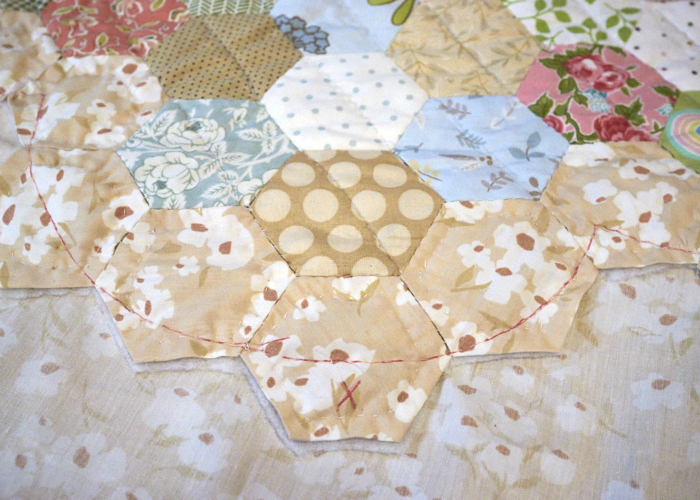
Step 5: Cut Away Excess
This part terrified me, so for better or worse, I first did a running stitch all the way around. I wasn’t sure if the project would linger for months, shoved around and stuff, so I just didnt want to risk anything falling apart. What if it took me years?! Perhaps you can skip that step. But what you do need to do is now cut along your marking.
In mine, I actually left a little beyond my line, which I ended up cutting anyway (if you keep reading, you’ll know I stitched this running stitch along it only to then cut that off later). You do you.
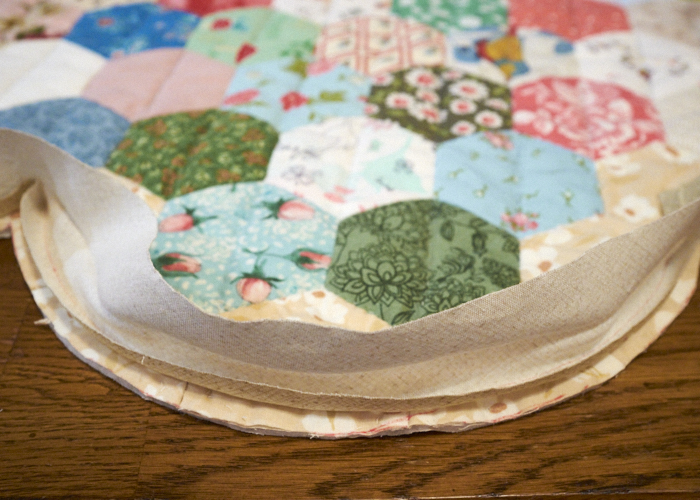
Step 6: Add Bias Binding to One Side
Be sure your binding has been cut on the bias, and is long enough to go all the way around (or leave unstitched tails long enough to continue to add on as you go). I chose to cut my purchased binding down for a slimmer look, in case you are curious about that. Then, I stitched the front on first, but you’re welcome to do this part however you like. It is not my area of expertise.
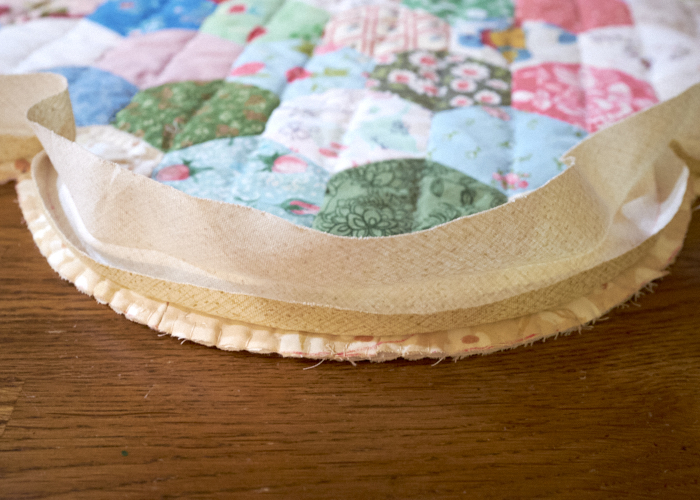
Step 7: Snip & Finish
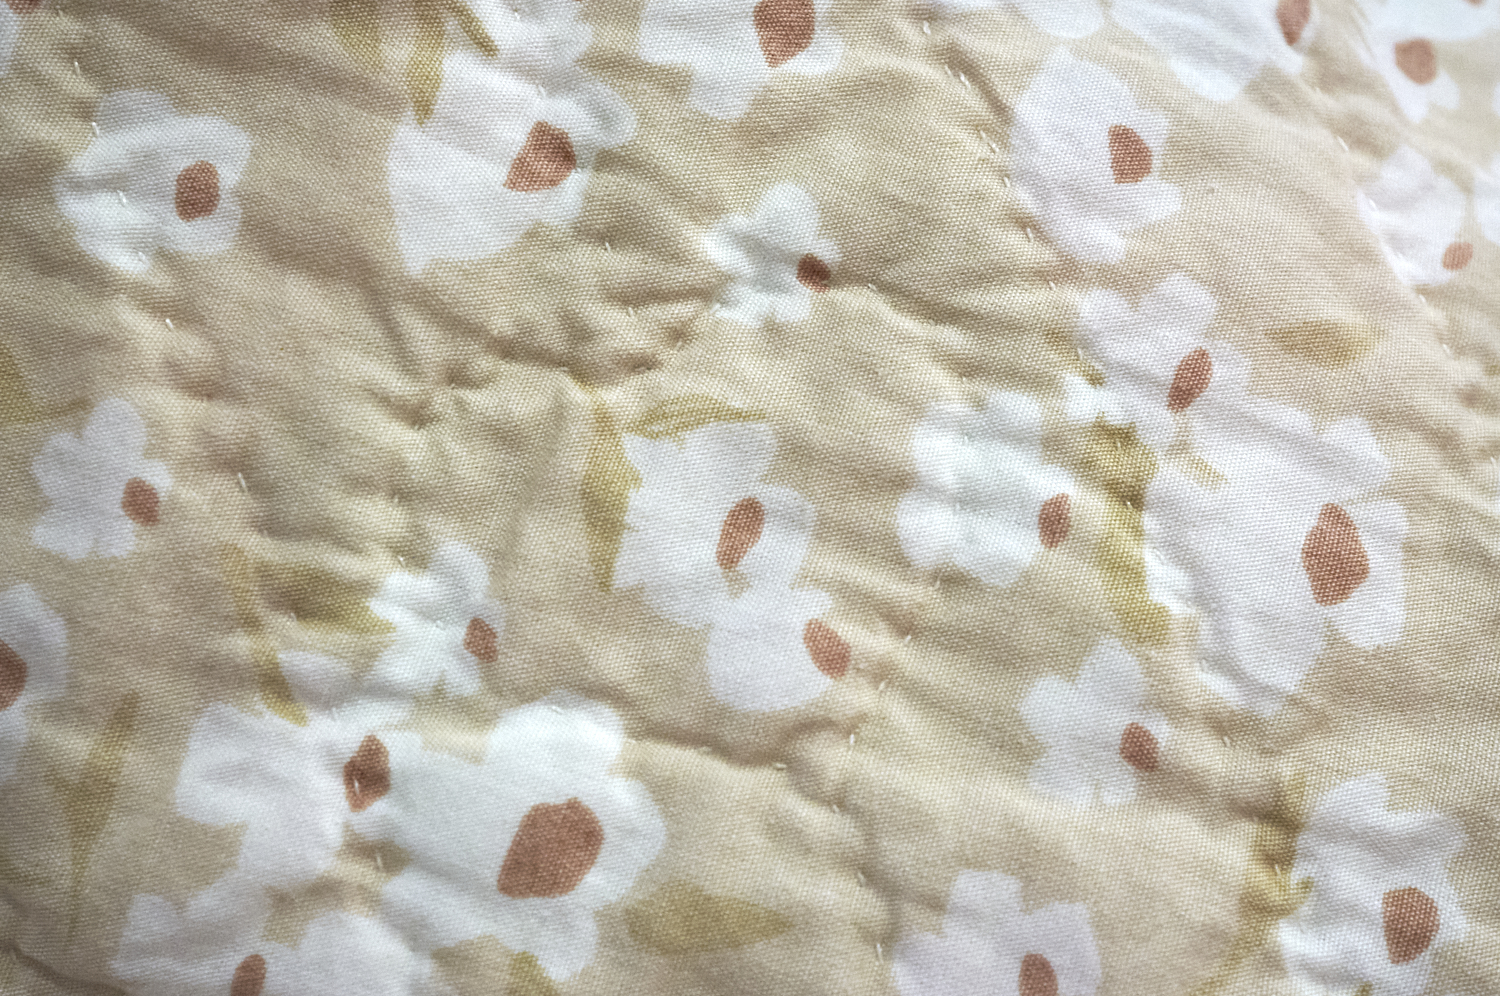
Once you have the binding sewn on one side, you now have a good stitch to prevent fraying, so snip each valley up to that stitched line without cutting the thread. Take your time here, folks! I also opted to then further trim my scallops, by the way. I wanted a thin binding so I needed to do a little more work. I cut off where I had original used a running stitch all the way around, and opted to – just in case – add a blanket stitch all the way around. I am thinking ahead. I imagine this quilt to get used and abused over the years (out of love and use and washings and dryings), and so I wanted to stave off any future problems. Probably unnecessary, but one never knows, and I was really in a rhythm to stitch that day! Plus, I did read it helps keep the edge flattened as you bind, so there’s that. Anyway, just attach the binding to the back and call it a day – and, if you care to, stitch up the valleys as I did.
— Hexie Dreams Stats —
Dollas spent: ???
Let’s not talk about that. I meant to use up all my stashed fabric but put a creative limit on myself to a) use a limited color palette and b) never repeat a pattern in my fussy cutting. But I will say that it was a few hundred dollars, many more when including the time my grandmother and I spent stitching it!
Number of Hexies: 1009
My quilt contains way more hexies than I had guessed I’d need. I suspected originally I would want something like 750. Here’s the breakdown and final tally:
Border hexies: 120
Fussy-cut hexies: 889
Flowers: 127 flowers
Rows: Two of each 7, 8, 9, 10, 11, and 12 with a central row of 13
TOTAL NUMBER OF HEXIES: A whopping 1009! What?! That doesn’t even count the hundreds of hexies and extra flowers that I ended up not using. My, oh my!
Size (in sq ft): 41 feet 7 inches
A friend asked a great question: how big is the quilt? I hadn’t even considered finding out until she asked. So here’s that information, too:
Short edge: 4 feet (48 inches)
Across flat edges: 6′ 5″ (77″)
Between farthest points: 7′ 3″ (87″)
TOTAL SQUARE FOOTAGE: With a googled reminder of how to do the math (find the area of a hexagon), this is about 41’7″ in square footage.
Hours Spent: 317 + Untold uncounted
I was curious how much time would go in to this project of mine, so I attempted to keep track. I wasn’t always great about that, or took notes that I’d understand so much later on (like now that I am writing this post, ha!).
Planning: I’m not sure. It was an idea that lingered for quite a while. Years, one could say. All the time sorting through my fabrics or looking online for some charm squares to buy were never jotted down. Nor the time it took to lay it out the way I wanted near the end. Lots and lots of time.
Learning Curve: Incalculable. Still learning right up to the end! But I certainly got faster as I went along, so the times listed below are perhaps inaccurate.
Selecting and Fussy Cutting: Not recorded
Ironing and Starching: Not recorded
Hexie Making: 4 minutes each (4036 minutes = 67 hours 15 minutes)
Flower Making: 60 minutes each (7620 minutes = 127h 0m)
Row Making: 5 minutes per side (between flowers? 126 sides?) (630 minutes = 10h 30m)
Joining Rows: “3.5 per edge” (Huh? Total guess of 126 edges) (441 minutes = 7h 20m)
Making Border Hexies: 2 minutes to join pairs (60 pairs) (120 minutes = 2h 0m)
Adding border: 11 minutes (to attach each flower? 42 outer flowers) (462 minutes = 7h 45m)
Gramma’s Quilting: I didn’t ask her to keep a record, but her guess is 3 hours a day for three weeks, with a Sunday – so let’s say 50 hours? (3000 minutes)
Binding: I worked a solid 5 days, 8-10 hours a day as a guess, so let’s say 45 hours (2700 minutes). This did include figuring out what the heck I was going to do, and messing around in photoshop, and all that. And the time spent making that initial running stitch was a wash when I decided to cut it back further. There was time spent trimming my bias tape to be thinner. Then, was the blanket stitch really important? That’s to be determined. On top of all of this, the reason I was able to work so steadfastly through to completion was I had a sinus infection and took time off work – surely, that lowered my efficiency!
Stitching Embellishments: As a work in progress, this part will slowly add more and more time as life goes on! Just a minutes or five per repaired line, I’d say.
Cleaning Up, etc: After each major session, there was time spent cleaning up, putting away excess fabrics, vaccuming little bits of cloth and thread. Then, of course, washing some of my old fabrics that had a faint odor. And washing the quilt in it’s final embodiment to remove pencil markings. But, like much of this project, it all went undocumented.
TOTAL MINIMUM TIME SPENT: 317 hours, or 13 solid 24-hour days, or almost two entire weeks. Put that way, it doesn’t really do justice to the three years it took!
We will never know the full truth, but the next time you scoff at the price tag of someone’s handmade work, just remember that handmade things are slowly made. Question cheap prices from markets without employee (and child) protection laws. Take care of your heirlooms and support small-scale artists when you can!

CaLynn this was awesome, I just read it and , I have to say you did a wonderful job, I can’t wait to read more of your Stories ❤️
Thanks, Joyce! 🙂