
A recent TextileArtist.org‘s Stitch Club project was a workshop with Priscilla Edwards who taught us how to make a wire frame and attach fabric with batik wax, kind of like a papier-mâché sculpture. While she made the suggestion to start with a basic shape like a spoon or cup, I (of course) decided to do something more complicated and crafted a sailboat. (People familiar with real sailboats will note my lack of understanding basic sailboat design, but ignore that, please!) At first, I was hesitant to purchase the necessary supplies because I only wanted to try her process; I was quite unsure if I would do it again. But Boy was enthused by her technique and went so far as to lend me his candle making kit from long ago and ordered me a hot plate. Once I finally found the right kind of batik wax, I set to work.
I enjoyed making the wire frame, though I didn’t have the right gauge of wire (as always, I try to use what I have when I can). Mine was smaller, but I simply doubled it where I thought I would need more sturdiness and that seemed to have mostly worked. On hand, I also had several silk scarves that I inherited when Boy’s grandmother passed away, and some other sheer fabrics to use (including tea bags), plus some sparkly gold tissue paper.
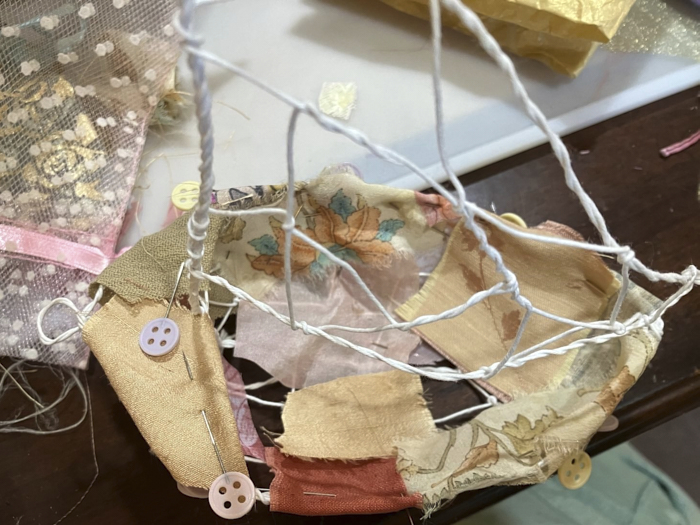
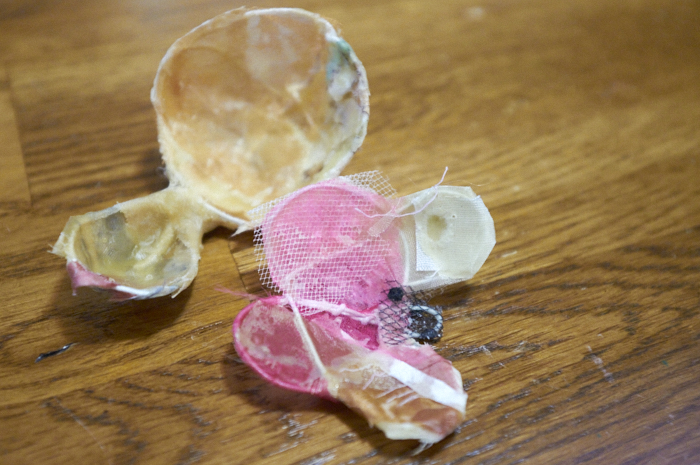
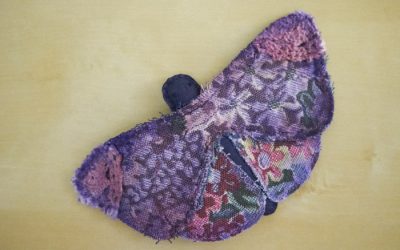
Once I had the frame, though, I was hesitant to dive right in with the wax process. I needed to understand that better so I tasked Boy to make a small spoon shape while I made a small butterfly. I am so glad I did this because originally, my wax was not hot enough, and was yellow and thick once dried. Plus, I could see which fabrics would work well, or how they changed colors, and just how to do it in general.
One other thing I want to note is that Priscilla’s style is to leave some of the sculpture free of fabric, which I intended originally. But, Boy – being so invested as he was – really pushed me to have a sailboat that could actually float on water (like in the original Stephen King’s It series). Combine that with the fun I was having adding bits here and there, and whether I intended to cover it all up or not, it happened that way!
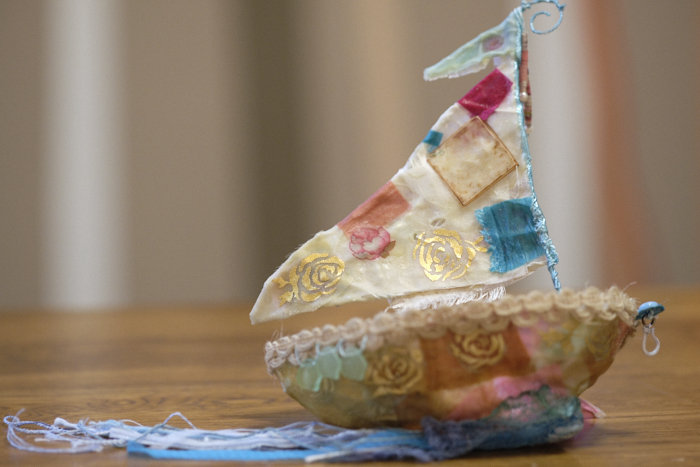
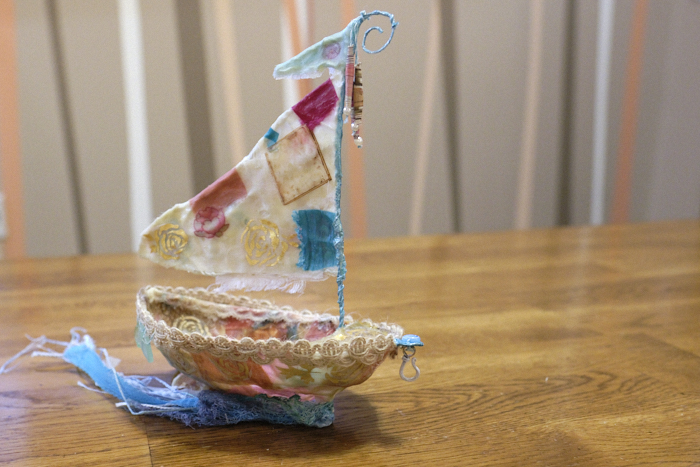
I used some shimmery blue paint on the mast and anchor area, but I kept the sail itself mostly white with a few quirky patches.
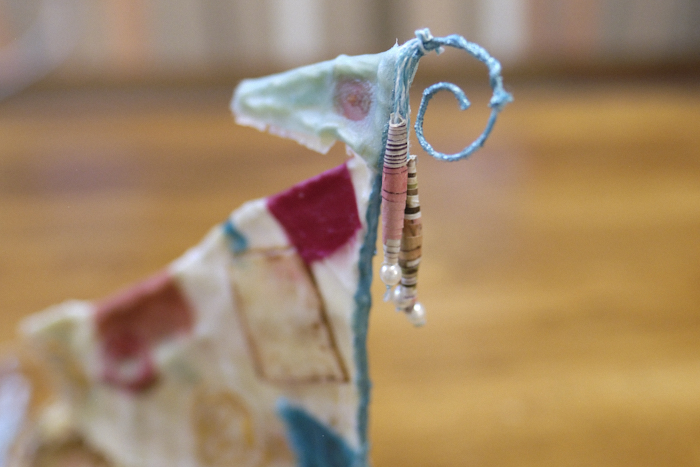
I also wanted to represent something reminiscent to fish, sardines maybe, and found some old paper beads from a broken bracelet I had. With a small pearl bead at the tip, I strung three together just for a little throw back to fishing.
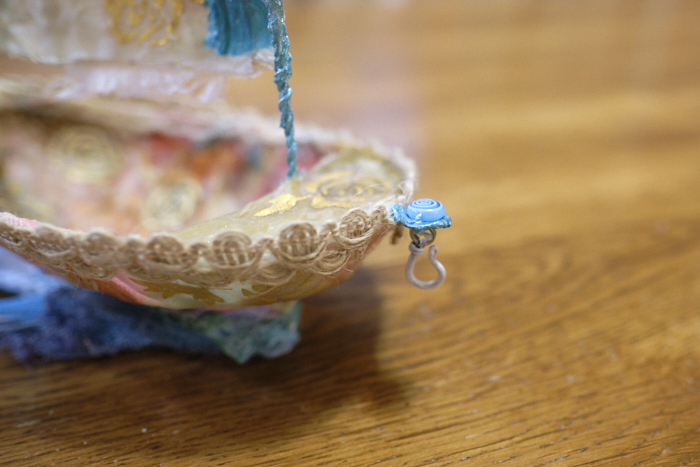
The anchor itself is a necklace clasp that I painted white. Right above it is a small bead which was the best interpretation of an evil eye that I could find. I wanted an evil eye somewhere on the little boat, but it didn’t look right anywhere else. I suppose it will ward off danger from above, maybe the storms themselves, eh?
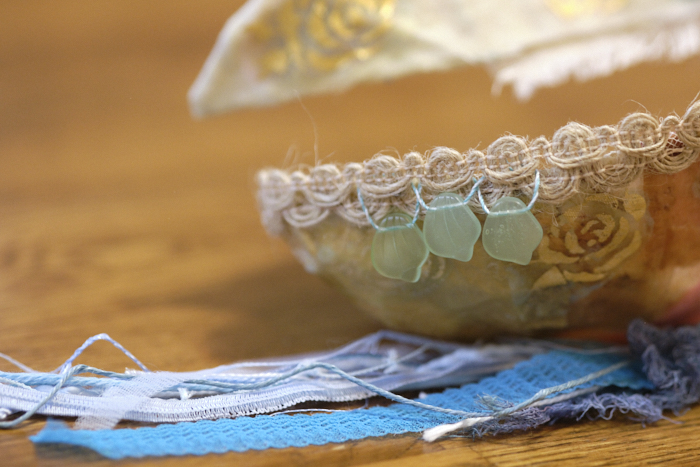
I know many boats also have some small “fenders”, so when I was digging through my stash and found beads that kind of looked like fish fins, I pulled out three to attach to the side of my boat.
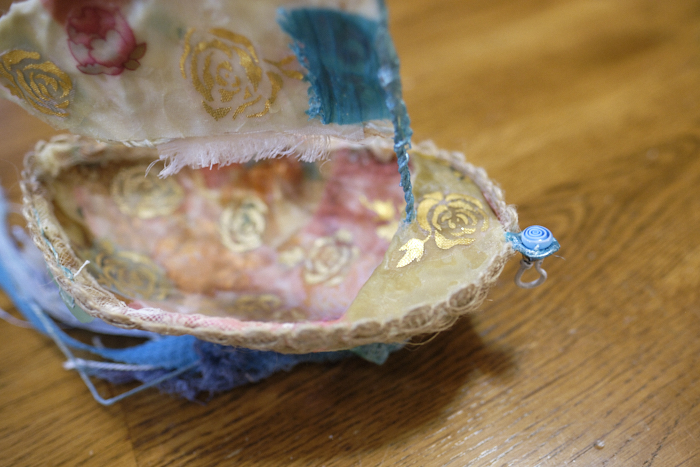
One of my favorite discoveries out of my stash were these small sheer bags with gold printed flowers – the kind of bag you might get treats in at a wedding or baby shower. Although the bags were pink and blue, with the wax applied, you could really only see the gold flowers. It looks like gold stamps! I love it.
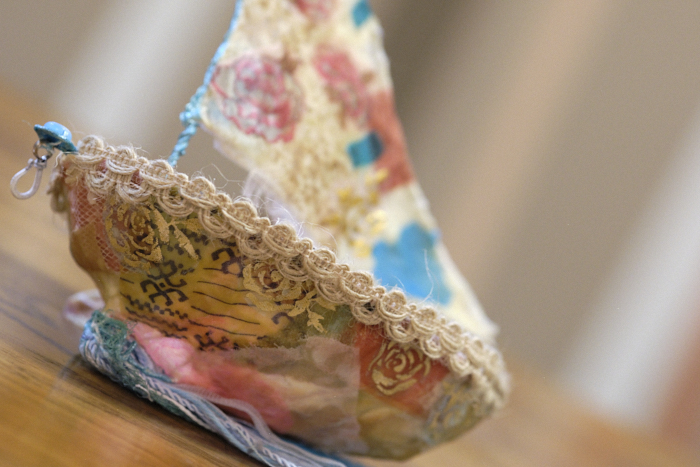
I used Elmer’s all purpose glue to add the burlap trim. I originally added white lace with wax but it wasn’t doing it for me. The burlap design reminded me a little of waves, and I liked the added texture and robustness.
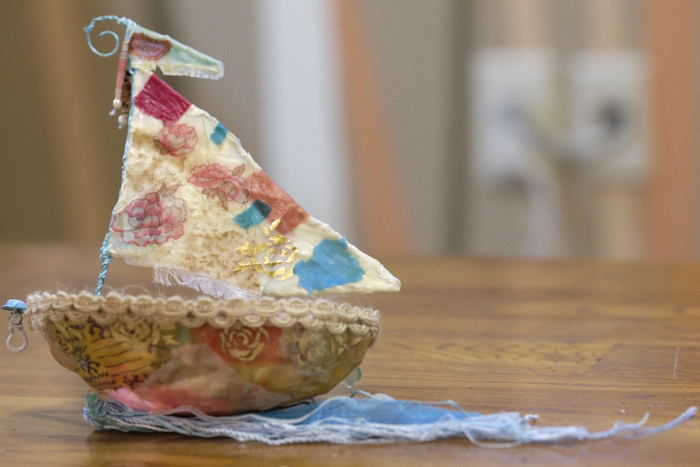
The sailboat mostly sits upright on its own, but the sail does over take it. I tried to address this by building in a little stand but in the end, with the added weight of wax and fabric, it didn’t work so well. I tried attaching it to a very large flat button, but still, that was not enough. Anyway, I had this little wire stand poking out the bottom, so to cover it up, I tied on a couple of different trims and threads and then glued a piece of hand dyed cheese cloth leftover from my talisman pouch. I might glue some pretty rocks to the bottom or something, but for now, it will live happily afloat, tucked away against the wall on the corner of my TV. So, while this isn’t a perfect project, I learned a lot and had real fun making it. It did remind me of being a school girl and playing with paper machě – only without getting my hands all icky. I’m so glad that I gave Priscilla’s workshop a try. Usually, if I don’t have the suggested/required items on hand, I skip the workshops rather than buying something I may never use again. I don’t know if I will come back to this or not, but I sure did have fun getting lost in the process! Thanks, Priscilla!
What a fun project! I love how you added the small extras that make it so special, such as the evil eye on the front and the fenders. So creative! Thanks for sharing this!
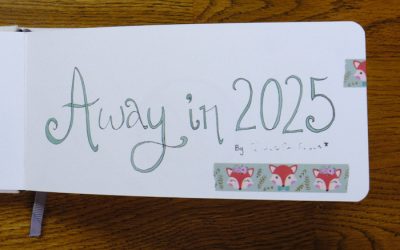
Thank you for appreciating it! I can’t say enough good things about Stitch Club, though I haven’t been participating much this year. Another reason I look forward to 2025;)