
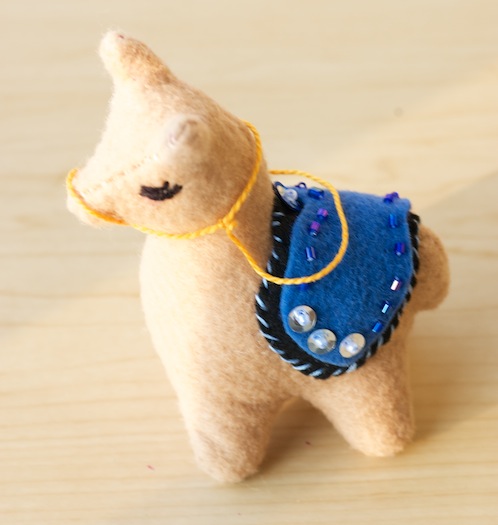
I do not actually know how I found the alpaca pattern, but it sure was an exciting find! Shishi Girl has the pattern up for free download. Although I have a ton of projects that I need to be working on, this one flew to the top of the list. It was perfect for my friend’s birthday. I met her during my bioarchaeology field school in Peru in 2007 and not only did we eat alpacas (a taste for me, no more!) but she has one as a pet. (If you are curious, it reminded me of steak flavor but with pork chop texture.)
Itwas my very first attempt at a “Softie”. But considering my large project for my niece Kaia (who incidentally was born on 1/30, yay!), I need to practice. People my age would set softies up on a shelf but little miss Kaia might find it appropriate to chew and squish and who knows what else with them so they need to be made very well.
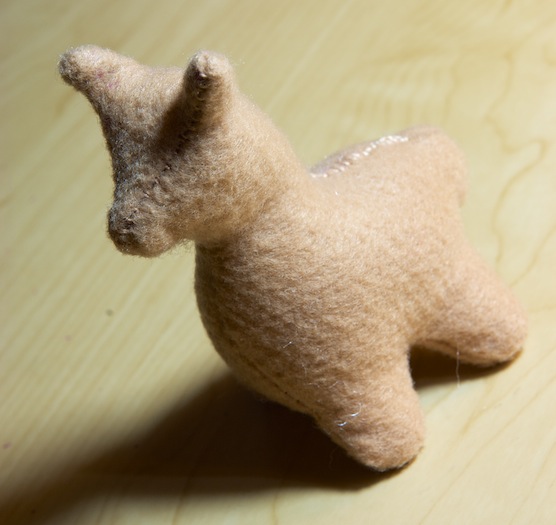
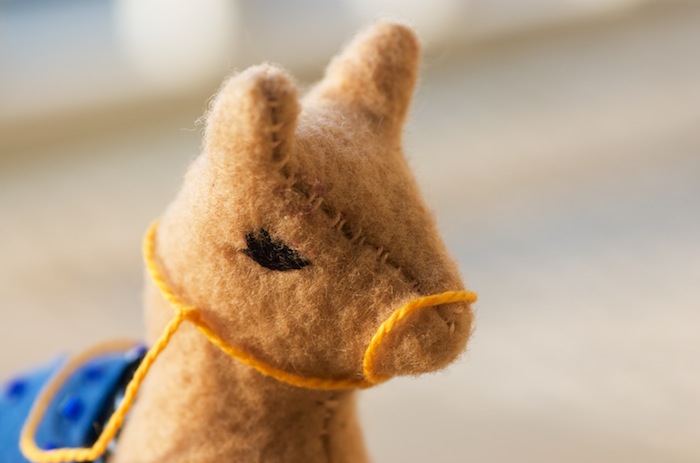
The pattern was very easy to follow. In fact, there are only 3 parts to it – a side (cut twice), the top of the head, and the belly. I was in such a hurry to churn this out and see how it worked that I didn’t wait to buy a fabric marker (I must have given the one I had back to the person I borrowed it from). I didn’t think it would be a problem to mark it in ink, but sure enough, there is a small spot on the face, of all places, that you can see it. Darn.
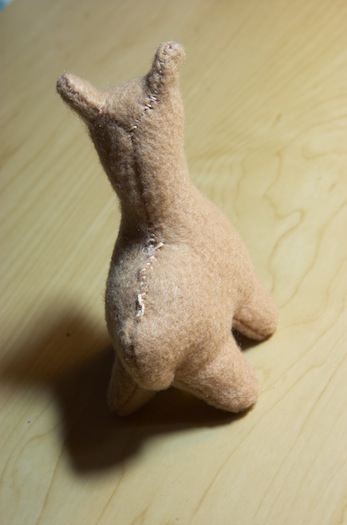
For it being my very first stuffed toy, I am pretty gosh darn proud how it turned out. I was careful with my measurements and so there’s really no weird pokey places where I was off on the seam allowance from one piece to the next. I stitched it together by hand, and you can see some of the stitching but I don’t think that it bothers me. I think it adds to the hand-sewn look.
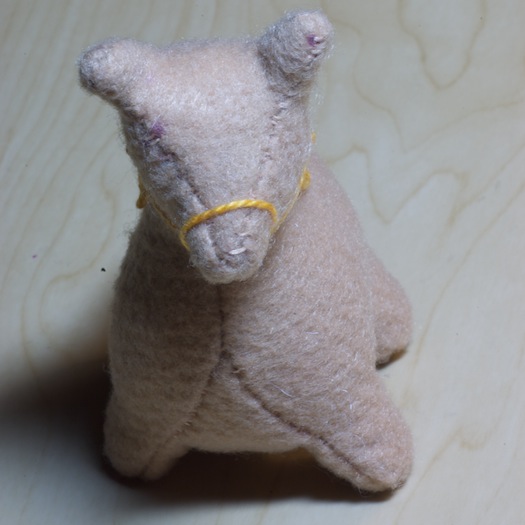
I really didn’t know how she did the bridle so I studied the image and decided to just try it. Something like that would leave a big knot so I used a teeny tiny crochet needle and poked it through from the opposite side of the head, in the stitch line. Then I grabbed the knot and carefully pulled it into the toy and worked the crochet needle back out. It seemed to have worked pretty well. Then I just looped it around the nose, poked it through to the other side and up and over the head and back into the alpaca. I made a knot and again worked it back into the animal with the crochet needle. Then I tied the reins around it, like in the picture.

The saddle was not included in the pattern, though the picture shows one. I just cut a piece of paper out and kept shaping it (folded in half) until I had the look I want and then cut the felt out with it. I beaded the blue felt first and then attached it to the black. Then I sewed it on to the body, hiding the knots underneath.
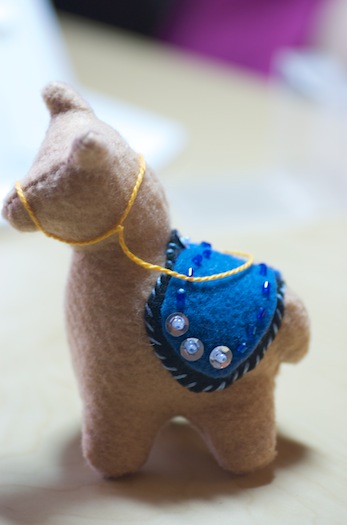
The drawback to this for me was that perhaps I went too little for my first toy. I had a really hard time reversing to right side out with the ears and tail. I also had a hard time stuffing the ears. Although I should mention that I decided to leave the needle in when I reversed it (and I did clip the seam allowance all the way around). I started with the tail on one side and went up to the chest and knotted. Then I repeated for the other side and continued up to the head pieces going to the stuffing gap and back around to the finish the head and knotted. Then I sewed from the tail up the back to the stuffing gap and rather than knotting it like I know I would have done years ago, I left it there. This allowed me to stretch the gap open a little further, but not have such a wide spot to sew from the right side. My stitches were ugly, but I knew I was hiding it with a saddle. But the worse part about it, that you may have noticed, is that he is a little crooked. Once I started sewing the saddle on, it pulled it to one side and I couldn’t stretch it enough to even it out. And his head is just a little bit off (we call it the Taco-Neck syndrome;).
I do have to say that I totally enjoyed it though, and cannot wait to do another! When I went out to pick up more supplies, I also grabbed some fat quarters, so I can’t wait to try it out with fabric and a sewing machine (that I currently do not have, poo). In fact, Shishi Girl offers a sting ray pattern – Kaia’s playset will be killer!


0 Comments