
I have a quilted bookcover that i picked up at a local arts and crafts show. I love the thing. It helps keep my books in great condition, and even resist dog eared corners and the occasional spill (its just enough to soak up the wetness while i whip the book out of its cover). Plus, the bookmark always stays put, and as a friend once pointed out to me – it allows privacy of the book you are reading so people cant make judgement calls. (Do people do that??)
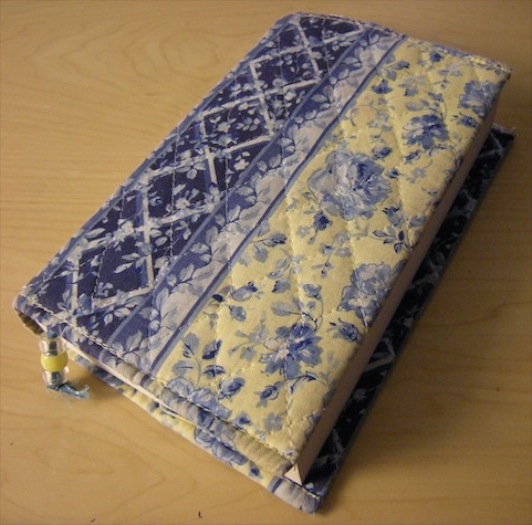
I wanted to try my hand at making one because i didnt see any that were embellished. Im thinking embroidery, beads, sequins – whatever. Since i usually dont make anything for myself, i needed a volunteer. Tofer was the obvious choice – we read the same kind of books and i see him like every day so hes who i thought of. But…
Invaraibly, he is a dude. And do dudes want a quilted book cover? Prolly not. He liked the idea of having one, but we agreed it had to be “manly”.
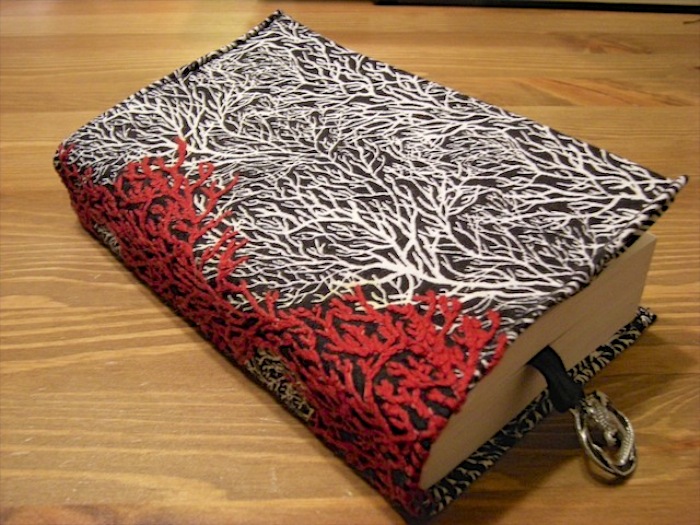
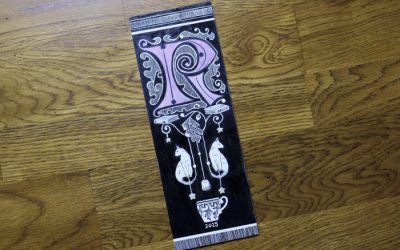
So i picked up a few fat quarters and chose this as his fabric. Black and white – classic, “man” colors, and a pattern that was simple. Now i needed to embellish it, but that very word seems feminine, doesnt it?
I went with “blood red” thread and followed some of the pattern. Two things:
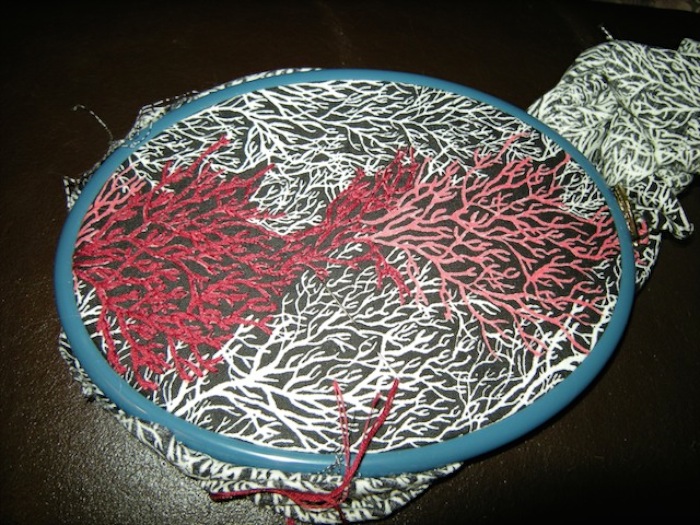
1. I had to color the pattern so i knew where i was sewing, but also so that any stitching gaps werent as obvious. My red pen turned more pink on the fabric, so that would be something i would change if i made this one again but in general, you cant really see it.
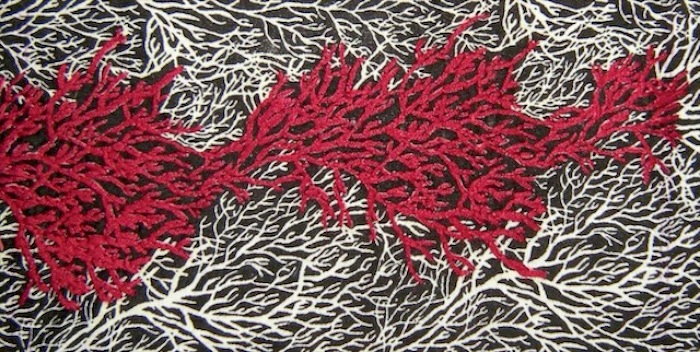
2. This part of the project was done before i had even more practice at embroidery and so I used all kinds of crazy stitches. Were i to do it all over again, i think i would use a chain stitch, and definitely vary the number of threads – by using the same everywhere, it gives it a very flat appearance. Lesson learned.
I didnt have a pattern. I kind of looked on the internet but wasnt quite confident that they matched the cover i owned. So…i winged it. I measured 3 times to cut once, but admit i cut sloppily for the outside piece because i had expected that i overshot the seam allowance more than i actually did. Good news though – i didnt run into any problems! Just had to adjust my sewing to make the edges straight.
So i had two peices of cut fabric and therefore a dilemma: My purchased cover was quilted, but i felt that would take away from the pattern and dudelyness of it. I could tack it with small stitches here and there, but again, i was worried that wouldnt be a good move. So i called my psuedo mom and she suggested finding a kind of hem tape. One Joanns trip later, I had Stitch Witchery to work with.
Since I wasnt sure how stiff it would become, i only used it in three strips – one for each flap that would get folded over, and one down the spine, where the embroidery was. It was an incredibly easy process, and was only barely stiffer than the fabric – i assume after a wash or two, you wont even be able to tell. BUT… somehow part of my fabric yellowed a bit. I tried to figure out what caused it: (a) i had already washed the fabric, so it wasnt any kind of bleeding from using a damp cloth with the stitch witchery (b) if it was caused by the stich witchery, it would have been in a different place, and at each strip (c) i used the same amount of time on each place, so it could also not be from too much heat from the iron. I am still at a loss at how it happened (though i am leaning on that it just must be from the heat of the iron), but Tof thinks its not noticeable and its his cover so Im good with it.
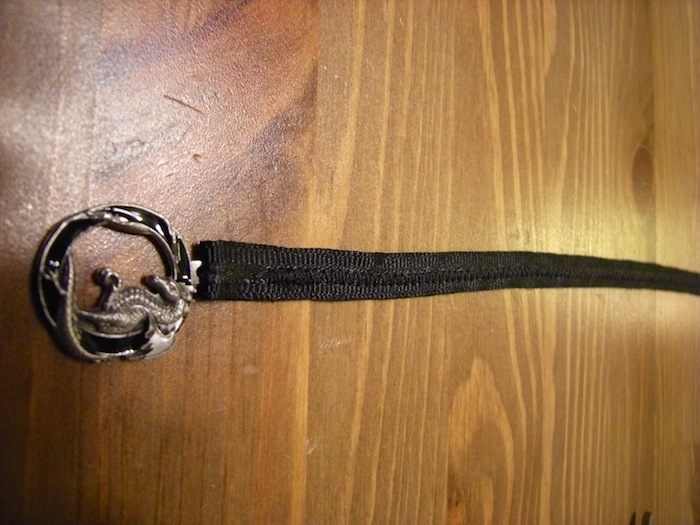
The last detail is the bookmark. A simple black ribbon sewn at the center of the top. Chris really digs dragons, so i searched Etsy and found artdawgs. The size of this pendant seemed good, and the colors were perfect. (It was also my first Etsy purchase, hooray!).
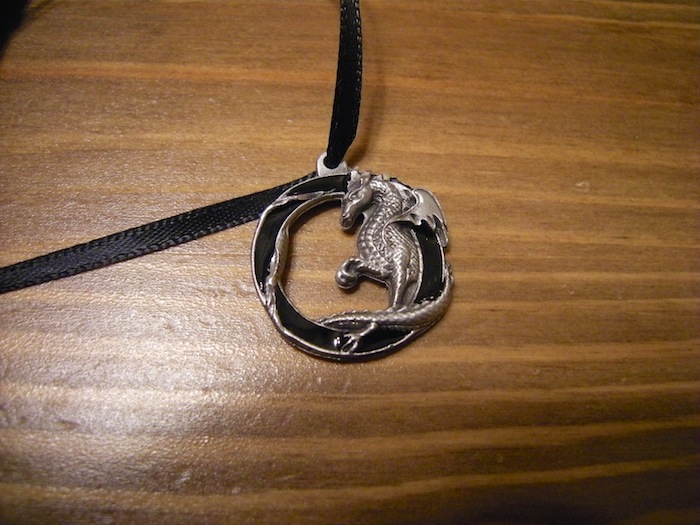
The token had a tiny little hole and the larger black ribbon didnt fit through it well. I improvised and sewed a smaller black ribbon along it. The first time was purely by machine, and it got crinkly. I used a zigzag stitch at 3 with length 4.

The second time, i stitched it by hand in long stitches, just so that when i used the machine, i wouldnt have to pull it left or right to keep the little ribbon center, which probably caused the crinkle.

It lies pretty much flat, so it worked! I did change the stitch length to 2 though, and it gave a really sturdy feel to the bookmark.
So, without any further adieu – voila!
pretty cool…you may be on to something here!! How long did it take to do the red stitching?
It is Awesome, and Thank you Calynn for creating this bookcover for one such as myself.
Dang! This is a great idea. Adam usually buys his book in hardback and tries very hard to protect them, so I may look into these. The stitching was an awesome idea and looks wonderfully executed!
Very nice, I want one!