
Oliver Bliss recently led a workshop through TextileArtist.org‘s Stitch Club on exploring tone and color. I had planned to sit this one out since I’ve had many art classes dealing with the topic and am short on stitching time. But, alas, I was pulled into it when he provided a skull to stitch. A skull, you say? Well, I couldn’t pass that up, not with my background!
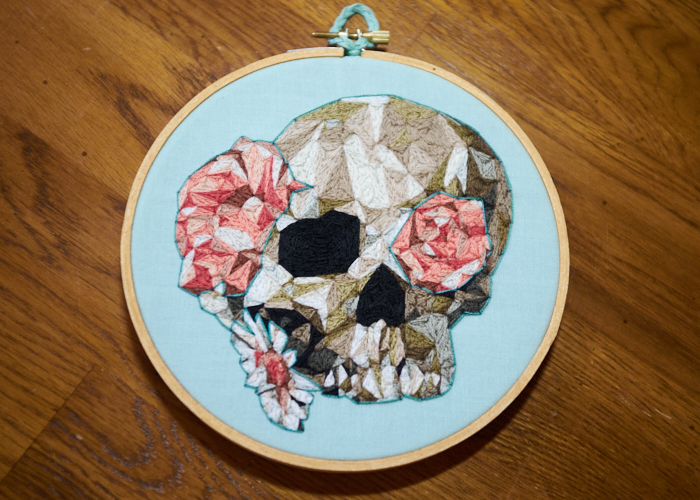
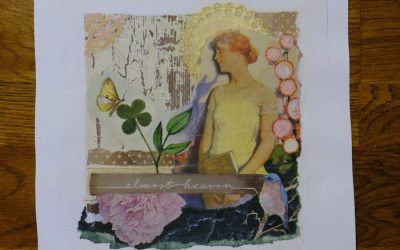
I want to be clear here, though, that the inspiration for this skull is not from Oliver but instead from Sima Miller, found here. His skull choice was problematic for me: it did not include details for the teeth which I felt looked like one of those blank-faced creepy things, but not in a good way. Plus, teeth are my jam! So I went looking online instead and found her lovely render. [More thoughts on this at the end…]
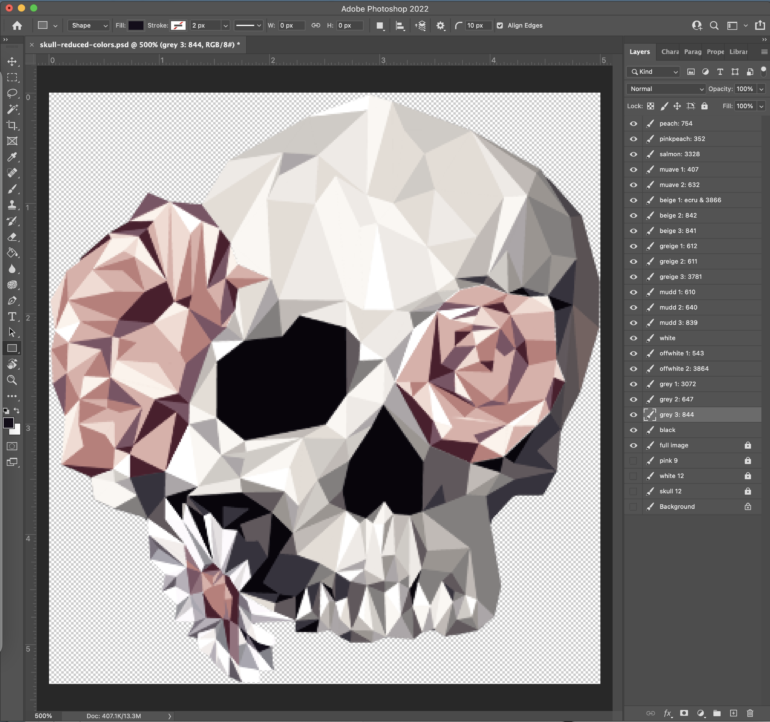
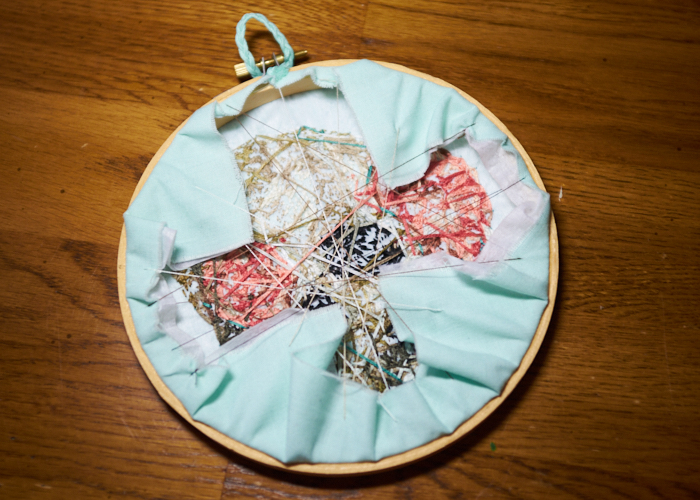
I snapped a screenshot, but working with as many colors as she had would be impossible since I try to only stick with what I have on hand already. Thus, the first thing I had to do was reduce the number of colors. I’ll explain this here so I have a future reference, and maybe it will help you some day, too. [But let us keep in mind I want to add something about all this at the end…] In photoshop, I first selected out the three main components: the skull, the pink flowers, and the white flower. I had to save these as three separate files for the next step. Under Image > Mode > Index Color, you can reduce the number of colors in the image. For this one, I think I settled on around about 8 different colors originally for each component, just eyeballing as few colors as I could get away with while retaining the overall feel. Then, I combined the three files back into one, and isolated each color group to determine how many colors of thread I would need (since some of the colors may have been similar between the three parts). At this stage, I merged a few more together, here and there, and was left with a total of 22 colors. It isn’t nearly as beautiful as Sima’s original, but I could at least work with it.
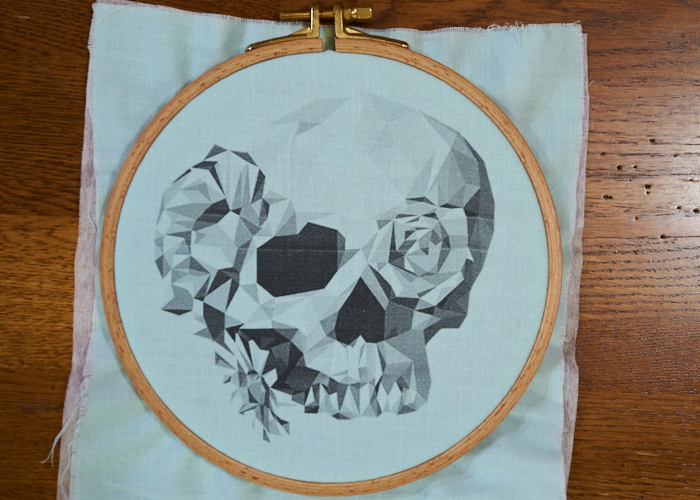
But 22 colors across however many triangles there are – it would be difficult to transfer this pattern to my fabric. I opted to test printing to the fabric directly. Huzzah, it (mostly) worked! To do this, I printed the skull onto paper, then taped my fabric where it needed to be, and printed again. I chose a minty color because, you know, the color theme I cannot break myself away from!
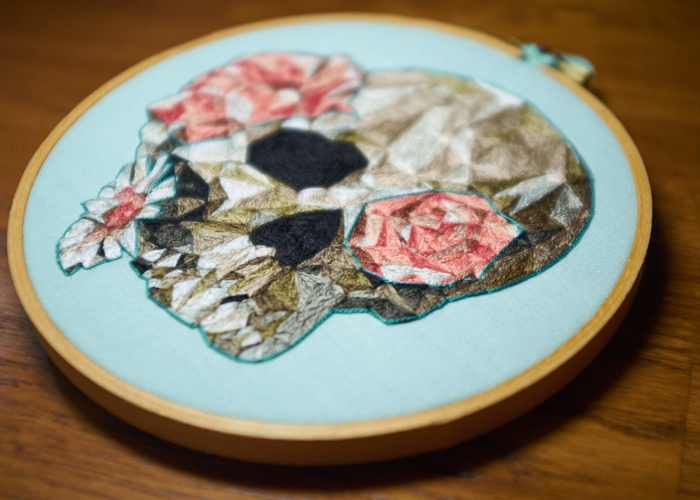
Going back in time, I wouldn’t have started it until I chose all the colors in thread. Instead, I chose for the first color group I had made in photoshop, and this created a problem when I didn’t have the right colors for the next group, but I would have, if I had only chosen differently the first time. In the end, I felt I needed to outline the flowers because of this mistake, which is why I ended up using a dark teal with two threads to set them off a bit.
This was meant to be a quick workup for the workshop, but it really wasn’t that fast. It *felt* fast, since each color grouping was actually not that many triangles, but, hello, there are a LOT of triangles! But this is why my stitching isn’t necessarily as neat as I could have made it. I used mostly split and straight stitching here with three threads. Going back in time, I would have probably used only two, though this would have added so very much time that I don’t know if that’s actually true. Going back in time, I might have also opted for satin stitching, but again, time.
I don’t have any real plans to finish her off, so she’ll just hang in this hoop for the time being. I will say she is the neatest backside I’ve yet created, though I didn’t think to snap a pic before tying the edges up. I am proud to say that I finally achieved the challenge of not using a single knot and keeping all the loose ends neatly clipped off.
In the end, I didn’t so much follow Oliver’s workshop as much as I simply rendered Sima’s art in hand embroidery. Huh.
And now that I’ve explained how I made it, I want to add my thoughts about this process. As a hobbyist with zero intentions on selling anything, I worked under the assumption that it’s been fair to grab images online to work from. There’s the old adage of just needing to change something 30% or whatever to avoid copyright issues, and isn’t working something with needle and thread a huge change anyway? I do my best to always link to the inspiration when I can, and even try to contact individuals (unfortunately, I am unable to contact Sima). Plus, I always add my own spin on things.
I make no profit; I give credit where credit is due; and my own artistic license is added to the mix. So, I’m fine. … Right?
Well, that’s the rub. I’m less of a hobbyist now and more serious (I even have two pieces in an upcoming art show) and this project in particular, for whatever reason, has made me question these assumptions. I just don’t feel right about this particular one, and if I think deeply, probably some others in my past as well. I considered not posting it, even, but I thought that perhaps my uncomfortableness will benefit someone else who may be making similar decisions.
My next task now is to understand artistic copyright issues better.
0 Comments