
3/25/2018 EDIT: This has been one of my most popular posts, so thank you for the interest! I am so glad my little fabric book cover tutorial has been made so many times, decorating and protecting so many loved books!
So…can you sew a straight line? Sew it six times and you’ll be on your way to reading in style! In fact, the Quick & Dirty version only uses two lines of stitching! I mean, does it get any easier than that? Download theCrafties Fabric Book Cover Tutorial, or continue reading:)
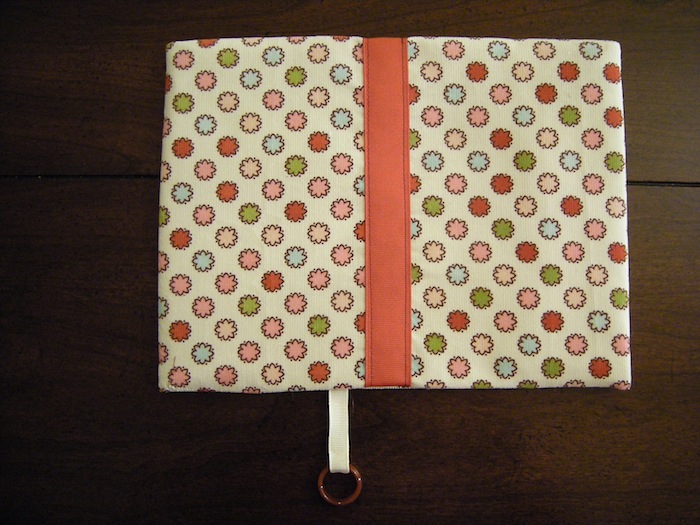
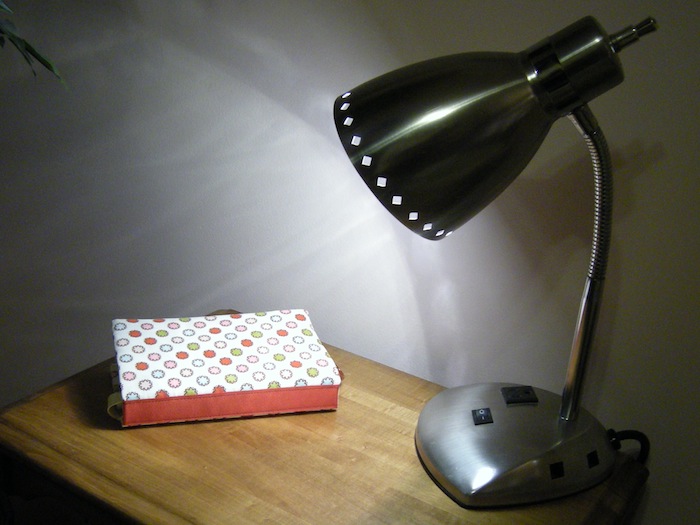 Fabric book covers are awesome – they protect your pages, hide your saucy titles, feel great on your hands, and look super. Make one for you or a gift for someone special – even guys can dig a smart black cover. But don’t stop there! Get creative – embroidery, embellish with beads, applique, whatever floats your boat. But be sure to add it to the Flickr Pool and share it with all of us 😀 It’s super easy to make, and what else is cool about it? The seams are hidden so it’s very clean looking!
I will show you how to make a book cover for a standard mass market paperback (tradeback books are a different size!). There are also directions at the end for the Quick & Dirty version.
You’ll need:
- Fabric (nothing stretchy – I prefer corduroys, linens, and soft canvas myself)
- Interfacing (I use medium or heavy weight, depending on how flimsy my fabric choice is)
- Ribbon (width is up to you and the ridged kind is great – oh! and a bauble if you like)
- Fabric glue (optional – see Step Two)
- Fabric marker
STEP ONE : Cutting
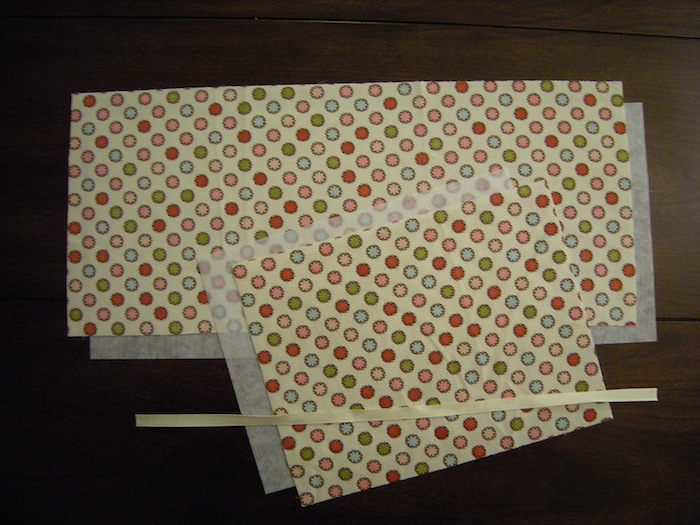
Outside Cover: Cut out a piece of fabric and interfacing measuring 18 1/2 x 7 3/4 inches
*Note: Super thick or super thin books may need adjustments in the length of the cover, but this is good for roughly 200-500 pages.
Inner Lining: Cut out a piece of fabric and interfacing measuring 10 1/4 x 7 3/4 inches
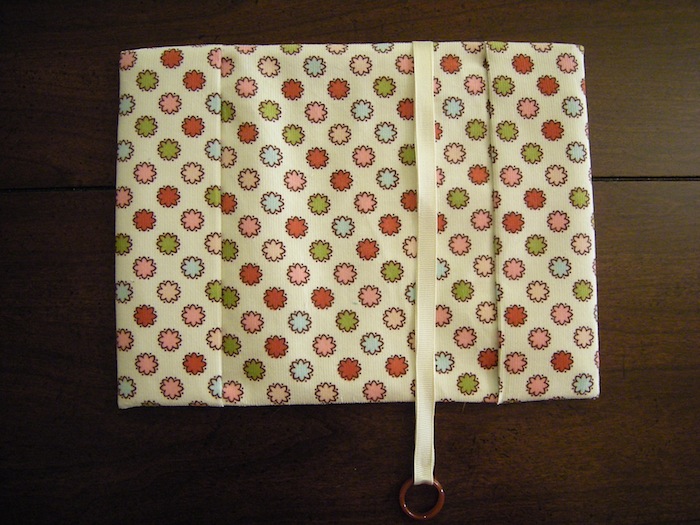
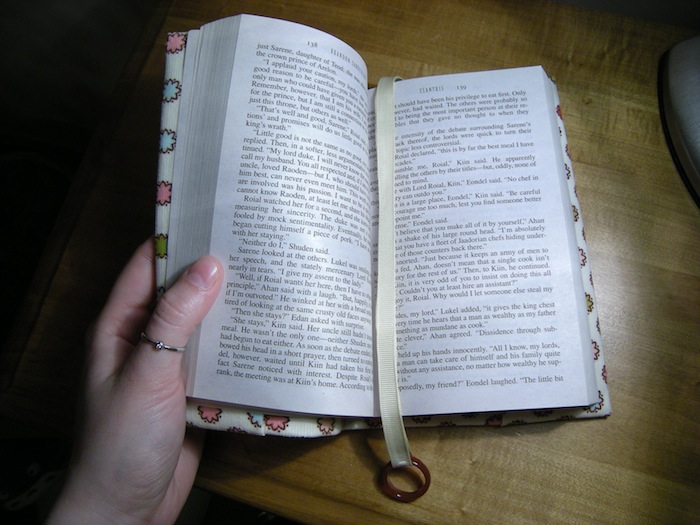
Bookmark: Cut a piece of ribbon 19 inches long
STEP TWO: Bookmark
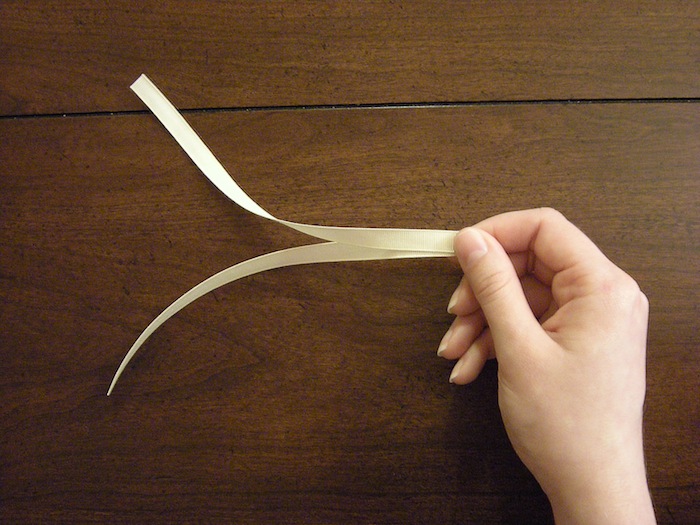
Finger press the ribbon in half.
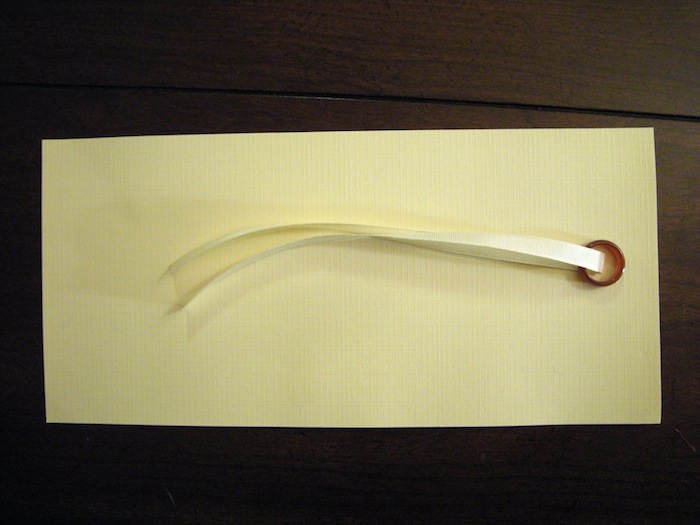
Attach your bauble – I slip on a circle shell bead, but you can sew a button on the end, or leave it bare, or whatever you can think of.
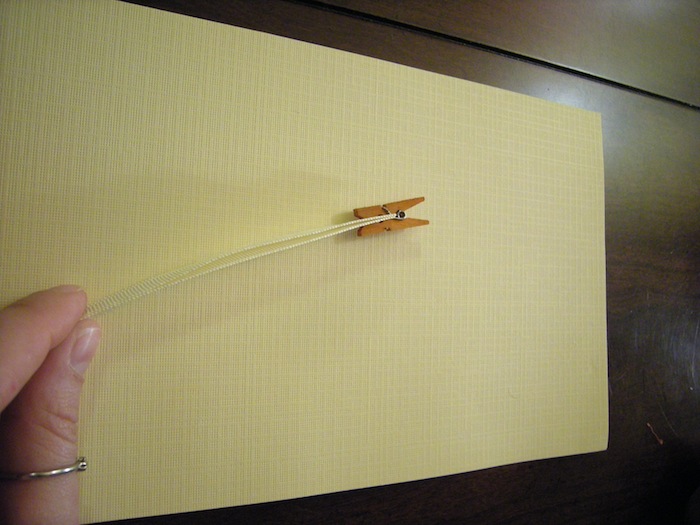
Pin the end of the ribbon (I found that miniature clothes pins work great for various sewing projects!). This will help keep the ribbon in line when you proceed to the next step.
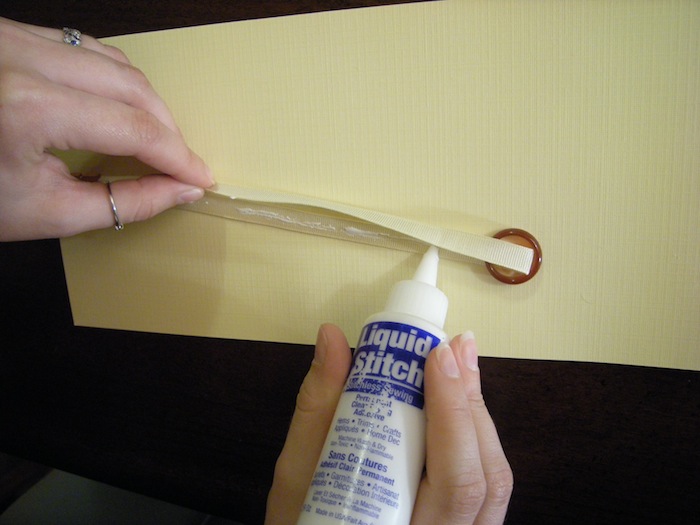 Optional: Use fabric glue along the ribbon to secure the sides together (put a piece of scrap paper underneath!). Another option is to sew it, but I found that too tricky. Of course, you could also cut the length in half instead of doubling up and skip this part altogether.
STEP THREE: Fabric and interfacing
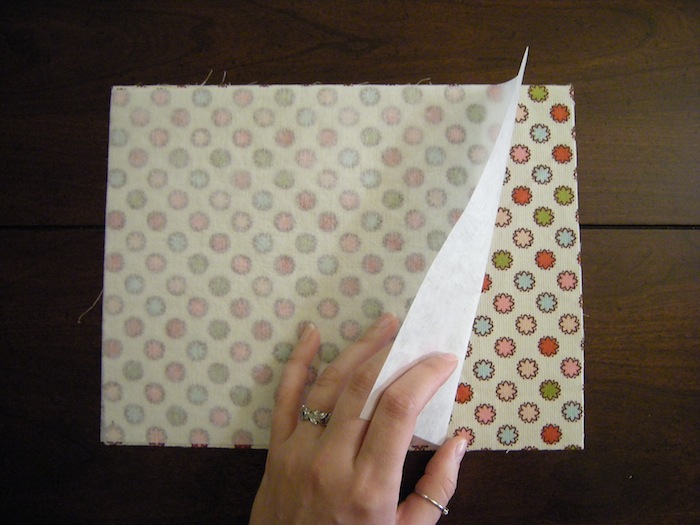
Lay each interfacing on top of the Cover and the Lining.
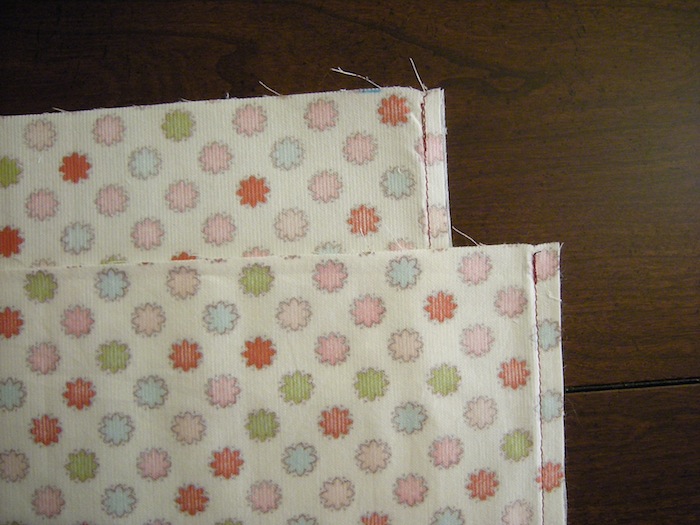
Using a 1/4 inch seam allowance, sew the two short sides of both the Cover and the Lining. You know what else is cool? It does not matter what color thread you use because you’ll never see it:)
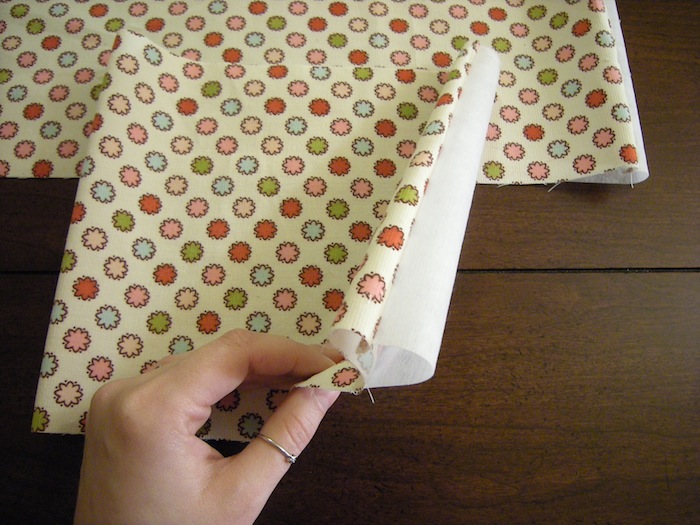
Reverse both the Cover and the Lining. But see how its real loosey-goosey?
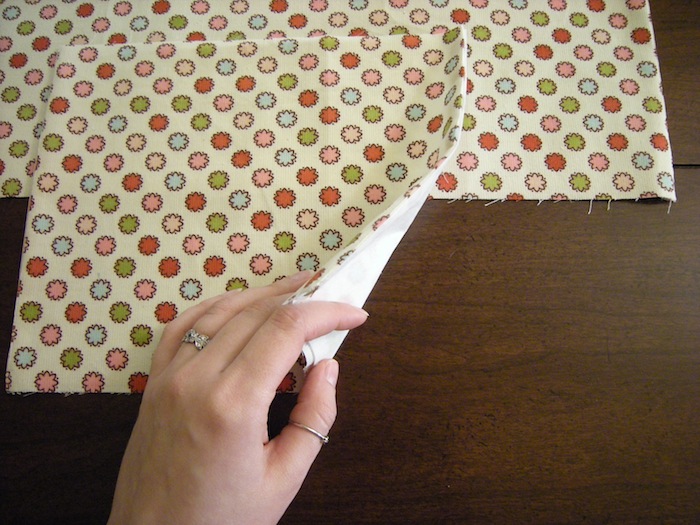
Introduce your iron to the problem and voila!

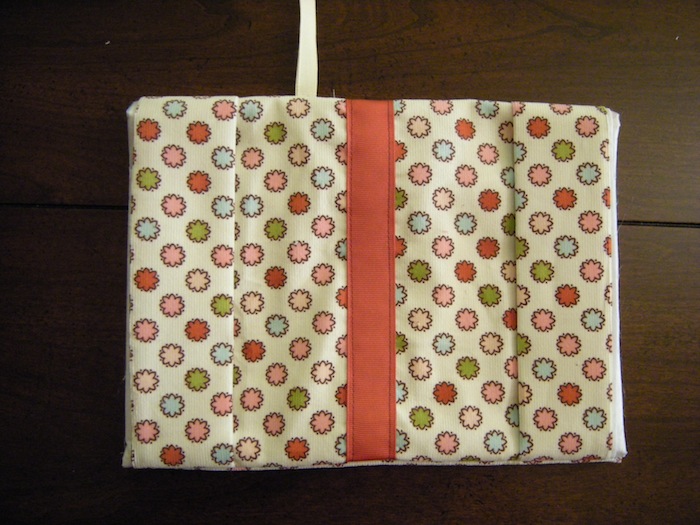
Here is the point where you can add embellishments – ideas: embroidery, buttons, applique, fabric flowers – try something out! I added a simple ribbon at the middle of the Cover along where the book binding will be.
If you decide to do something on just the front cover, measure where the center is and then measure from that point (towards the right): half of the depth of your book, and draw a line. This will be the left side of the front cover. Then measure from that point over by the width of your book and that will be the right side of your cover. Also remember to stay within the seam allowance along the top and bottom.
STEP FOUR: Folding
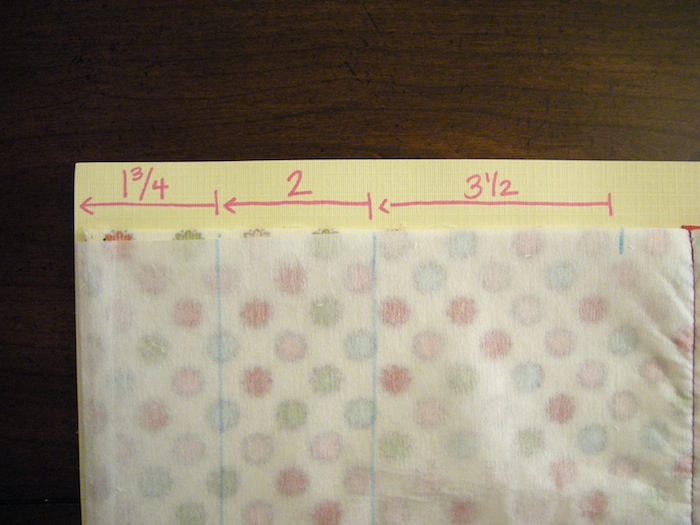
Lay the Cover face down. Measuring from both edges, mark 1 3/4 inches. The mark itself will roughly give you 1/8 of an inch for the fold allowance, so you’ll then want to move your ruler and mark 2 inches in from that. Do not worry about the 3 1/2 mark yet.
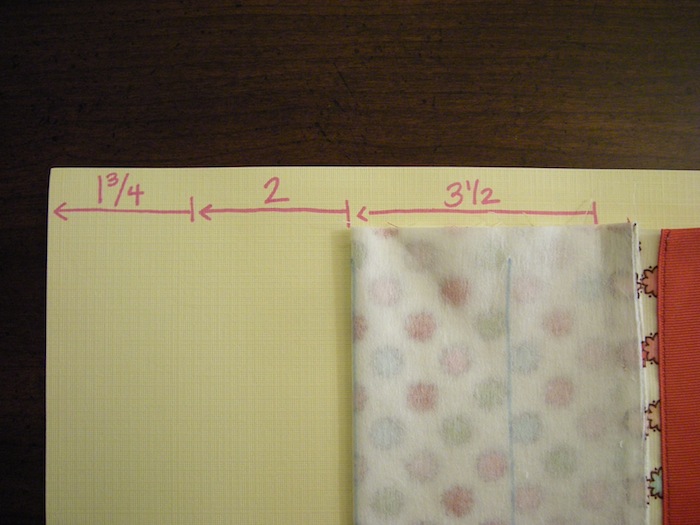
Flip the Cover over and fold both sides in at the 2 inch mark.
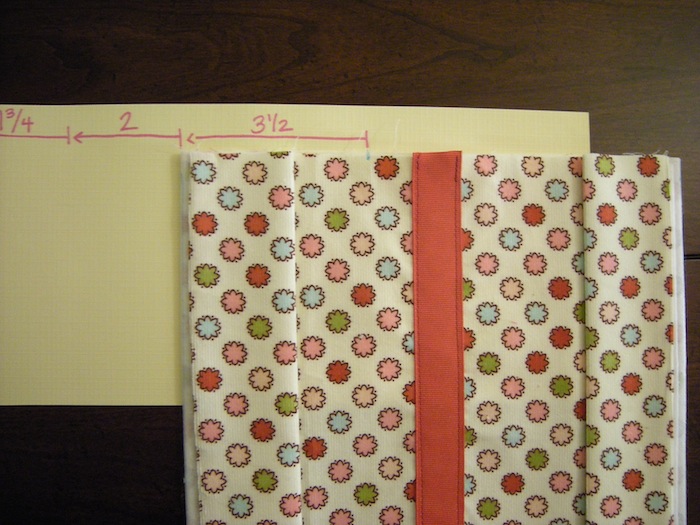
Fold the sides back over themselves at the 1 3/4 inch mark. Have a go with the iron again. Now is the time to mark the 3 1/2 mark at the top, only on the left side (this will be for placing the book mark).
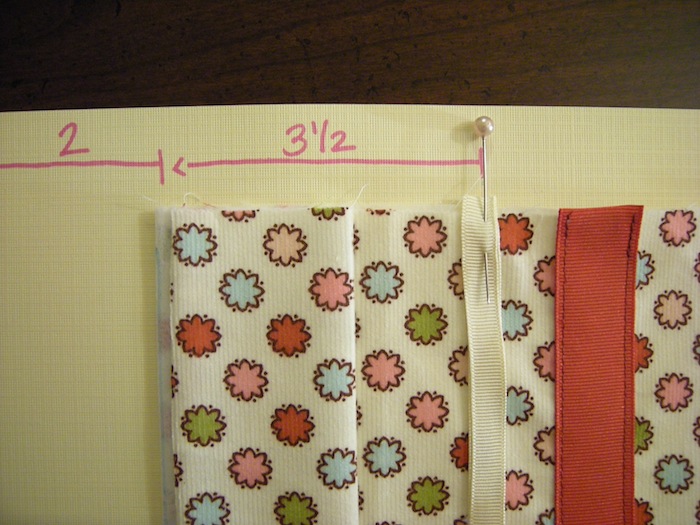
Pin your bookmark centered over the 3 1/2 mark. Be sure to leave 1/4 of an inch poking passed the cover just to be extra sure it gets sewn in well during the next step.
**This is really important!!** Make sure that you twist your bookmark out to the side because if you don’t, and you leave it poking down at the bottom, you will sew it into the cover and curse yourself as you rip the seams out! Trust me!
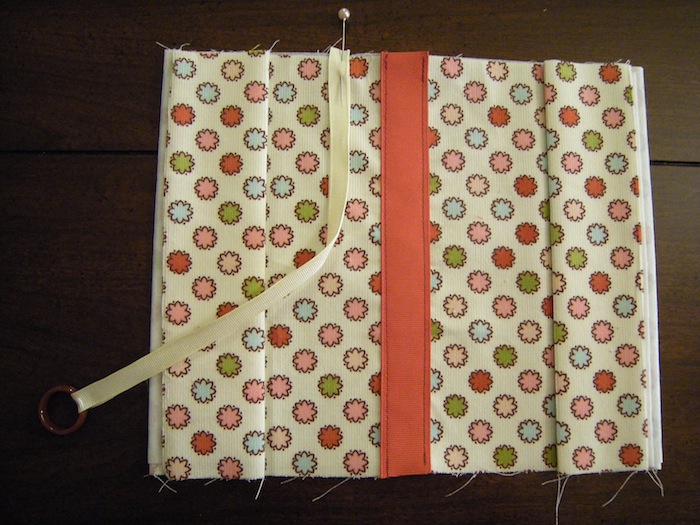
Lay the Lining facedown on top of the folded Cover. Make sure you see that bookmark poked out of the side, gosh darnit!
STEP FIVE: Sew it up!
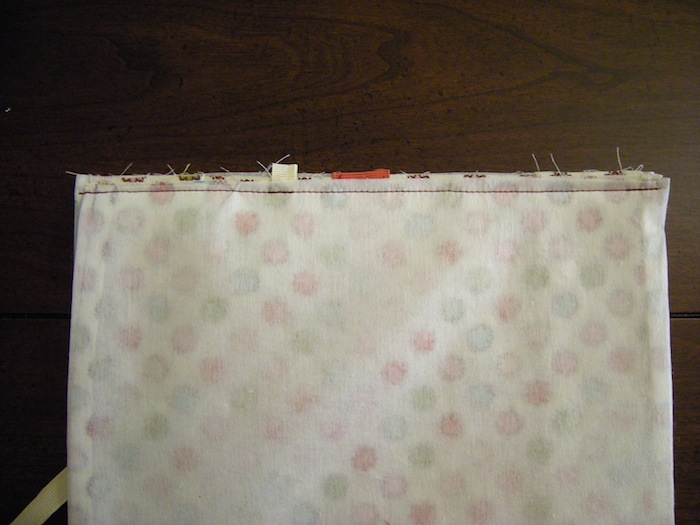
Along the top and bottom, sew with 1/4 seam allowance.
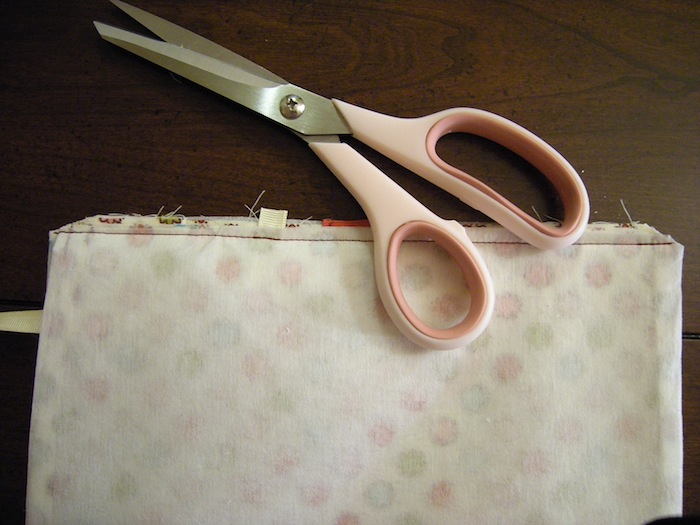
Clip the corners and the 1/4 tab left from the bookmark.
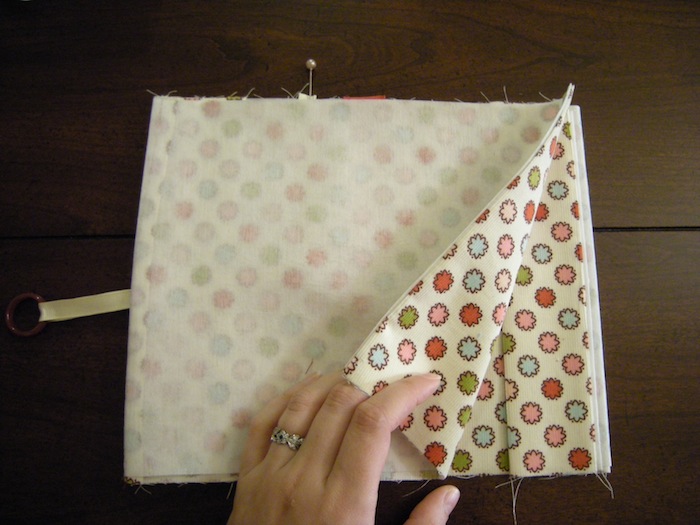
STEP SIX: Flip it out!
Reverse the cover.

Reverse the pockets.
Use your finger to poke the corners nicely and then iron the sucker out.
I HOPE YOU ENJOYED MY FABRIC BOOK COVER TUTORIAL! 🙂

I would love for you to add your photos to theCrafties Fabric Book Cover Pool, or leave a comment here, or send an email. Photos are awesome but so are any issues you had when making the cover. I’d be glad to work out quirks!
QUICK AND DIRTY:
The Q&R version omits the interfacing and is best with thicker fabrics because thinner ones will feel flimsy and cheap (and may even be see-through!). Because of that, the side edges are raw but this really doesn’t matter since they ultimately end up in the very inside of the cover.
- Reduce the Length of both the Cover and Lining by 1/2 inch.
- Skip the talk about cutting out interfacing, and the part about sewing the interfacing to the fabric in STEP THREE.
- Follow all the other steps.
Quick, huh? 🙂
Do tell me if you enjoyed this, won’t you? And please remember to add your photos to theCrafties Fabric Book Cover Pool! 😀

Fantastic!! I absolutely enjoyed it and I’ll be making some, too! Thank you so much for this tutorial! 🙂
You’re welcome! I can’t wait to see what you come up with! 🙂
is loosey-goosey an official sewing term? haha! very cute project!!
That, I don’t know, but I think it should be if it isn’t 🙂
CaLynn, this is the very best tutorial I’ve seen and can understand.thank you so much for taking the time to do this. joanie
Thank you, Joanie! I’d love to see what you make with it:D
Thanks for this tutorial, a cute project
Merci, Janine!
Dear CaLynn, This is the greatest pattern instructions I have ever seen for a paperback bookcover.When I got my Fave Newsletter this morning I was so inspired that I went to my sewing room and put together this bookcover. !!!! Fabulous,fun and easy. Love it.
I wish I could figure out how to attach a picture as I am pretty proud of this. Thank you for sharing. Priscilla
Priscilla, I am so happy you loved my tutorial! It’s great that I was able to inspire you so immediately:D That is an honor!
I’m so glad I found this! I’m a complete newbie (and moron!) to sewing but want to make something for end-of-year teacher gifts and was hoping to find something I could do. Can’t wait to try it.
Thank you SO much for sharing this!
I am so glad you’ve found my tutorial interesting! I am actually quite newb myself, especially when it comes to writing tutorials, so if you have any questions, please do not hesitate to ask. I’d love to see a photo when you’re done too:D
Great tutorial!!! I am looking forward to making some of these book covers. I so appreciate other artist sharing there ideas.
Thank you! I wish you many good days of crafting ahead:)
Got a question. I’m confused on measuring for an embellishment on the front cover. I want to embroider a cute “I read banned books” on the front. Do I measure half way point between the center (measuring to the right) and 3 3/4″ from the right edge? In other mark 3 3/4 from the right edge, to accommodate for the pockets and then mark half way between it and the center? Much thanks.
Hello!
I’ve sent you an email but, yes, this sounds about right. I’ll double check when Im back home for the break. 🙂
Great,tutorial, thank you for sharing. I like to read the other
Comments, the one from Jan giving it as a teacher gift 🙂
Thanks, Sharon! I also love hearing how people have used their bookcovers:)
I know may this sound crazy but I was wondering how to change the pattern for a text book or over a composition notebook. I’m not good at changing patterns since most of my changes become disasters! Help please. Thank you.
Christy, I will update the book cover tutorial with some pointers once I get back in the groove of crafting. It’s coming soon, so check back!
Great tutorial! I have made several covers from different tutorials I’ve seen all from the same fabric. However, I was not really 100% pleased with any of the earlier efforts because the end result was bulky even though it was the same fabric. I was proud enough of the results from your pattern that I gave it to a friend for her to use during an upcoming hospital stay.
Margaret, this is wonderful, thank you! I am sorry to hear that your friend is stuck in the hospital but she will be happy with her fancy book and make all the others jealous;)
great tutorial, I made one for my manager as a leaving present. I added a stuffed appliqued giraffe’s head on the front and he loved it (he loves giraffes) Ali G
Ali, awesome! I am sure your manager appreciated your effort and I’d love to see a pic! From ALL of you crafty crafters!
Thank YOU!
I’ve been searching and searching. This is truly the most thorough and reliable pattern.
SO glad to find you!
Jill, I am so glad I could help! Do send me a photo:D
Received one of these for a gift (wore it out); loved it! It had handles, and a paperback went everywhere with me, just in case …. of ‘spare time’. The handles, made from the same material as the cover: so easy to grab & go. The book covers are washable; the ‘real’ book cover stays new, and the pages don’t curl (slip most of the read pages into the left cover-flap). Loved my cover, and now I can finally make one for myself with your pattern. Thank you.
Ho ho! You know exactly why I love them – everything you said is so true! I am glad I could help. I’d love to see it when you are done – send me a photo! 😀
Great ? tutorial, can’t wait to try it. Thanks
Great ? tutorial. Thanks so much for taking the time to make it. Can’t wait to try it.
Chris
Chris, you are welcome! I hope you didn’t ran into any trouble!