
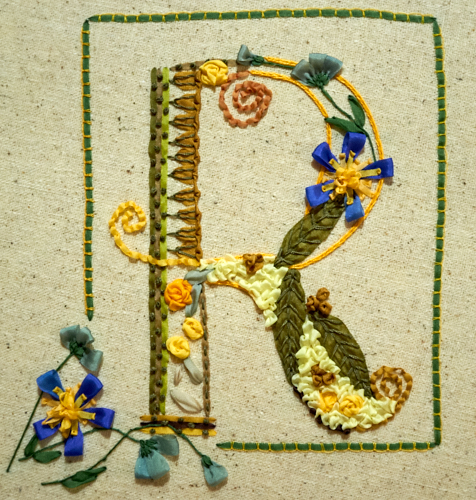
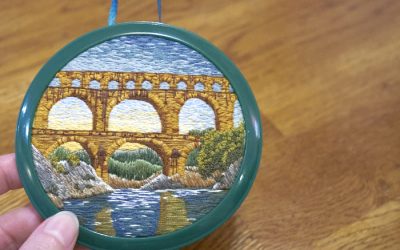
I first learned about Tatiana Popova’s ribbon work through NeedlenThread’s review. As I’ve mentioned before, floral designs aren’t really my thing, but I had been interested in learning more about ribbon embroidery. I enjoyed Tatiana’s work and decided to see if she had any kit I might be interested in. Well, hello “R”! If you’ve seen my post about my name tag, you’ll know why I selected this letter. I loved everything about this R – the colors, the shape of the letter – those curly q’s! So last fall, I had to have it, no matter that I put a self-imposed embargo on spending money on crafts. And several months later, here it is:
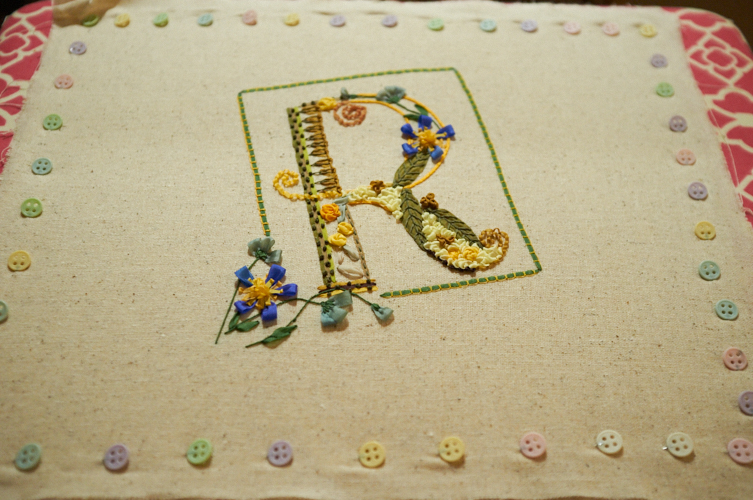
The kit came with a full colored photo printed directly to the fabric. I decided to instead trace the design onto my own fabric. (My MIL and SIL ordered the letter K, and it is not pre-printed, so her patterns vary in that respect.) In this photo of damp-stretching to remove any wrinkles, you can see I paid no heed to the grain of the fabric. For better or worse, I am still learning what is and is not important in embroidery (for me). So far, I don’t think this is an issue. I’d also add that my “drum” method of securing the fabric to the hoop to prevent uneven stretching worked brilliantly. I think it is part of my process now for important projects until I get higher quality hoops!
The detail in the ribbon embroidery instructions make it clear that Tatiana put a lot of work into them, thinking like a beginner to help stave off issues before they are had. Everything is in full color, too, so it is easy to follow along. I was a complete novice to all of the techniques and never once did I have to go searching on the internet to understand them better.
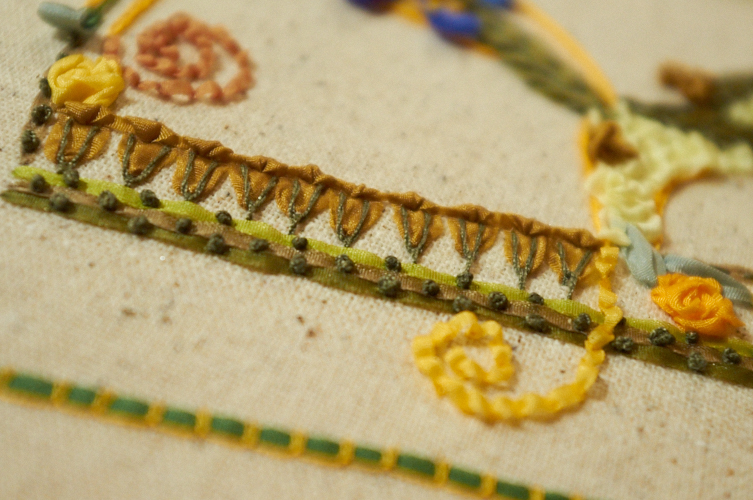
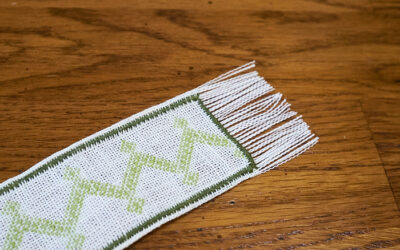
When I saw the bag of ribbon in the kit, I thought I’d have to dump it out and sort through it, but she actually secured each piece to a labeled paper. I just taped it up by my ceiling so it stays safe and out of the way (of curious kitties!), cutting lengths off as needed. That’s something else I learned immediately – usually I use a full arm’s length of thread but because silk ribbon is so delicate, you really ought to work with smaller lengths – she suggests 8-10″. Ribbons get secured to the needle, and sewn to the fabric backing to “knot” them – quite different than embroidery thread tails and quilter’s knot (or lack thereof!). Ribbon embroidery also requires a laying tool, which I don’t currently have. I used either a big fat tapestry needle or my tiniest crochet hook to help shape the ribbon. And on top of all that, it is best to iron the ribbon as well, so just getting ready to start sewing is a process in itself!
Because I traced my image, I had to make some changes here and there. Not only was my tracing just slightly off, but I opted to enlarge the piece by using the larger “title page” cardstock’s image rather than the preprinted fabric’s image as my template. That caused some issues with sizing so I made that up where I could. I did run out of the orange ribbon prematurely, too (my fault), but I had plenty of extra green (so I’ve stashed them away safely for future fun). But, duh, I should have thought of all that! I wasn’t really intending on enlarging the piece, though – it just seemed simpler and easier to trace off a sheet of cardstock than off printed fabric, you know? The journey is in the learning! It’s just like me to overcomplicate learning something new like ribbon embroidery. Sigh.

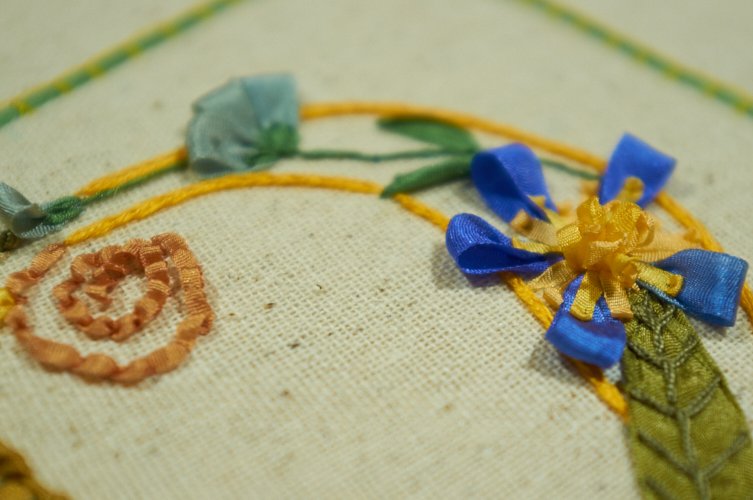
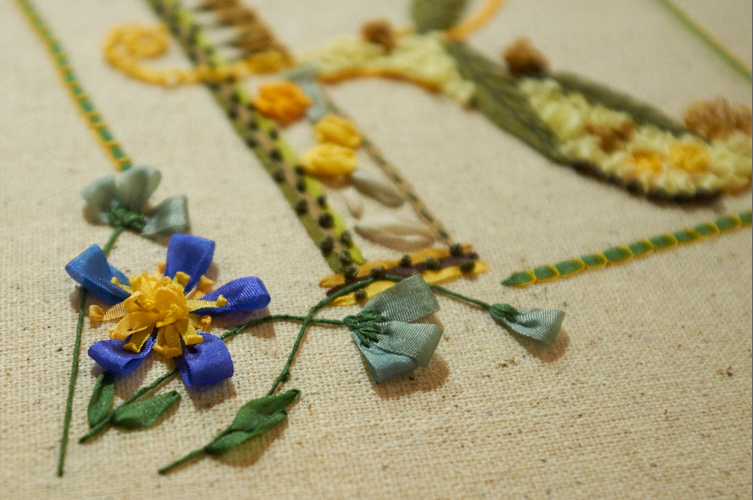
I love the gentleness in ribbon embroidery. Like many arts, the photos don’t do it justice. “Lovely” is certainly appropriate for this type of craft. It’s just so soft and pleasing to the eye, in my opinion. And Tatiana’s color choices are so serene but still interesting, not just a dull palette. She chooses beautiful shades and selects a color to add contrast; with the R, you have some greens, pale yellow to light orange tones, and rich blues.
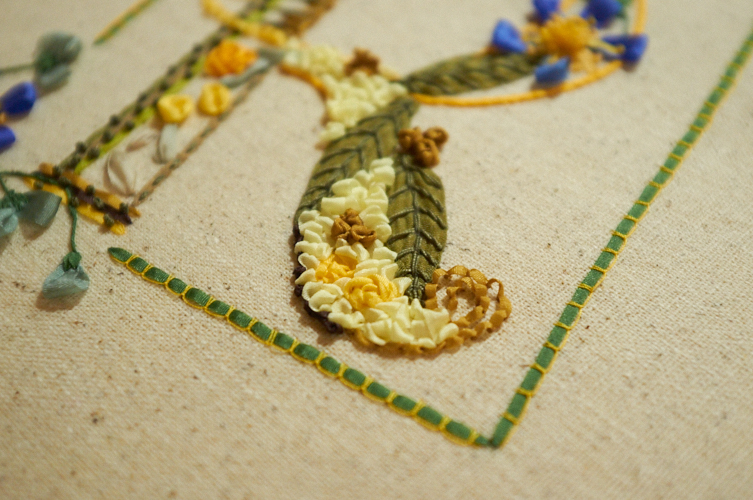
On the other hand, since I attempt to be upfront and honest about my crafting journeys here, I must add that because the softness in ribbon embroidery stems from the use of silk ribbon, and silk ribbon is delicate, I found it frustrating rather than pleasing to stitch. It absolutely requires (for me) a hoop stand, making it a non-portable project. It absolutely involves higher concentration as you can’t go poking your needle all willy-nilly because you will mar the ribbon, and you can’t “cheat” with how much thread you have left – you either do or do not have enough ribbon to make that one last itty bitty stitch (I often did not and much grumbling had been done). And it absolutely requires a specialty shop, as I have yet to find silk ribbon for sale randomly at any of the craft stores I visit – I’d have to shop online and I still barely know anything about the craft to be able to make wise purchasing decisions. Because of these factors, I won’t be getting into ribbon embroidery any time soon, but I do hope to revisit it. I also super hope I can score a bag of random silk ribbon somewhere so I can have the freedom to practice.
Overall, my ribbon embroidery experience challenged me, and that’s exactly what I was looking for. I love Tatiana’s designs and I simply adore my R. This is a project that has many mistakes known to me (rather than a few or less, these days), but even still, I find it gorgeous and am proud of it. I found a frame, and now just need to hang it on my wall!


0 Comments