
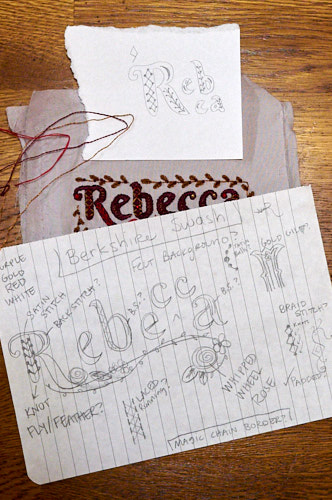
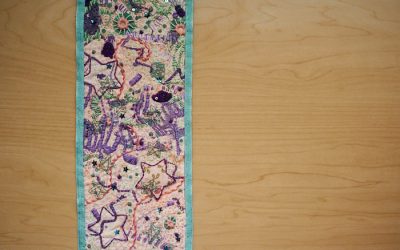
New embroidery guild members are tasked with eventually making their own embroidered name tag. I finally got around to mine, a year later! Another guild member already goes by my nickname, so I went with my formal name when I joined. Since my last name is also on the piece, I won’t be showing you in full, you understand. #internetprivacy. Shrug.
I first began with doodling. This year, I am trying something different – normally, I just start with needle in hand and fabric at the ready. This year though, I want to develop my own creativity, remember? So, I now begin instead with pencil in hand and paper at the ready. Of course, I still went off plans a wee bit. Mostly because my plans wouldn’t work, or didn’t turn out as I had imagined they would, but also because needle in hand and fabric at the ready is just, well, sort of inspiring on its own.
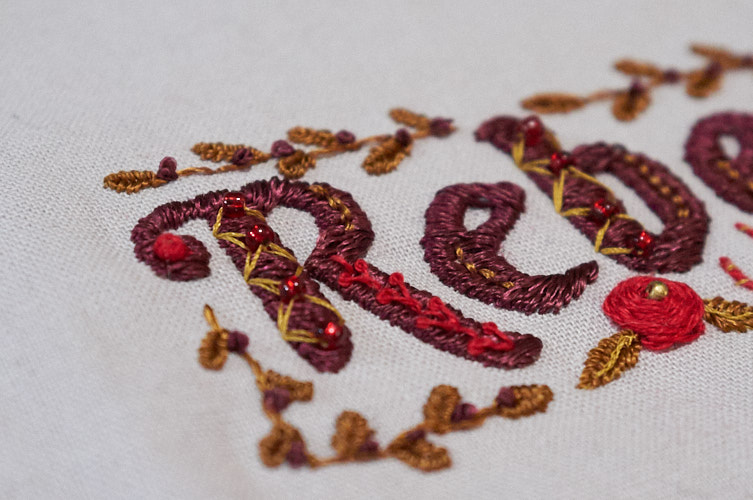
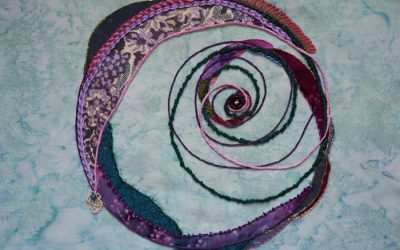
This embroidered name tag was the first time I used rayon threads. I read about them, and I inherited two colors, and they seemed fussy. They are super silky, and the 6-strands practically fall apart from each other as you hold them. I don’t think it is even possible to make an accidental knot, they are so loosey-goosey! Luckily, the strands are somewhat thick, so as I approached a satin stitch background here, it covered quickly! Though I broke this project into two days worth of work, I could easily have finished it in a single solid day. Like, all of it! The threads weren’t difficult to stitch with at all, other than sometimes the light reflecting off them when trying to get the perfect satin stitch position (sadly you will never understand the brilliant reflections through a photo, but the real effect is gorgeous!).
I had been wanting to do an illuminated letter style for a while but didn’t have a specific project in mind. So when I decided to do this, it was prime opportunity! Afterward, I had some wonderings about what it meant that I stitched my name so royally, but regardless, I love it!
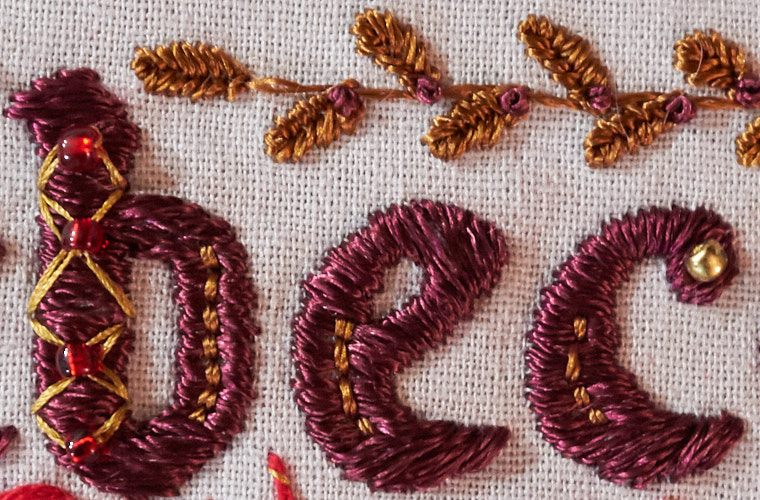
Deep purple rayon thread was stitched over a traced google font (Berkshire Swash). I added some golden thread left over from my stumpwork in a criss-crossed fashion with small red glass beads that really look awesome reflecting light (also hard to capture in a photo) for the stem of the R, b, and a.
Some solid red stitches (straight stitches mimicking a fly stitch with pistol colonial knotting) were made using normal DMC thread on the leg of the R. This thread was also used for my last name which was written in my own signature handwriting, much smaller than my first, and kind of as part of the border. The first letters of it were also whipped with the golden thread. The R and a also got a fat colonial knot in red in the serif portion. The c letters got a small gold bead there instead.
I only had one other rayon thread color, a good brown. So, after adding a red whipped wheel rose (with a gold bead center), I used this brown for the leaves (closed fly stitches highlighted with a vein of golden thread). I still wanted something added to the two e letters, so I used just a few straight stitches on their curve. I liked it, so I added them to all the letters. Then I added a detached-chain stitch vine around the whole thing, but decided it should be filled in. I did this with a fishbone stitch. To top that off, I added small purple colonial knots at each leaf.
I think normally I would have made all the leaves in green, but honestly, the effect of the brown fits so well with the other colors, making it look rather pomp and rich, that I am glad I am on a 0$ spending budget for myself, forcing me to use all the goodies that I have. I don’t think green would have looked good at all!
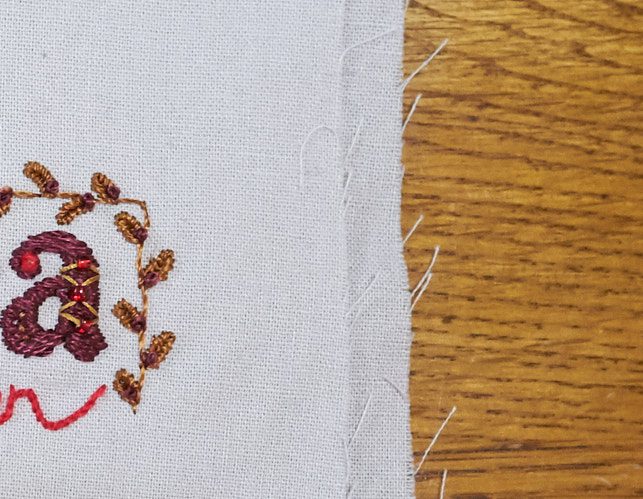
The background cloth is a solid light grey cotton leftover from my window seat backing. I doubled it up for support of my threads.
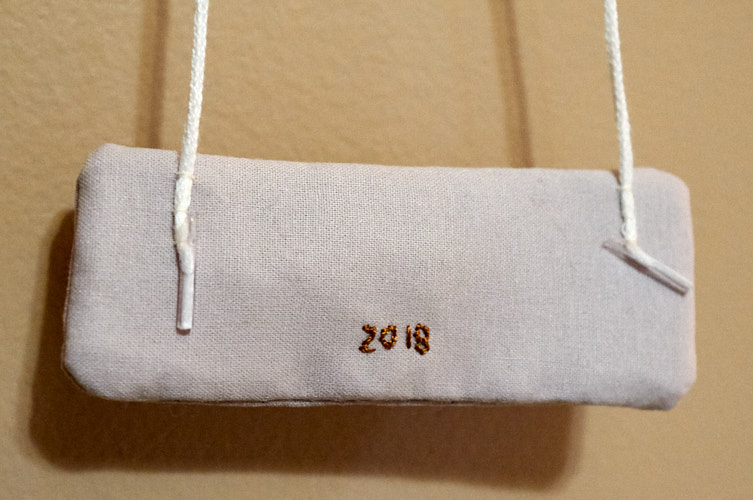
My name is a little bigger than I’d like for an embroidered name tag (albeit necessary to be able to stitch the designs on top of the satin stitching) but it will do. To finish, I sewed some medium weight interfacing to both the front (embroidered) piece and the backing (same grey fabric). Then I sandwiched them together and sewed around, leaving a gap as one normally does. Turned it right side out, whipped stitched a lanyard to the back, added 2018 there also for posterity’s sake, and then blind stitched the bottom closed. El fin!
Did you ever have to make an embroidered name tag? I’d be curious to see yours!


0 Comments