My Hexie Dreams quilt, which was carefully fussy cut and hand pieced by me, then hand quilted by my gramma, is finally finished after three+ years of work (and avoidance). The proof is in the stitching – persistence pays off!
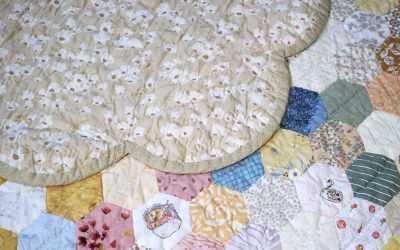
Hexie Dreams + Template
read more